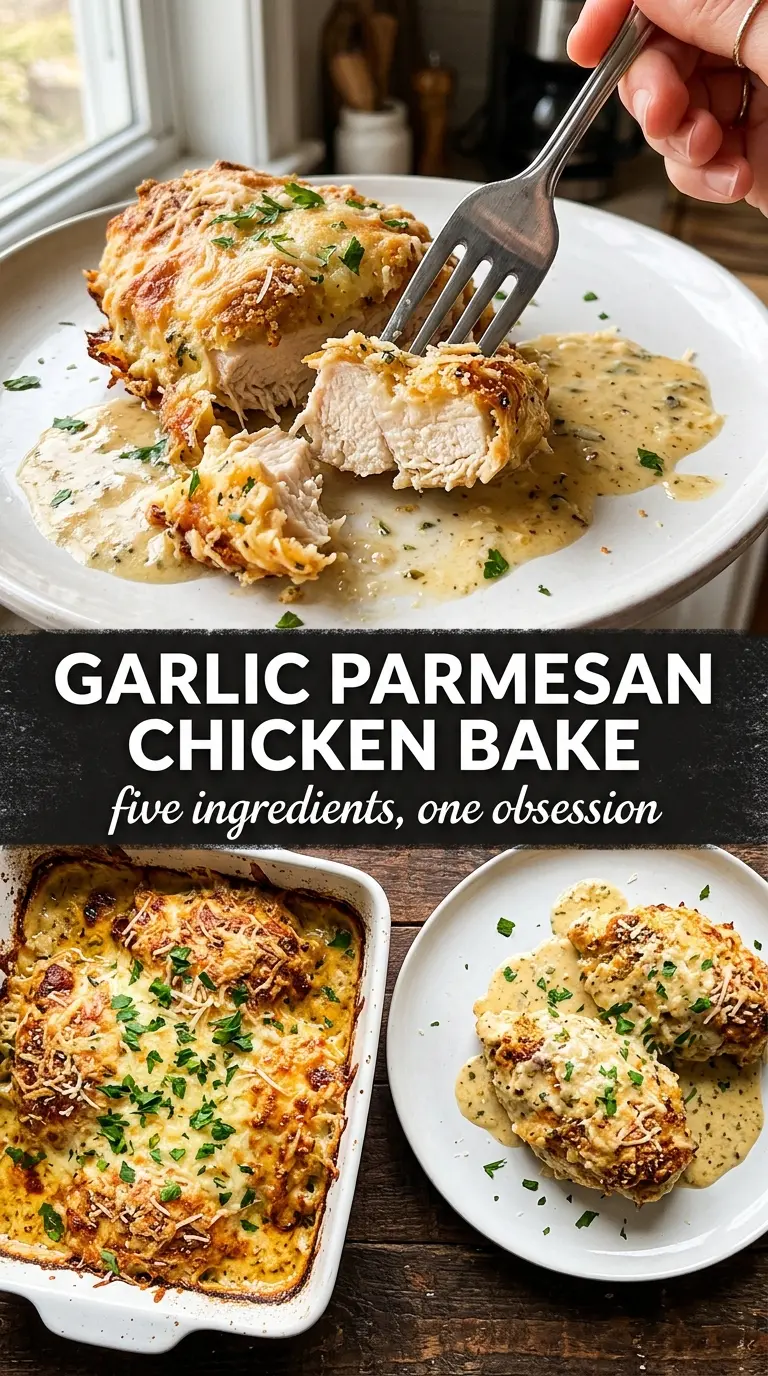
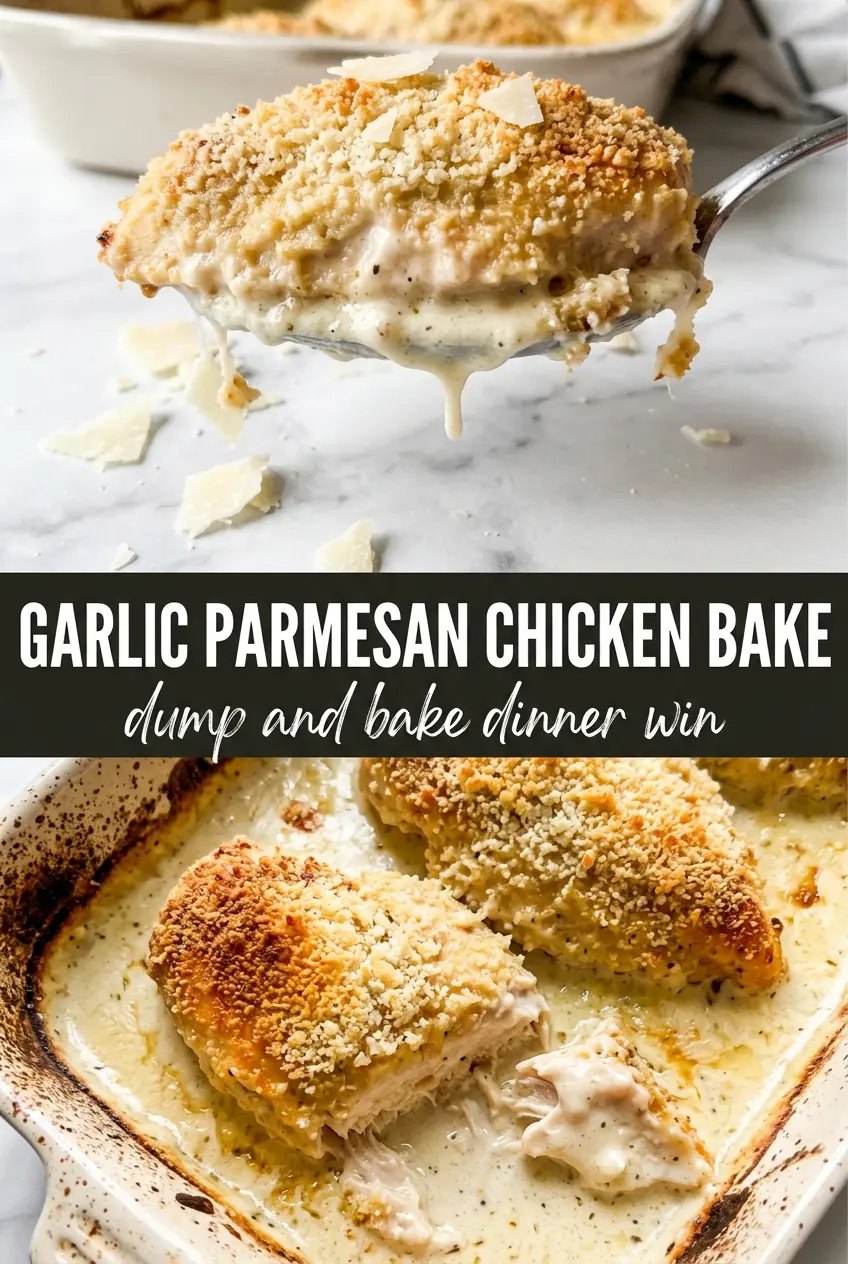
Chicken breasts come out of the oven with a crackled Parmesan crust that stays crisp on top while the meat underneath stays juicy. The garlic butter soaks into the chicken before the cheese and panko mixture goes on, which means you get seasoning all the way through instead of just on the surface. When it bakes correctly, the top turns deeply golden and fragrant, with browned cheese edges that lift cleanly from the pan.
The trick is in the layering. Butter and garlic go on first so the topping has something to cling to, then the Parmesan, panko, and herbs get pressed down firmly so they form a real crust instead of sliding off halfway through baking. Freshly grated Parmesan matters here because the pre-shredded kind often has anti-caking agents that keep it from melting into that tight, savory shell.
Below you’ll find the exact texture cues to watch for, the one step that keeps the topping from scattering in the pan, and a few smart ways to adjust the recipe without losing that golden finish.
The Parmesan crust baked up evenly and actually stayed on the chicken instead of falling into the dish. I loved the little hit of lemon at the end too.
Love that crackly garlic Parmesan crust? Save this Garlic Parmesan Chicken Bake for the nights when you want juicy chicken with a browned, cheesy top and almost no cleanup.
The Step That Keeps the Parmesan Crust Stuck to the Chicken
The topping only behaves if the chicken has a tacky surface to grab onto. That means the butter needs to go on generously, and the cheese mixture needs to be pressed, not sprinkled, over the top. If you just scatter it on, the breadcrumbs toast in spots and the Parmesan melts away from the meat instead of forming one cohesive crust.
Thickness matters too. Chicken breasts that are wildly uneven will finish at different times, and the thinner end dries out before the thick end is done. If one side is much thicker, pound it lightly or slice the breast into cutlets before baking. The goal is a piece of chicken that reaches 165°F at the same time the topping turns deeply golden.
- Chicken breasts — Boneless, skinless breasts work best here because they give you a clean surface for the crust and bake fast. If yours are large, split them horizontally or pound them a little so the center doesn’t lag behind the topping.
- Freshly grated Parmesan — This is the main source of flavor and browning. Pre-grated cheese can work in a pinch, but it usually melts less smoothly and gives a drier crust.
- Panko breadcrumbs — Panko keeps the topping light and crisp instead of dense. Regular breadcrumbs will work, but the crust will be finer and less shattery.
- Butter and garlic — Melted butter helps the topping adhere and carries the garlic flavor into the chicken. Minced fresh garlic gives a sharper, more fragrant result than garlic powder alone.
What Each Ingredient Is Actually Doing in This Baked Chicken
- Chicken breasts or thighs (the protein) — Let them sit at room temperature for 15 minutes before baking. This helps them cook evenly.
- Olive oil or butter (the cooking medium) — This prevents the chicken from drying out and carries herb and spice flavors.
- Garlic (the aromatic foundation) — Fresh minced or thin slices mellow and become sweet when baked. Don’t brown it or it turns bitter.
- Cream or sauce (the moisture keeper) — This prevents the chicken from drying out in the oven. Balanced sauce makes the difference between dry and juicy.
- Lemon or white wine (the brightness) — Acid prevents heavy cream sauces from tasting flat. Add it so flavors balance.
- Fresh herbs (basil, thyme, parsley) — These add complexity. Add some during cooking and some after so you get both cooked and fresh flavors.
- Cheese (optional richness) — Parmesan or feta adds creaminess and salt. Don’t overdo it or the dish becomes heavy.
- Proper oven temperature (375-400°F) — This temperature bakes chicken through without drying the edges. Use a thermometer for 165°F.
Getting the Chicken Baked Through Without Burning the Top
Building the Garlic Butter Base
Brush the melted butter and garlic over every inch of the chicken so the seasoning has something to cling to. Don’t leave dry spots, because those areas won’t brown the same way and the crust can separate as the chicken releases moisture. A light, even layer is enough; pooling butter in the dish just softens the bottom of the coating.
Pressing on the Crust
Mix the Parmesan, panko, Italian seasoning, parsley, and paprika, then press that mixture firmly onto the buttered chicken. You want the top to look densely covered, almost packed on, because that pressure helps the cheese melt into the bread crumbs and lock everything in place. If the mixture looks loose or sandy, it won’t form the same crisp lid in the oven.
Watching for the Finish
Bake at 400°F until the top is deeply golden and the chicken reaches 165°F in the thickest part. If the crust browns too fast, the chicken usually needs a few more minutes, so tent loosely with foil only after the top has enough color. Let the chicken rest for a few minutes before serving so the juices settle and the crust stays intact when you slice into it.
Ways to Adjust the Crust Without Losing the Crunch
Gluten-Free Crust Swap
Use gluten-free panko in place of regular panko. The topping still bakes up crisp, but it can brown a little faster, so start checking a few minutes early. Keep the Parmesan and butter the same so the crust still holds together.
Dairy-Free Version
Swap the butter for a neutral plant-based butter and use a dairy-free Parmesan-style alternative. The topping will be a little less savory and less deeply browned, but the garlic and seasoning still give you a solid crust-like finish.
Using Chicken Thighs Instead
Boneless skinless thighs give you juicier meat and a slightly richer result, but they need a few extra minutes in the oven. The topping still works well, though the shape is less even, so arrange them with enough space for the crust to brown.
Storage and Reheating
- Refrigerator: Store leftovers covered for up to 3 days. The crust softens a little, but the flavor holds up well.
- Freezer: This freezes best after baking. Wrap individual portions tightly and freeze for up to 2 months, though the topping won’t stay as crisp after thawing.
- Reheating: Warm in a 350°F oven until heated through. The oven brings back more texture than the microwave, which tends to turn the crust soggy before the chicken is hot.
Answers to the Questions Worth Asking
Garlic Parmesan Chicken Bake
Ingredients
Equipment
Method
- Preheat the oven to 400°F and grease a 9x13 baking dish, so the chicken bakes evenly without sticking.
- Season the chicken breasts with salt, pepper, and garlic powder, then place them in the prepared dish in a single layer.
- Mix the melted butter with the minced garlic and brush generously over each chicken breast to create a flavorful, glossy layer.
- Combine Parmesan, panko, Italian seasoning, dried parsley, and smoked paprika, then press the mixture firmly over the buttered chicken to fully coat the tops.
- Bake for 25-30 minutes at 400°F until the Parmesan crust is deeply golden and the cheese is browned and crackled.
- Check doneness: bake until the internal temperature reaches 165°F, then garnish with fresh parsley and serve with lemon wedges.


