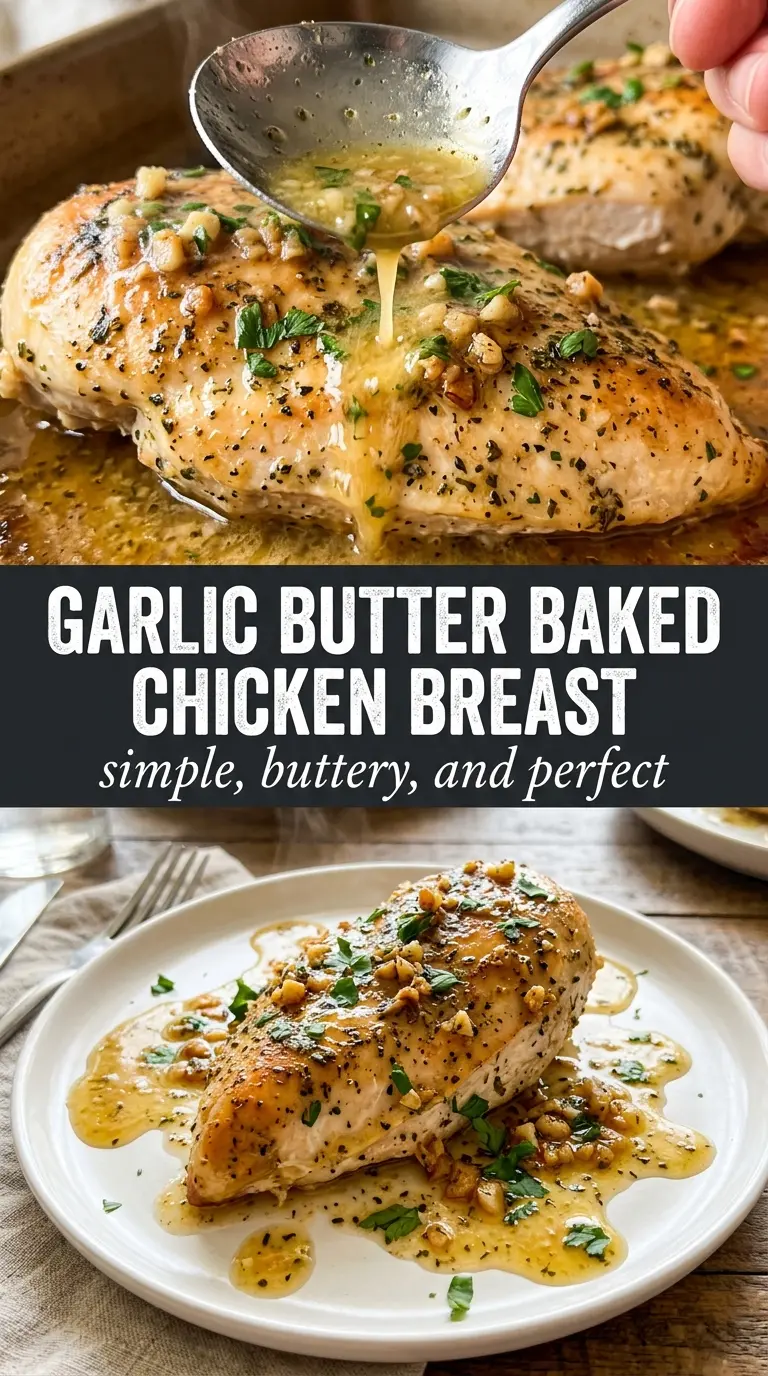
Garlic butter baked chicken breast lands on the plate with a golden surface, fragrant herbs, and pan juices that beg to be spooned over every slice. The butter keeps the lean meat from drying out, while the garlic and lemon cut through just enough to keep each bite bright instead of heavy. It’s the kind of chicken that looks like you paid more attention than you actually did.
What makes this version work is the order of operations. The chicken gets seasoned before the butter goes on, so the outside has flavor even where the glaze slides off. The butter is melted first, which helps the garlic and herbs distribute evenly without clumping, and the halfway baste gives the tops a second layer of flavor while the pan juices build underneath.
Below, I’ll show you the part that matters most for juicy baked chicken: how to keep the breasts from overcooking at the thick end while the thin end stays tender. There’s also a small trick for getting more out of the pan juices, because that’s where the best flavor lives.
The butter sauce stayed in the pan instead of sliding off, and the chicken was still juicy even after the full 25 minutes. I spooned the juices over rice and my husband asked if I could make it again next week.
Save this garlic butter baked chicken breast for the nights when you want juicy chicken and a lemony herb pan sauce without a long ingredient list.
The Part Most Chicken Breasts Get Wrong: Heat Too Low, Then Too Long
Chicken breasts dry out for two common reasons: the oven isn’t hot enough to give the outside a head start, or the cook waits for the center to hit temperature while the thin ends have already gone past it. A 425°F oven gives you a better balance here. The outside picks up color before the meat has time to go stringy, and the butter helps the surface stay protected.
The other thing that matters is thickness. If one breast is much thicker than the others, it will finish later and the thinner pieces will suffer. Lightly pounding the thick end or slicing very large breasts in half lengthwise gives you a more even bake, which is the real shortcut to juicy chicken.
- Hot oven — This recipe needs enough heat to brown the butter and herbs a little while the chicken cooks through. Lower heat tends to leave you with pale chicken and watery pan juices.
- Pan juices — Don’t throw them away. They carry the garlic, herbs, and lemon back over the chicken at the table.
- Rest time — Five minutes off the heat lets the juices settle back into the meat. Cut too soon and they run straight onto the cutting board.
What Each Ingredient Is Actually Doing in This Chicken
- Chicken breasts — Boneless, skinless breasts are lean, which is why the butter matters so much. If yours are especially large, slice them horizontally or pound the thick end so they cook evenly.
- Butter — This is the base of the sauce and the reason the chicken stays moist in the oven. Olive oil can work in a pinch, but it won’t give the same rich pan juices or the same finished gloss.
- Garlic — Fresh minced garlic gives the dish its main aroma. Jarred garlic is usable, but it tastes flatter and can lose some of the sharpness that makes the butter taste alive.
- Parsley, thyme, and rosemary — Fresh herbs are worth using here because they stay bright under heat. Dried herbs can take over fast, so if that’s what you have, use about one-third as much and keep the rosemary light.
- Lemon juice — A small amount keeps the butter from tasting heavy and helps the pan juices taste cleaner. Add it at the end of the butter mixture so it stays lively instead of dull.
- Smoked paprika — It adds color and a gentle roasted note. If you want a milder result, use sweet paprika instead.
How to Bake It So the Butter Stays Glossy and the Chicken Stays Juicy
Season the Chicken First
Pat the breasts dry, then season both sides with salt, pepper, garlic powder, and smoked paprika. Dry chicken browns better, and seasoning before the butter goes on keeps the flavor from sitting only on the surface of the sauce. If the breasts look damp, the butter will slide around instead of clinging, and you’ll lose that glossy coating.
Mix the Herb Butter While It’s Warm
Melt the butter, then stir in the garlic, parsley, thyme, rosemary, and lemon juice. Warm butter carries the garlic and herbs through the dish more evenly than softened butter, which can clump and sit in pockets. Don’t let the garlic sit in scorching butter for long before baking or it can turn bitter.
Baste Halfway, Then Leave It Alone
Pour the butter over the chicken, then bake until the halfway point and spoon the pan juices back over the tops once. That second baste builds flavor and helps the surface look lacquered, but opening the oven too often slows the cooking and dries the meat. Pull the chicken when the thickest part hits 165°F, then let it rest before serving so the juices stay in the meat instead of running out.
How to Adapt This for Different Kitchens and Different Nights
Dairy-Free Version
Swap the butter for a good-quality olive oil or a plant-based butter that melts cleanly. You’ll lose some of the rich pan sauce and the final gloss, but the garlic, herbs, and lemon still carry the dish well.
Using Chicken Thighs Instead
Boneless skinless thighs work if you want richer meat and a little more forgiveness in the oven. They usually need a few extra minutes, and you can cook them to a slightly higher internal temperature without drying them out the way breasts do.
No Fresh Herbs on Hand
Use dried herbs at about one-third the amount, and crush the rosemary between your fingers before adding it. The flavor will be less bright and a little more rustic, but the chicken will still taste like garlic butter chicken instead of plain baked chicken.
Storage and Reheating
- Refrigerator: Store leftovers in an airtight container for up to 4 days. The butter sauce will firm up when chilled, which is normal.
- Freezer: This freezes well for up to 2 months if you cool it completely first. Freeze the chicken with some of the pan juices so it doesn’t reheat dry.
- Reheating: Warm covered in a 325°F oven with a spoonful of the pan juices or a splash of broth. The biggest mistake is blasting it in the microwave until the edges turn tough before the center is hot.
Questions I Get Asked About This Recipe

Garlic Butter Baked Chicken Breast
Ingredients
Equipment
Method
- Preheat oven to 425°F and lightly grease a baking dish. Keep the oven fully preheated so the chicken starts browning right away.
- Season chicken breasts on both sides with salt, pepper, garlic powder, and smoked paprika. Press the spices lightly to help them adhere to the surface.
- Melt butter and stir in garlic, parsley, thyme, rosemary, and lemon juice until combined. The mixture should look fragrant and glossy as herbs soften.
- Place chicken in the prepared dish and pour garlic herb butter over each breast, coating thoroughly. Tilt the dish as needed so the butter pools around the base.
- Bake for 20-25 minutes, basting with the pan juices once at the halfway point. Look for a golden surface glistening with caramelized garlic bits.
- Check doneness: bake until internal temperature reaches 165°F. The juices should run clear and the thickest part should no longer look pink.
- Rest chicken for 5 minutes after baking. You’ll see the pan juices settle and the chicken finishes cooking gently.
- Serve with pan juices spooned over and lemon wedges alongside. Baste again right before plating for extra shine.