Banana oatmeal bars hit that sweet spot between snack and breakfast: chewy in the center, lightly crisp on top, and sturdy enough to pack into a lunchbox without falling apart. The best ones taste like ripe bananas and toasted oats, not like a dry granola bar pretending to be dessert. This version keeps the ingredient list short, but the texture still lands right where you want it.
The trick is in the banana-to-oat ratio and how firmly you press the mixture into the pan. Too little banana and the bars bake up crumbly; too much and they turn soft and wet in the middle. A little almond butter or peanut butter gives the bars enough structure to slice cleanly, while honey or maple syrup adds just enough sweetness without making them sticky.
Below you’ll find the small details that matter: how ripe the bananas should be, why cooling completely changes the cut, and which mix-ins hold up best if you want chocolate chip, cranberry, or raisin bars.
I was shocked these held together so well with just bananas and oats. I cooled them completely like you said, and they sliced into neat little bars with a chewy center and crisp edges.
Save these banana oatmeal bars for a chewy, make-ahead breakfast that cuts cleanly and actually travels well.
The Reason These Banana Oat Bars Hold Together Instead of Crumbling
The most common failure with banana oat bars is that they bake up like loose baked oatmeal, then fall apart as soon as you lift them from the pan. That usually happens when the bananas weren’t mashed smooth enough, the oats were measured loosely, or the mixture never got pressed down with real pressure. This batter is supposed to look thick and a little sticky, not wet or pourable.
Pressing the mixture firmly into the parchment-lined pan matters more than people think. You’re not just shaping the bars; you’re compacting the oats so they knit together as they bake. If the top looks dry before the center is set, the bars need a few more minutes in the oven, but pulling them too early is the fastest way to end up with a soft middle that won’t slice cleanly.
- Bananas — Use ripe bananas with plenty of brown spots. They mash smoother, taste sweeter, and help bind the oats without needing extra sugar. If your bananas are still a little firm, the bars won’t be as sweet or as cohesive.
- Rolled oats — Old-fashioned rolled oats give the bars their chew and structure. Quick oats can work in a pinch, but the texture gets softer and less substantial. Avoid steel-cut oats here; they won’t soften enough in the bake time.
- Nut butter — Almond butter or peanut butter adds fat and holds the bars together. Natural nut butter is fine, but stir it well first so the oil is fully incorporated. Sunflower seed butter works if you need a nut-free version, though the flavor is a little more earthy.
- Honey or maple syrup — You only need a little, but it rounds out the banana flavor and helps the bars brown. Maple syrup gives a softer sweetness, while honey sets a touch firmer. Either one works; use what you have.
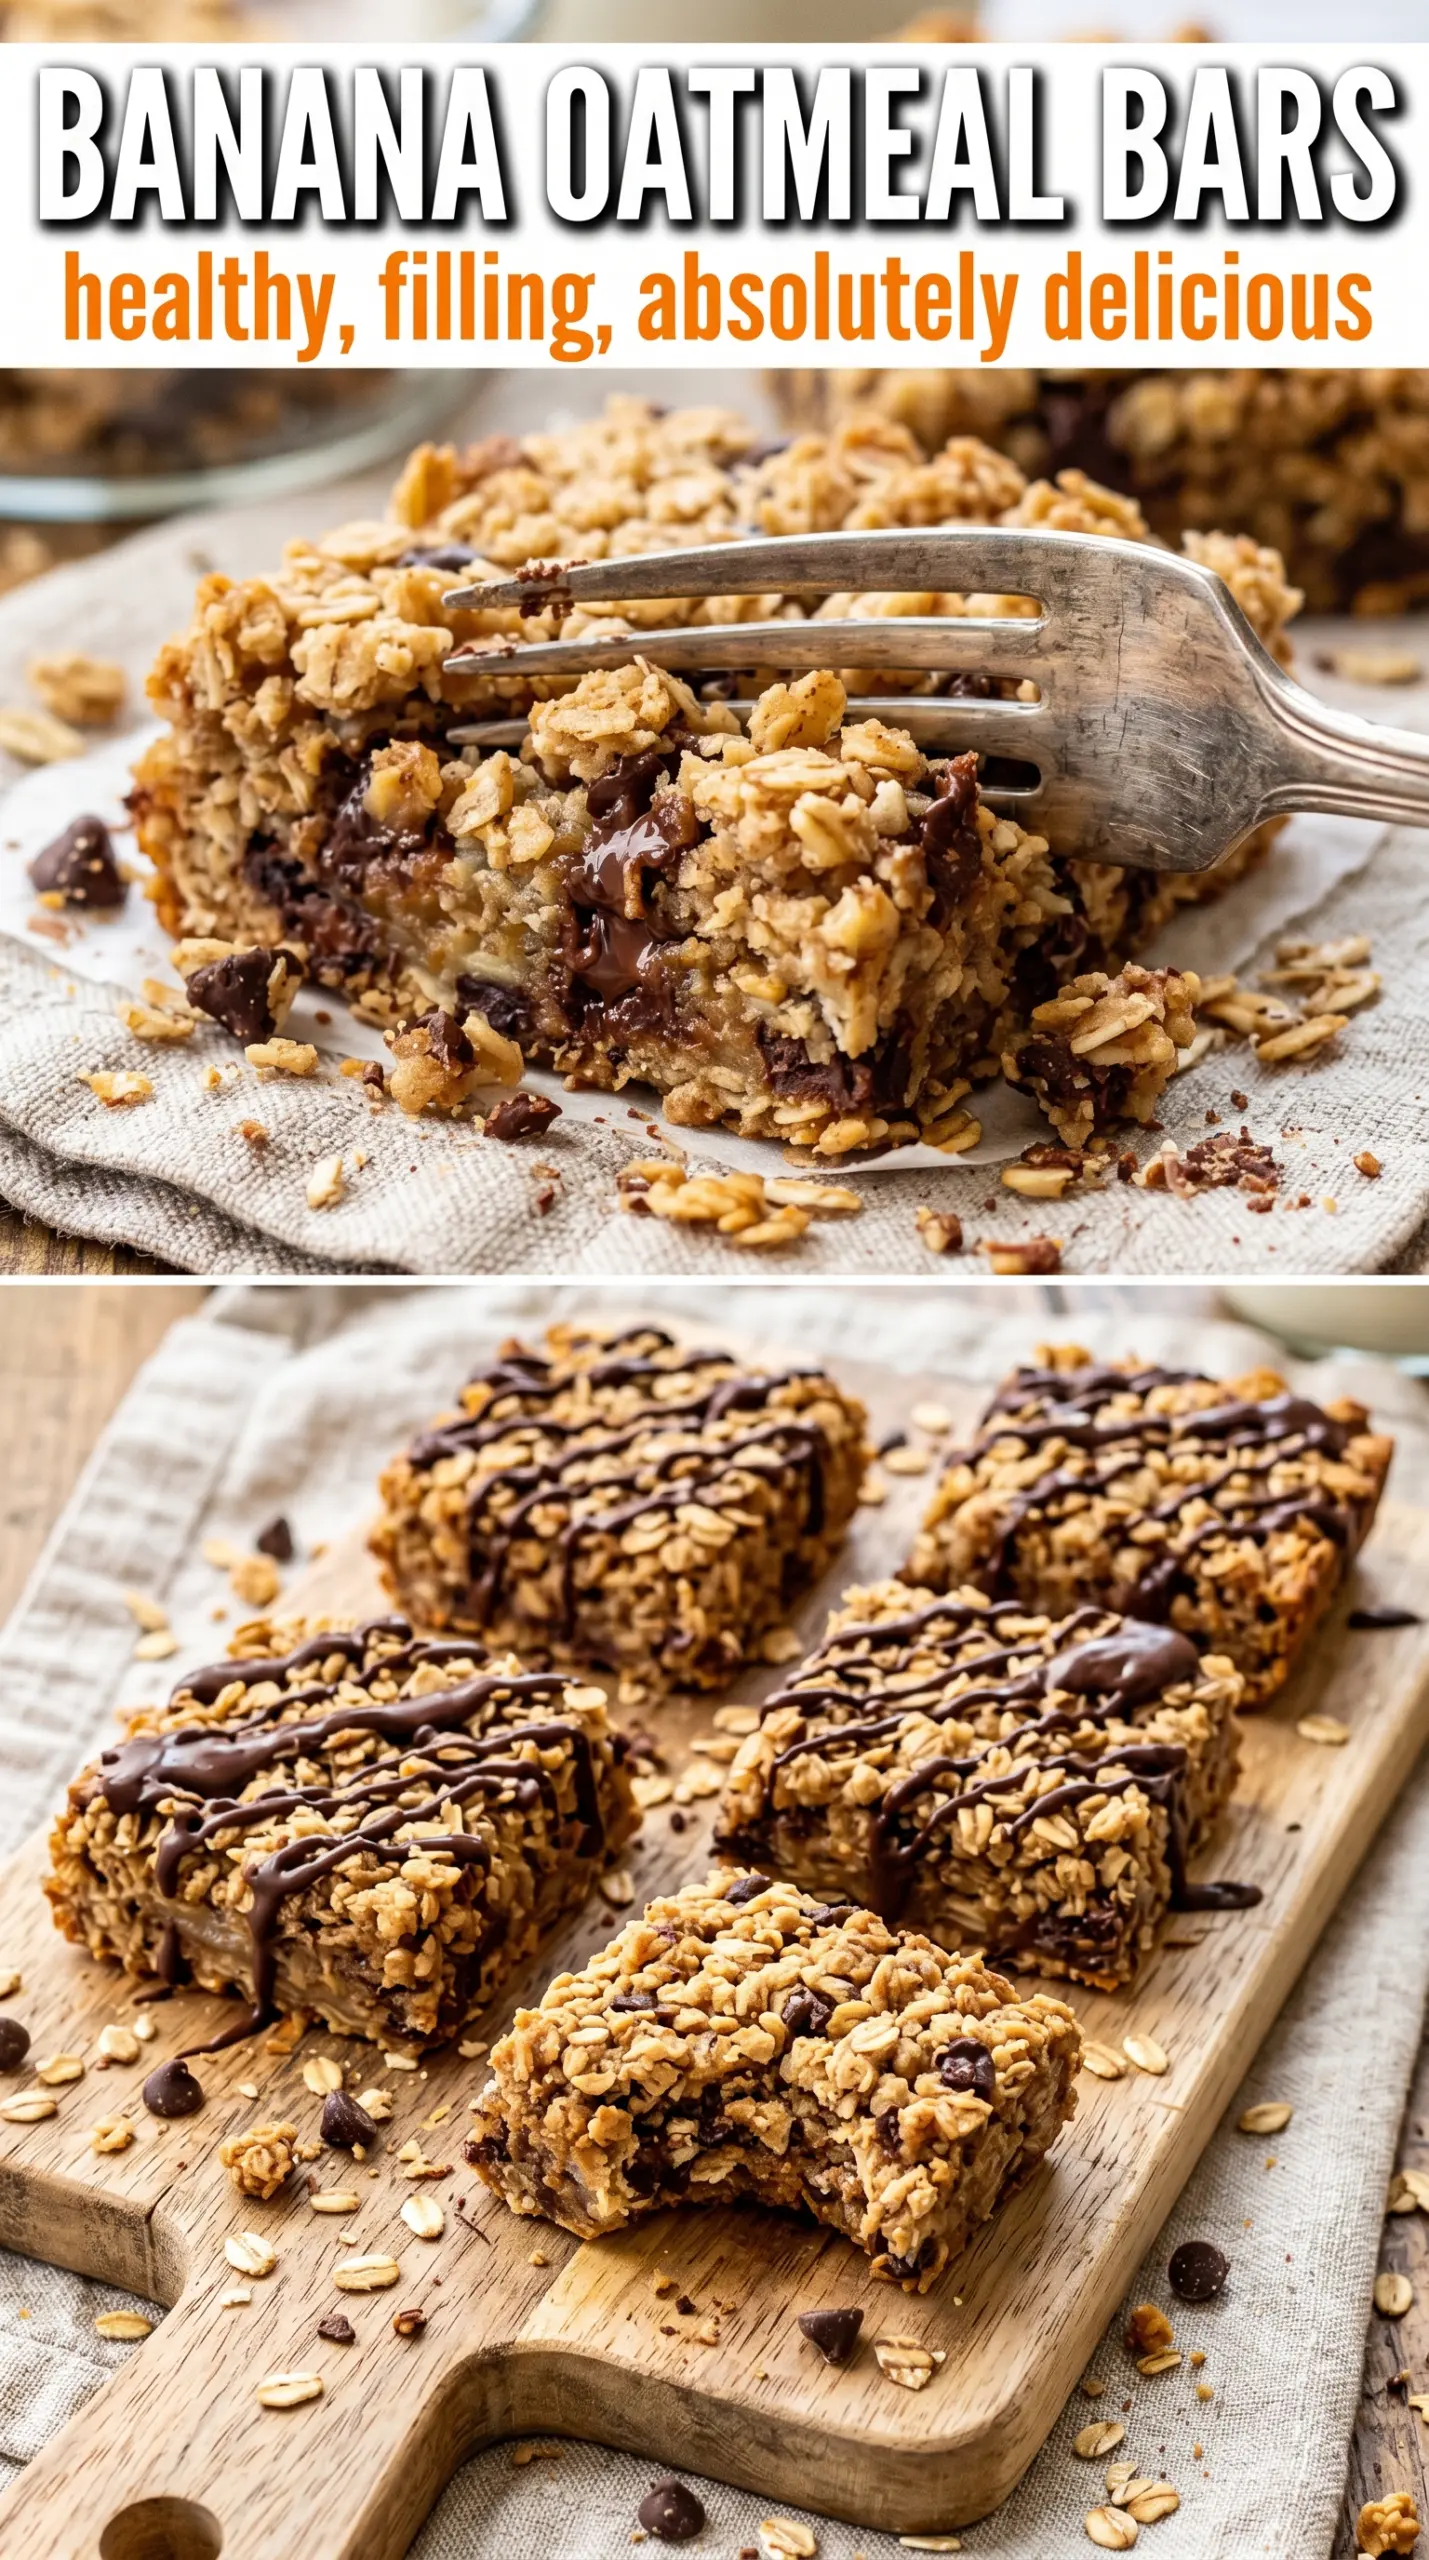
- Mix-ins — Chocolate chips, cranberries, or raisins all fit this base. Fold them in last so they stay evenly distributed instead of sinking into the batter. If you use dried fruit, chop larger pieces so the bars slice more neatly.
What Each Ingredient Is Actually Doing in This Baked Good
- Sugar (the sweetness and structure) — Sugar tenderizes baked goods and creams with butter to create air. Don’t reduce too much.
- Butter (the richness and crumb) — Proper creaming adds air and creates tender texture. Use room temperature butter.
- Eggs (the binder and lift) — These create structure and help baked goods rise. Beat eggs in gradually for volume.
- Flour (the structure base) — Don’t overmix or the baked good becomes tough. Mix just until combined.
- Leavening (baking powder or soda) — This creates rise and light crumb. Too much makes it taste bitter.
- Liquid (milk, yogurt, or other) — This hydrates the flour and carries flavors. Too much makes it dense; too little makes it dry.
- Flavorings (vanilla, spices, or extract) — These define the personality. Use quality flavorings so they shine.
- Mix-ins (nuts, chocolate, fruit, or other) — These add texture and interest. Don’t overfill or the batter becomes dense.
The Part That Matters: Mixing, Pressing, and Baking Until Just Set
Make the Banana Base Smooth First
Mash the bananas until there are no large chunks left. Those soft pieces look harmless, but they leave pockets that bake unevenly and can make the bars feel damp in spots. Stir in the almond butter, honey or maple syrup, vanilla, cinnamon, and salt until the mixture looks glossy and uniform.
Fold in the Oats Without Overworking Them
Add the rolled oats and stir just until every flake is coated. You want the mixture thick enough to hold its shape when you scoop it, not like a batter that runs across the bowl. Fold in the chocolate chips, cranberries, or raisins at the end so they don’t get crushed while you mix.
Press Harder Than You Think
Spoon the mixture into the prepared pan, then press it down firmly with the back of a spoon or a piece of parchment. The surface should look level and compact, with no loose piles of oats on top. If you barely press it, the bars bake up airy and break when sliced.
Bake Until the Edges Color and the Center Sets
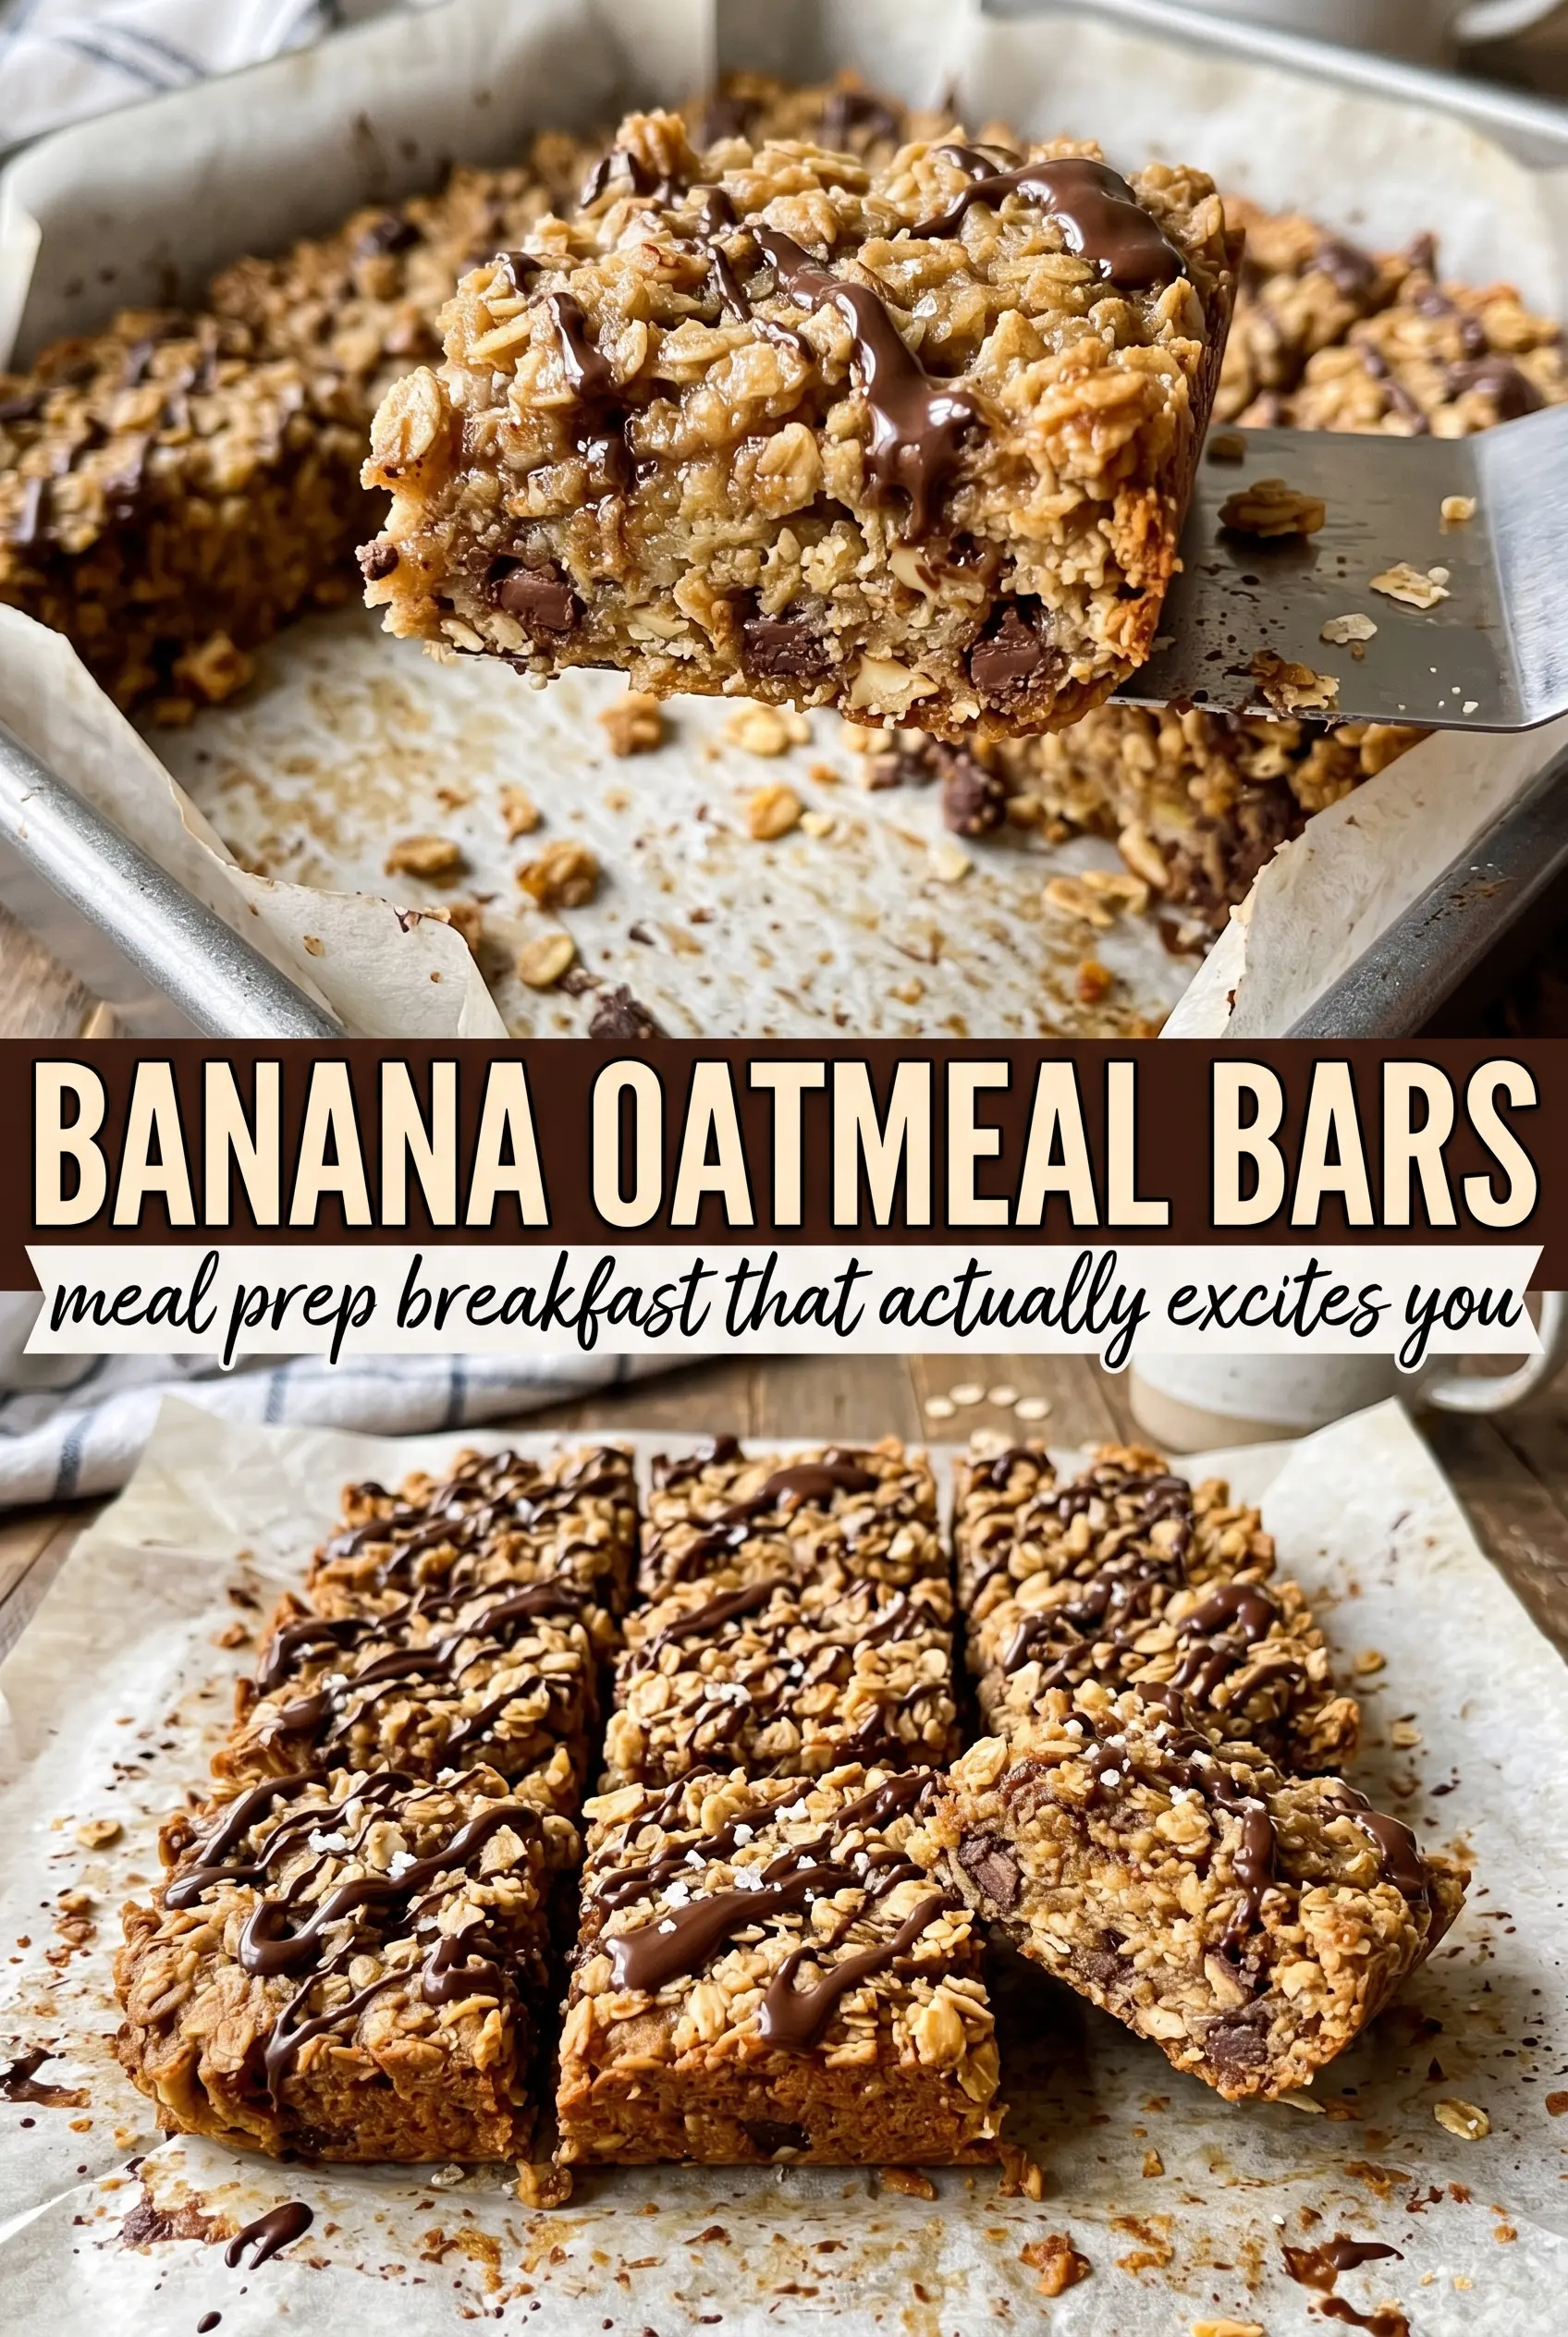
Bake at 350°F until the edges are golden and the center no longer looks wet, usually 22 to 25 minutes. The middle should feel set when you gently tap the pan, but it can still be soft. Let the bars cool completely before you cut them; warm bars will seem underbaked and turn crumbly at the knife.
Chocolate Chip Banana Oat Bars
Use mini chocolate chips if you want the cleanest slices and the most even distribution. Regular chips work too, but they create bigger pockets of melted chocolate that can make the bars a little messier when warm. This version leans more snack-bar than breakfast bar, which is exactly why it disappears fast.
Dairy-Free and Gluten-Free Banana Oat Bars
These bars are naturally dairy-free as written, and they stay gluten-free if you use certified gluten-free oats. That certification matters if you’re baking for someone sensitive, because regular oats are often processed alongside wheat. The texture stays the same; only the label changes.
Nut-Free Version
Swap the almond butter for sunflower seed butter and keep everything else the same. The bars will taste a little more toasted and less sweet, but they still hold together well. If the seed butter is very loose, chill the mixture for 10 minutes before pressing it into the pan.
Storage and Reheating
- Refrigerator: Store in an airtight container for up to 5 days. They firm up in the fridge and slice more cleanly cold.
- Freezer: Freeze the cut bars with parchment between layers for up to 2 months. Thaw in the fridge overnight or on the counter for about 30 minutes.
- Reheating: Warm a bar in the microwave for 10 to 15 seconds if you want it softer. Longer heating makes the chocolate chips melt out and the edges dry.
Questions I Get Asked About This Recipe
Banana Oatmeal Bars
Ingredients
Equipment
Method
- Preheat the oven to 350°F and line an 8x8 pan with parchment paper, leaving overhang for easy lifting.
- Mash the ripe bananas until completely smooth, then stir in the almond butter or peanut butter, honey or maple syrup, vanilla extract, cinnamon, and salt.
- Fold in the rolled oats until fully combined, then fold in your chocolate chips, dried cranberries, or raisins.
- Press the mixture firmly and evenly into the prepared pan so the bars hold together when sliced.
- Bake for 22–25 minutes at 350°F until the edges are golden and the center is set with no wet spots.
- Cool the bars completely before slicing so they cut cleanly without crumbling.
- Refrigerate for cleaner cuts, then cut into neat rectangles.