Sticky, glossy honey garlic chicken thighs are the kind of slow cooker dinner that earns repeat status fast. The sauce turns rich and lacquered, clinging to the chicken instead of pooling watery at the bottom of the pot, and the thighs stay tender enough to pull apart with a fork. That balance is what makes this version worth keeping.
The trick is in the order of things. Bone-in, skin-on thighs hold up to the long cook without drying out, and the sauce gets enough acid from apple cider vinegar to keep the honey from tasting flat. The cornstarch slurry goes in only after the chicken is done, which gives you a thick glaze instead of a thin, overly sweet broth.
Below, I’ve included the one step that makes the skin worth finishing under the broiler, plus a few swaps that still keep the sauce balanced. If you’ve ever had slow cooker chicken come out pale or bland, this method fixes both problems.
The sauce thickened into a shiny glaze, and the chicken stayed juicy all the way through. I finished it under the broiler for a couple minutes and the skin turned out just like the picture.
Like this honey garlic slow cooker chicken? Save it for a no-fuss dinner with sticky glaze and tender thighs.
The Reason the Sauce Sticks Instead of Staying Thin
Slow cooker sauces often end up tasting washed out because all the liquid goes in at the beginning and never gets a chance to reduce. Honey garlic chicken avoids that problem by relying on a concentrated sauce base plus a separate thickening step at the end. That final cornstarch slurry matters more than people think. It turns the cooking juices into a glossy glaze that coats the chicken instead of sliding right off.
Bone-in thighs help here because they stay juicy through the long cook and give the sauce something flavorful to work around. Skin-on thighs also add richness, even if you finish them under the broiler later for texture. If you use boneless, skinless thighs, shorten the cook or they can go soft before the sauce is done.
What Each Ingredient Is Actually Doing in the Glaze

- Bone-in, skin-on chicken thighs — These hold up to long, gentle cooking and stay flavorful. The bones help protect the meat from drying out, and the skin adds richness even if you finish it separately for crispness.
- Honey — This is the main body of the glaze, but it needs the soy sauce and vinegar around it so it doesn’t taste one-note sweet. Natural honey works best; darker honeys give a deeper flavor.
- Soy sauce — This brings salt and depth. Low-sodium soy sauce is the better choice if you want more control, because the sauce reduces and concentrates as it cooks.
- Apple cider vinegar — The acid keeps the glaze bright and stops the honey from turning cloying. If you substitute rice vinegar, use the same amount for a softer tang.
- Ketchup — It adds body, a little sweetness, and that cooked-tomato note that makes the sauce taste rounded instead of flat. Don’t skip it unless you replace it with a spoonful of tomato paste and a splash of water.
- Cornstarch slurry — This is what turns the cooking liquid into a spoonable sauce. Mix it with cold water first; if it goes in dry or hits boiling liquid unevenly, you’ll get lumps.
How to Keep the Chicken Tender and the Skin Worth Eating
Building the sauce first
Whisk the honey, soy sauce, garlic, ketchup, vinegar, ginger, red pepper flakes, and black pepper together before it goes over the chicken. That keeps the seasonings evenly distributed, and it prevents one thigh from getting all the garlic while another sits in plain liquid. Pour it around and over the chicken so the thighs are coated but not buried. If the pieces are fully submerged, the skin softens faster and you lose that roasted look at the end.
Cooking low and slow
Set the thighs skin-side up and cook on low for 5 to 6 hours, or on high for 2.5 to 3 hours if you’re short on time. The chicken is done when it reaches 165°F and the meat pulls away from the bone with only a little resistance. If you cook past that point, the thighs can still be tender, but the texture starts to turn stringy. Keep the lid closed during the cook; lifting it dumps heat and stretches the timing for no good reason.
Thickening the sauce at the end
Take the chicken out before adding the cornstarch slurry. Stirring it in while the chicken is still in the pot makes it harder to judge the texture, and the sauce thickens more evenly once it’s by itself. Cook it on high for about 15 minutes until it goes from thin and shiny to visibly glossy and able to coat the back of a spoon. If it still looks loose, give it a few more minutes; the sauce will tighten as it cools.
Broiling for the finish
This step is optional, but it’s the difference between decent and memorable. Put the chicken under the broiler for 3 to 4 minutes until the skin darkens in spots and starts to blister. Watch it closely, because honey burns fast once the surface dries out. Spoon the thickened sauce over the chicken after broiling, then finish with sesame seeds and sliced green onions.
How to Adapt the Glaze Without Losing the Balance
Make It Gluten-Free
Swap the soy sauce for tamari or a certified gluten-free soy sauce in the same amount. The flavor stays deep and salty, and the texture of the glaze doesn’t change.
Make It Less Sweet
Cut the honey back by 2 to 3 tablespoons and add an extra teaspoon of vinegar. That keeps the sauce glossy but gives it a sharper edge, which works well if you’re serving it with rice or noodles.
Use Boneless Thighs
Boneless thighs work, but start checking them earlier because they cook faster and can go soft if left too long. You’ll lose the bone-in depth, but the meat still stays juicy if you stop as soon as it’s tender.
Storage and Reheating
- Refrigerator: Store leftovers in an airtight container for up to 4 days. The sauce thickens more in the fridge, and the skin softens, but the flavor gets even deeper.
- Freezer: This freezes well for up to 2 months. Freeze the chicken with plenty of sauce in a sealed container, then thaw overnight in the fridge before reheating.
- Reheating: Warm gently in a covered skillet over low heat or in the oven at 325°F until heated through. Don’t blast it in the microwave for too long or the honey sauce can get sticky on the edges while the center stays cold.
Questions I Get Asked About This Recipe
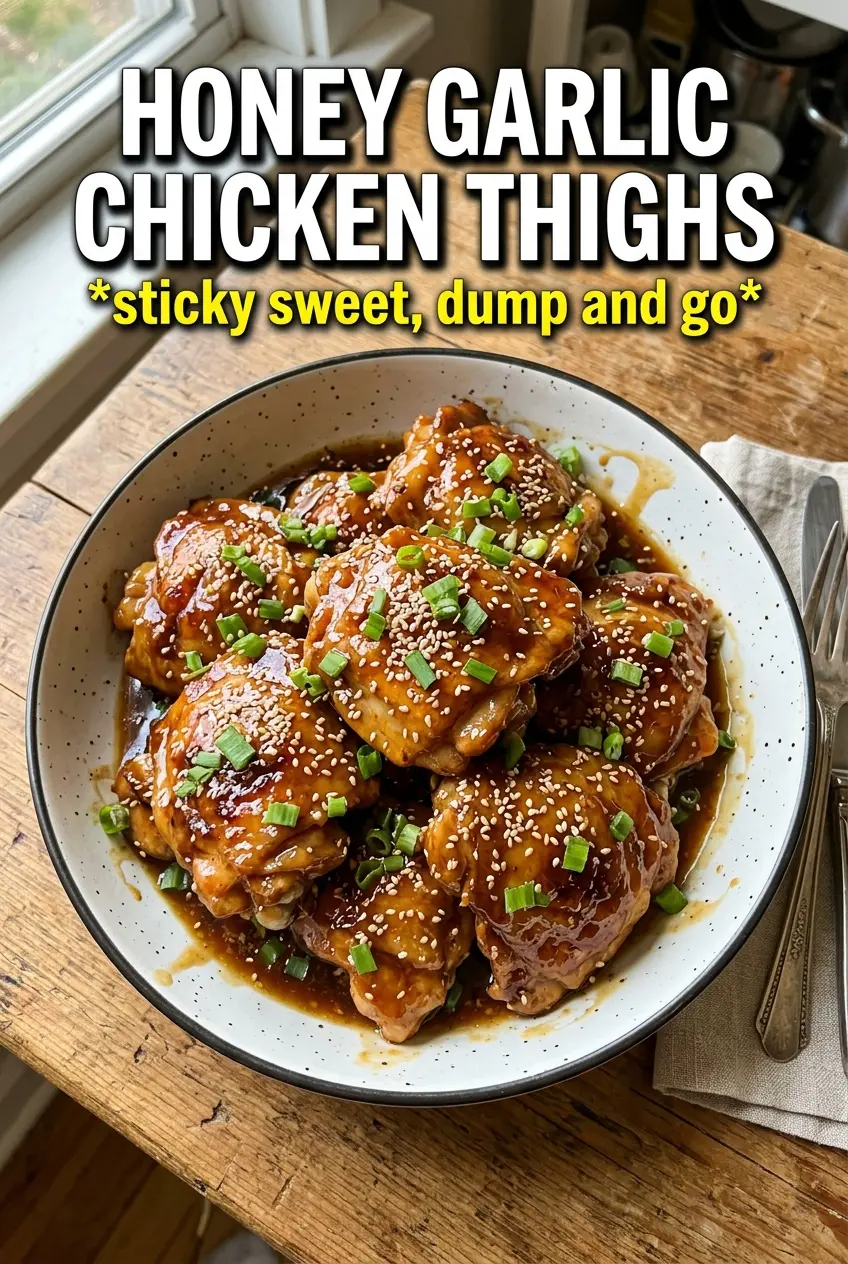
Honey Garlic Slow Cooker Chicken Thighs
Ingredients
Equipment
Method
- Place the bone-in skin-on chicken thighs skin-side up in the slow cooker.
- Whisk together honey, soy sauce, minced garlic, ketchup, apple cider vinegar, ground ginger, red pepper flakes, and black pepper until smooth.
- Pour the honey garlic sauce over the chicken thighs so they’re coated as evenly as possible.
- Cook on low for 5–6 hours (or high for 2.5–3 hours) until the chicken is cooked through and tender.
- Remove the chicken and set it aside while you thicken the sauce.
- Whisk cornstarch and cold water together, then stir it into the sauce in the slow cooker.
- Cook on high for 15 minutes until the sauce is thickened and glossy.
- Optional: broil the chicken for 3–4 minutes to caramelize the skin.
- Spoon the thickened sauce over the chicken, then garnish with sesame seeds and green onions.


