Golden, juicy baked boneless skinless chicken thighs are one of those dinners that quietly earn their spot in the rotation. The edges turn deeply seasoned and a little caramelized, while the centers stay tender and moist instead of drying out the way chicken breasts so often do. It’s the kind of pan of chicken that tastes like you spent a lot more effort than you did.
The trick is high heat, dry chicken, and a short roast. Boneless thighs need enough oven temperature to brown on the outside before they give up all their juices, and patting them dry first keeps the seasoning from sliding off. A simple blend of garlic, onion, paprika, and Italian seasoning does the heavy lifting here, so every bite tastes savory without needing a long marinade.
Below, I’ve included the little details that matter most: how to keep the thighs from steaming, what the seasoning layer is doing, and the one temperature cue I trust more than the clock. If you’ve had baked chicken come out pale or rubbery before, this version fixes both problems.
I followed the high-heat bake exactly and the thighs came out browned on top with juicy centers, not dry at all. The seasoning crust stuck beautifully, and the lemon at the end made the whole pan taste bright instead of heavy.
Save these baked boneless skinless chicken thighs for a fast dinner with a caramelized crust and juicy center.
The Reason These Thighs Brown Instead of Steam
Most baked chicken goes wrong before it even hits the oven. If the thighs are damp, crowded, or baked at too low a temperature, they release moisture and sit in it long enough to turn pale. High heat changes that balance. It pushes the surface toward browning fast enough that the seasoning actually toasts instead of dissolving into the pan.
Boneless thighs are forgiving, but they still need space. A single layer on a foil-lined sheet gives each piece direct contact with hot air, which is what builds those browned edges. The other detail that matters is resting time. Pulling the chicken out and cutting it immediately lets the juices run out onto the board instead of staying where they belong.
- Dry chicken — This is where the browning starts. Paper towels take off surface moisture so the oil and spices cling instead of slipping off.
- 425°F oven — Lower heat will cook the chicken through, but it won’t build the same caramelized edges before the meat overcooks.
- Single layer — Crowding traps steam. If the thighs overlap, they’ll roast in their own moisture and the seasoning won’t crisp.
- Resting after baking — Three to five minutes gives the juices time to settle back into the meat, which keeps each bite tender.
What Each Seasoning Is Doing Here

- Olive oil — It carries the spices and helps the surface brown. You can use avocado oil instead if that’s what you keep around; just use enough to coat every piece lightly.
- Garlic powder and onion powder — These give you a savory base without the risk of raw garlic burning in the oven. Fresh garlic can work, but it’s easier to scorch, especially at 425°F.
- Smoked paprika — This is what gives the chicken that warm, slightly smoky color and depth. Regular paprika works in a pinch, but the flavor is flatter.
- Italian seasoning — A dried herb blend makes the chicken taste layered without adding extra prep. If yours is old and faded, replace it; stale dried herbs are basically dust.
- Lemon wedges and parsley — These aren’t just garnish. The lemon cuts through the richness of the thighs and wakes up the seasoning right before serving.
How to Get Juicy Chicken Thighs from Oven to Plate
Seasoning the Surface Evenly
Pat the chicken dry first, then toss it with oil and seasonings until every piece looks evenly coated. If you see dry patches of spice clumping in one spot, keep tossing for another few seconds. That even coating matters because the seasoning layer is thin, and any bare area will bake up dull instead of browned. A little messier on the bowl side is better than patchy chicken.
Spacing the Thighs on the Pan
Lay the thighs in a single layer on a foil-lined baking sheet with a little room between them. If they touch, the moisture they release stays trapped and you lose the crisped edges that make this recipe work. The pan should look busy but not crowded. If you’re making a double batch, use two sheets instead of stacking everything onto one.
Watching for the Finish Line
Bake for 20 to 25 minutes, but don’t chase the clock alone. You want the edges browned and the center cooked to 165°F. The chicken should look juicy, with the spices darkened and the bottom edges a little crisp. If the thighs are thick, they may need a few extra minutes; if they’re smaller, start checking early so they don’t overcook.
Resting Before Serving
Let the chicken sit for 3 to 5 minutes after it comes out of the oven. That short rest keeps the juices from spilling out the second you slice in. Serve with lemon wedges and parsley while the surface is still hot and aromatic. The lemon is worth squeezing over the top because it sharpens every savory note in the pan.
How to Adapt These Chicken Thighs for Different Nights
Gluten-Free and Naturally Low-Carb
This recipe is already gluten-free and low-carb as written, which is part of why it works so well for a quick dinner. Just check your spice labels if you’re sensitive to cross-contamination, since some seasoning blends add anti-caking agents or fillers. The texture and flavor stay the same.
Make It More Herb-Forward
Swap half of the Italian seasoning for dried thyme or oregano if you want a sharper, more herbal finish. Thyme reads a little woodier, oregano a little brighter. Either way, keep the total amount about the same so the coating doesn’t get dusty.
Use Boneless Chicken Breasts Instead
You can use boneless skinless chicken breasts, but they need less time and a closer eye. Pound them to an even thickness so the thinner ends don’t dry out while the thicker middle finishes. The flavor stays the same, but the texture will be leaner and less forgiving than thighs.
Storage and Reheating
- Refrigerator: Store leftovers in an airtight container for up to 4 days. The seasoning stays good, though the edges soften a bit after chilling.
- Freezer: These freeze well for up to 3 months. Wrap portions tightly and freeze them flat so they thaw evenly.
- Reheating: Warm in a 325°F oven, covered loosely with foil, until heated through. The biggest mistake is blasting them in the microwave too long, which makes the meat turn dry at the edges before the center is hot.
Answers to the Questions Worth Asking
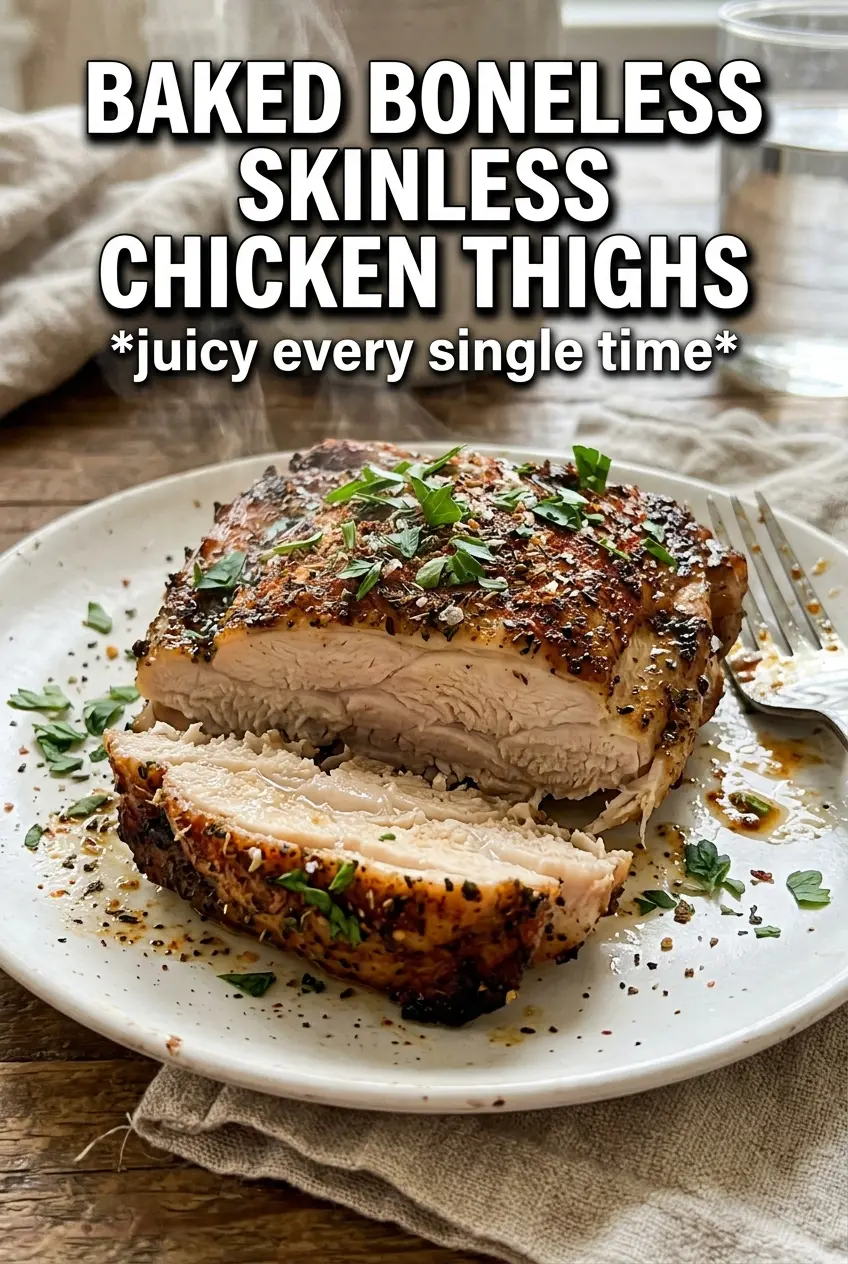
Baked Boneless Skinless Chicken Thighs
Ingredients
Equipment
Method
- Preheat the oven to 425°F and pat the chicken dry with paper towels—this helps the surface brown evenly (no wet sheen).
- In a bowl, toss the chicken with olive oil and all seasonings until every piece is evenly coated, with no dry powder spots visible.
- Arrange the chicken on a foil-lined sheet pan in a single layer without crowding, leaving space between pieces for airflow.
- Bake for 20–25 minutes at 425°F until the edges caramelize and the thickest part reaches 165°F; the top should look golden and slightly darkened at the borders.
- Rest the chicken for 3–5 minutes, so the juices redistribute and the center stays tender rather than watery.
- Serve with lemon wedges and parsley, with bright citrus and fresh herb aroma on top.