Garlic butter chicken thighs hit the pan with a hard sizzle, turn deeply golden, and finish with a glossy herb butter that clings to every bite. The chicken stays juicy because it gets a proper sear before the butter goes in, and the butter picks up all the browned bits left behind in the skillet. That’s where the restaurant-style flavor comes from: not extra ingredients, just good timing and a little patience at the stove.
Boneless thighs work especially well here because they cook fast and stay tender even if the heat runs a little high. The garlic goes in after the chicken is mostly cooked, so it softens and turns fragrant without burning, and the fresh thyme and rosemary keep the butter from tasting flat. If you’ve ever had chicken thighs that came out pale or soggy, the fix is in the sear — dry surface, hot pan, and no crowding.
Below, I’ll walk through the part that matters most: getting that crust before you start basting, plus the small detail that keeps the garlic butter from turning bitter.
The chicken got that deep golden crust and the garlic butter stayed sweet instead of burnt. I basted it for the full two minutes and the pan sauce was perfect over rice.
Save these garlic butter chicken thighs for the nights when you want a fast skillet dinner with a real pan sauce.
The Seared Crust Is What Keeps the Butter Sauce from Going Flat
A good garlic butter chicken thigh starts with color, not the sauce. If the chicken goes into a lukewarm pan, it steams and the butter later tastes one-note because there’s nothing toasted in the skillet to anchor it. You want a deep golden crust on the chicken first, because those browned bits dissolve into the butter and give you the savory base that makes the whole dish taste finished.
The other mistake is rushing the butter stage. Once the butter hits the pan, the heat needs to come down so the garlic softens and the milk solids don’t scorch. Golden butter and fragrant garlic are the goal; dark brown garlic means bitterness, and once that happens there’s no fixing it.
What the Butter, Garlic, and Herbs Are Each Doing Here
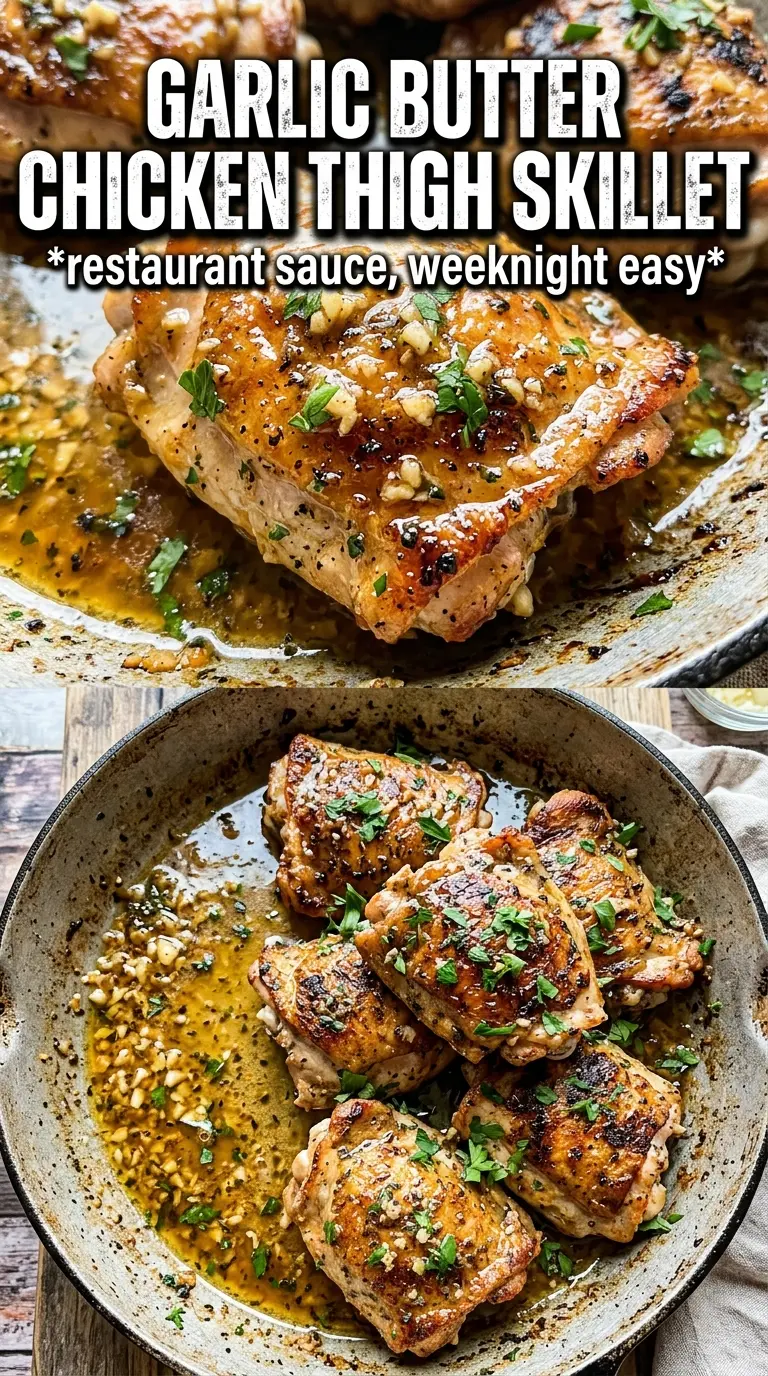
- Chicken thighs — Thighs stay juicier than breasts and forgive a little extra time in the skillet. Boneless thighs are fastest, but bone-in works too if you give them a few more minutes and check that the center is cooked through.
- Unsalted butter — This carries the garlic and herbs and becomes the sauce. Unsalted is better here because you’re seasoning the chicken separately, which gives you more control over the final taste.
- Garlic — Smash the cloves so they release their flavor into the butter without turning into tiny burnt pieces. Pre-minced garlic works in a pinch, but it’s more likely to brown too fast and taste sharp.
- Fresh thyme and rosemary — These herbs make the butter smell like something you’d get from a good steakhouse. Dried herbs can work, but use a light hand because they read more intense once they hit hot fat.
- Olive oil — A little oil helps the chicken sear before the butter goes in, since butter alone would brown too quickly. It also keeps the pan from drying out during the first side of cooking.
How to Build the Skillet Sauce Without Burning the Garlic
Season the Chicken First
Salt and pepper both sides of the chicken before it hits the pan. That seasoning is what gives the meat flavor all the way through, not just on the surface. If the chicken looks wet, pat it dry first or the skillet will steam instead of sear. A dry surface is the difference between a pale thigh and a crisp, golden one.
Sear Until the Chicken Releases Cleanly
Heat the oil over medium-high and leave the chicken alone once it goes in. If you try to move it too early, it sticks because the crust hasn’t formed yet. After 5 to 6 minutes per side, the chicken should release more easily and show a deep golden color. Pull it out when it’s cooked through, or nearly there if it’s a thicker piece, then let the butter finish the job without overcooking it.
Let the Butter Foam, Then Start Basting
Drop the heat to medium before adding the butter, garlic, thyme, and rosemary. The butter should foam and smell nutty, not dark and bitter. Once the garlic turns pale gold, return the chicken and tilt the pan so the butter pools to one side. Spoon that butter over the chicken repeatedly for about 2 minutes, and watch the surface turn shiny and glazed.
Serve While the Butter Is Still Active
This dish is at its best right out of the skillet. The butter stays loose and aromatic for a short window, and that’s when it tastes richest. Spoon the pan butter over the chicken and serve with lemon wedges so the acid can cut through the richness. If you let it sit too long, the butter tightens up and you lose that silky finish.
How to Adapt This for Bone-In Chicken, Dairy-Free Cooking, or a Bigger Dinner
Bone-in thighs with deeper flavor
Bone-in thighs take a few minutes longer, but they bring a little more flavor and stay extra juicy. Start them skin-side down if they have skin, then finish the last few minutes with the butter baste. If the outside is browning too fast, lower the heat and let the inside catch up before you call them done.
Dairy-free garlic herb chicken
Use a plant-based butter with a high fat content and cook it the same way, though the sauce won’t taste quite as rich as the original. Add an extra teaspoon of olive oil if the pan looks dry. The garlic and herbs still do the heavy lifting, so you’ll keep the same savory backbone.
Making it for four with leftovers in mind
This recipe scales up cleanly, but don’t crowd the skillet or the chicken will steam. Cook in batches if needed, then return everything to the pan for the butter baste. The leftovers are good the next day, but the skin and crust won’t stay crisp, so reheat gently instead of blasting them in the microwave.
Storage and Reheating
- Refrigerator: Store in an airtight container for up to 4 days. The chicken stays tender, but the butter sauce will firm up when cold.
- Freezer: Freezes well for up to 2 months, though the herb butter loses a little of its fresh aroma. Wrap tightly and thaw in the fridge before reheating.
- Reheating: Warm gently in a skillet over low heat with a splash of water or chicken broth. High heat dries out the thighs and can split the butter sauce.
Answers to the Questions Worth Asking

Garlic Butter Chicken Thighs
Ingredients
Equipment
Method
- Season chicken generously with salt and pepper on both sides. Pat lightly so seasoning adheres.
- Heat olive oil in a large heavy skillet over medium-high heat, then add chicken and sear for 5-6 minutes per side until golden and cooked through. Remove and set aside.
- Reduce heat to medium and add butter, garlic, thyme, and rosemary to the skillet. Cook until the butter foams and the garlic turns golden, about 2 minutes.
- Return chicken to the pan and tilt the pan to pool the garlic butter. Use a spoon to baste the chicken repeatedly with the garlic butter for 2 minutes.
- Serve immediately with the garlic pan butter spooned over the top. Add lemon wedges for serving.