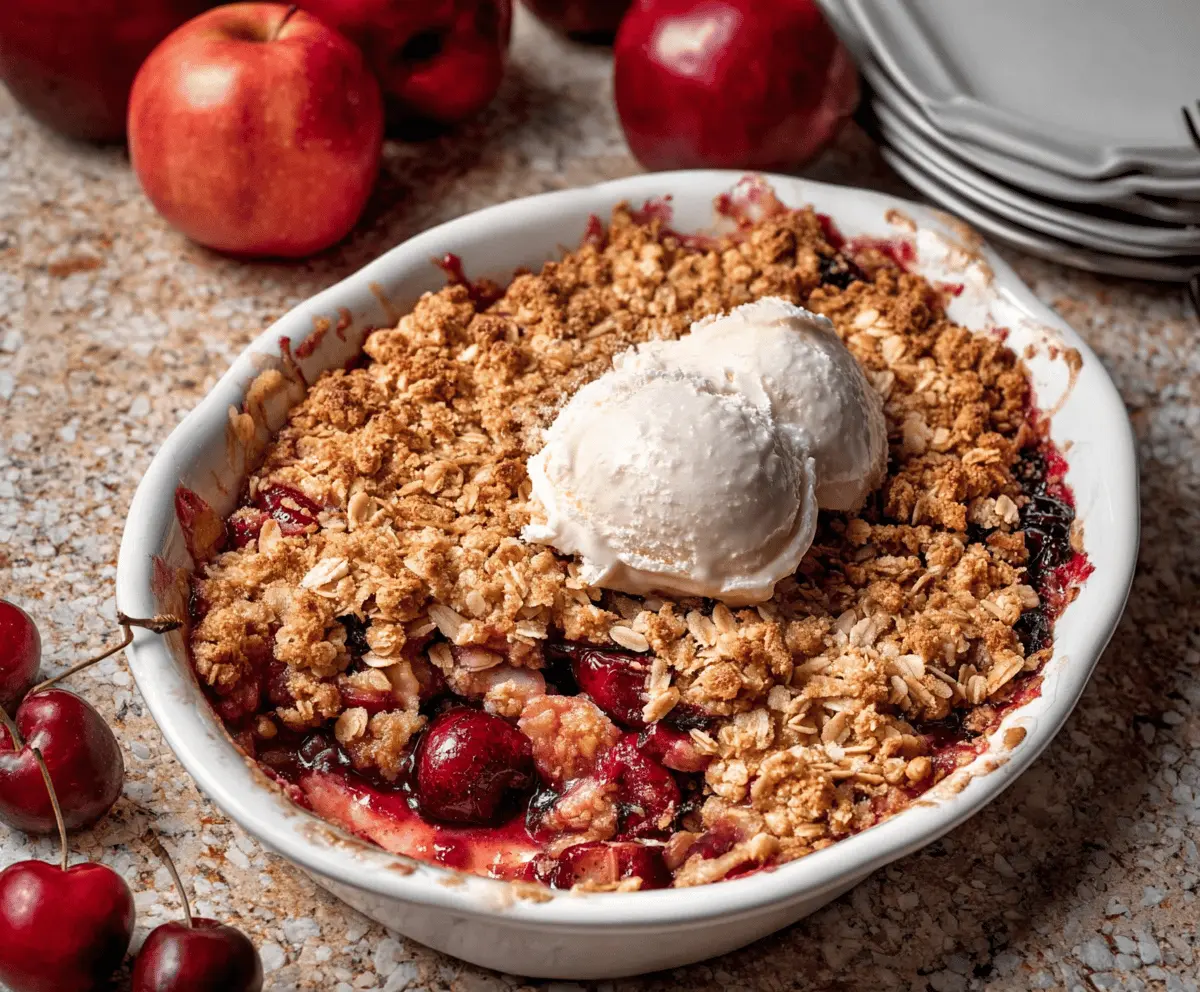
This Apple Cherry Crisp is a warm, fruity treat that combines sweet apples and tart cherries topped with a crunchy, golden oat topping. It’s the perfect dessert for any fruit lover!
Every bite feels like a comforting hug, especially when served warm with a scoop of ice cream. I can never resist sneaking leftovers for breakfast—don’t worry, I won’t tell! 😄
Key Ingredients & Substitutions
Tart Cherries: Fresh or frozen works well. If you can’t find tart cherries, sour cherry preserves can be a great substitute for that tangy flavor!
Apples: Granny Smith or Fuji is ideal due to their firmness and balance of sweetness. Try other apples like Honeycrisp or Braeburn if you prefer something sweeter.
Sugar: Granulated sugar adds sweetness, but you could use coconut sugar or honey instead to suit your taste or dietary preferences.
Cornstarch: This thickens the fruit juices. If you’re avoiding cornstarch, try using tapioca flour or skip it altogether for a juicier crisp.
Butter: Unsalted butter is suggested, but coconut oil or a vegan butter can easily work for a dairy-free version.
How Can I Ensure My Oat Topping is Crunchy and Delicious?
Getting a nice crunchy topping is key to a great apple cherry crisp. Here’s how to achieve that perfect texture:
- Mix oats, flour, and brown sugar until well combined, and ensure the butter is fully incorporated.
- Allow the topping to clump slightly—it helps create those irresistible crunchy bits!
- Spread the topping evenly over the fruit without packing it down. This allows for air to circulate while baking, ensuring that it stays crispy.
Remember to watch your crisp during the last few minutes of baking. If it looks golden brown but the fruit juices aren’t bubbling yet, don’t be afraid to leave it in a bit longer!
Apple Cherry Crisp
Ingredients You’ll Need:
For the Fruit Filling:
- 3 cups tart cherries, pitted (fresh or frozen)
- 3 medium apples, peeled, cored, and sliced (such as Granny Smith or Fuji)
- 1/4 cup granulated sugar
- 1 tablespoon lemon juice
- 1 teaspoon vanilla extract
- 1/2 teaspoon ground cinnamon
- 1/4 teaspoon ground nutmeg
- 1 tablespoon cornstarch (optional, for thickening fruit juices)
For the Crisp Topping:
- 1 cup old-fashioned rolled oats
- 3/4 cup all-purpose flour
- 1/2 cup packed light brown sugar
- 1/2 teaspoon ground cinnamon
- 1/4 teaspoon salt
- 1/2 cup unsalted butter, melted
Optional Toppings:
- Vanilla ice cream
- Whipped cream
How Much Time Will You Need?
This delightful Apple Cherry Crisp takes about 15 minutes of prep time and 40-45 minutes to bake. You’ll spend some time preparing the fruit and mixing the crisp topping, but the oven does the hard work for you while you wait for the warm, sweet aroma to fill your kitchen!
Step-by-Step Instructions:
1. Prepare the Oven and Baking Dish:
Start by preheating your oven to 350°F (175°C). Lightly grease a 9-inch round or a similar-sized baking dish to avoid sticking when it’s time to serve.
2. Make the Fruit Filling:
In a large bowl, combine the sliced apples and pitted cherries. Add in the granulated sugar, lemon juice, vanilla extract, ground cinnamon, nutmeg, and cornstarch if you’re using it. Toss the mixture gently until the fruit is well coated with the sweet and spice flavors. This will add a lovely taste to your crisp!
3. Assemble the Fruit Layer:
Transfer the fruit mixture into your prepared baking dish, spreading it evenly across the bottom. This way, every bite will have those delicious apples and cherries!
4. Prepare the Crisp Topping:
In another medium bowl, mix together the rolled oats, flour, brown sugar, cinnamon, and salt. Pour the melted butter over this mixture and stir until everything is mixed and crumbly. This will create that gooey texture we all love on top of the fruit!
5. Add the Crisp Topping:
Evenly sprinkle the oat topping over the fruit filling in the baking dish. Make sure it looks nice and even to ensure all the fruit is covered!
6. Bake to Perfection:
Slide the baking dish into your preheated oven and bake for about 40-45 minutes. You want the topping to turn a lovely golden brown and for the fruit juices to bubble around the edges. This is where the magic happens!
7. Let It Cool:
Once baked, remove the crisp from the oven and allow it to cool slightly. This step is important because it lets the juices settle a bit, making it easier to serve.
8. Serve and Enjoy:
Your warm Apple Cherry Crisp is ready to be enjoyed! Serve it up while it’s warm, and feel free to top each portion with a scoop of vanilla ice cream or a dollop of whipped cream if you like. Enjoy the deliciousness!
Dig in and indulge in this tasty treat that’s sure to bring smiles to everyone at the table!

Can I Use Frozen Cherries for This Recipe?
Absolutely! Frozen cherries work just as well as fresh. Just make sure to thaw them beforehand and drain any excess liquid to prevent the filling from becoming too watery.
How Do I Store Leftovers?
Any leftovers can be stored in an airtight container in the refrigerator for up to 3 days. To reheat, place it in the oven at 350°F (175°C) for about 10-15 minutes until warmed through.
Can I Make This Crisp Ahead of Time?
You can prepare the fruit filling and crisp topping separately in advance. Just assemble right before baking! If you’ve already baked it, it can also be reheated as mentioned above.
What Other Fruits Can I Use?
Feel free to get creative! You can mix in other fruits like blueberries, raspberries, or peaches for an extra flavor twist. Just remember to adjust the sugar based on the sweetness of the other fruits used.