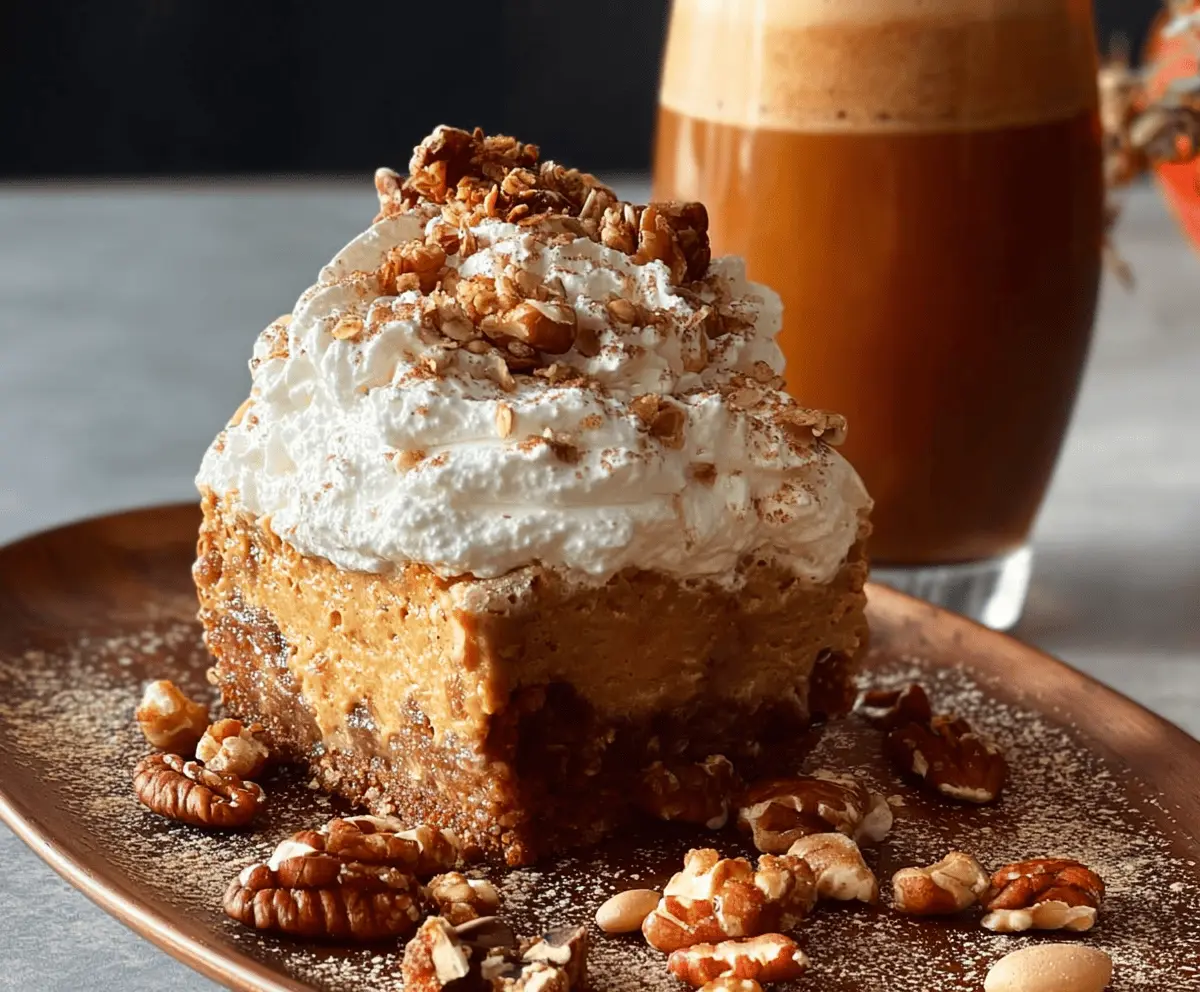
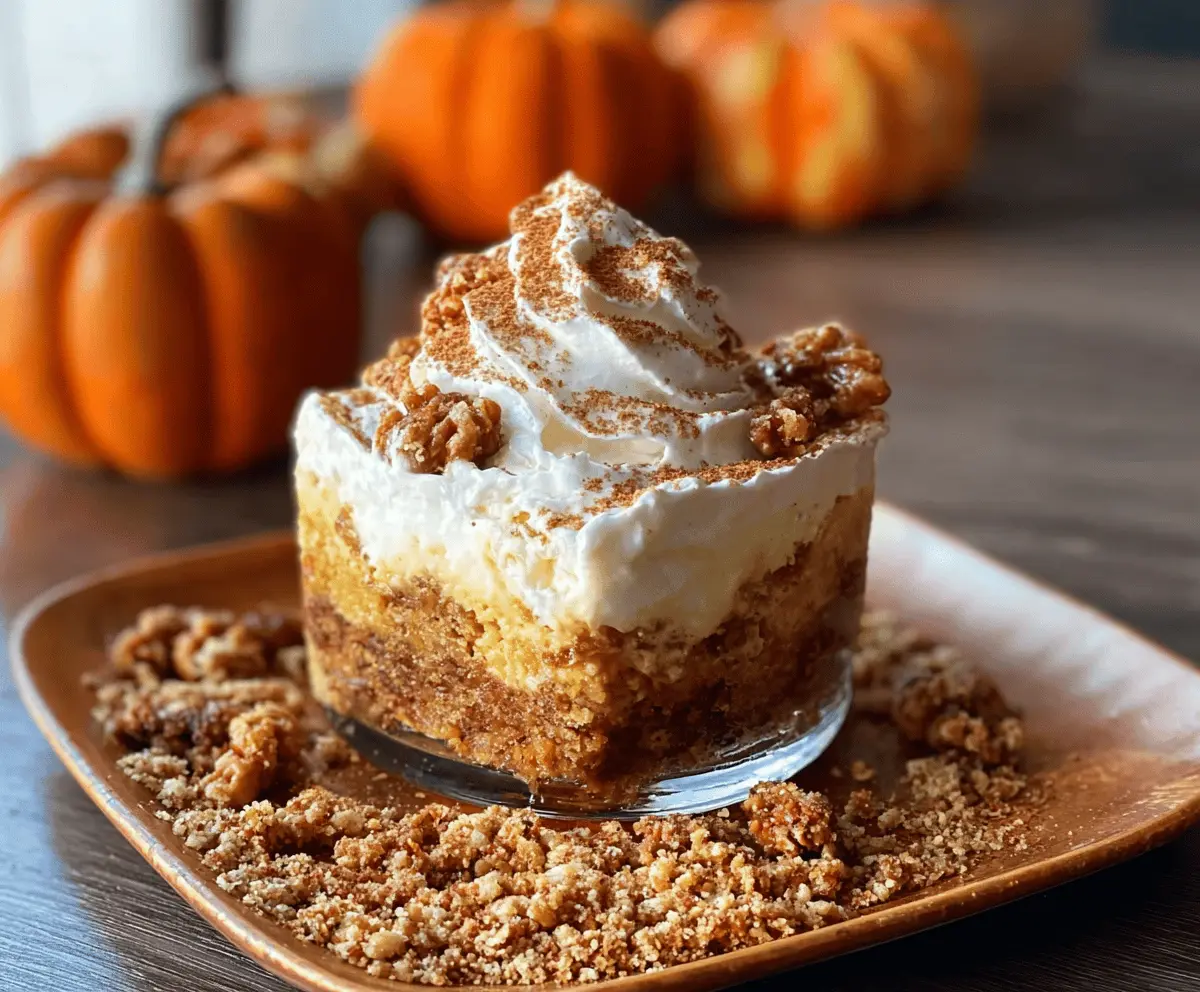
This Pumpkin Autumn Crunch Delight is a cozy dessert that combines creamy pumpkin filling with a crispy, crunchy topping. Perfect for fall gatherings or just a sweet treat at home!
Honestly, the best part is that crunchy topping—it’s like a little parade of goodness on every bite! I can’t resist sneaking spoonfuls when no one is looking! 😂
What I love most is how simple it is to make. Just mix, layer, and bake. It fills my kitchen with that warm spice smell that makes everyone feel right at home!
Key Ingredients & Substitutions
Graham Cracker Crumbs: These create a delicious base for the dessert. If you want a gluten-free option, try crushed gluten-free cookies or almond flour instead.
Walnuts: They add a nice crunch and nutty flavor. If you’re not a fan or have nut allergies, feel free to substitute with sunflower seeds or skip them altogether.
Canned Pumpkin Puree: This is essential for that classic pumpkin flavor. If you want to, you could use homemade pumpkin puree, just make sure it’s well drained so your filling doesn’t end up watery.
Heavy Whipping Cream: For the topping, whipped cream gives it that light finish. If you’re looking for a non-dairy version, coconut cream works well for a tropical twist!
What’s the Best Way to Ensure Creamy Pumpkin Cheesecake?
The secret to a smooth and creamy filling is to ensure all your ingredients are at room temperature. This helps them blend evenly without lumps. Here’s how to achieve that:
- Take the cream cheese and eggs out of the fridge at least 30-60 minutes before you start.
- When mixing, start slow to avoid over-mixing, which could incorporate too much air and lead to cracks in your cheesecake.
Also, make sure to mix in the eggs one at a time. This prevents over-mixing and helps keep a nice, smooth filling!
Pumpkin Autumn Crunch Delight
Ingredients You’ll Need:
For the Crust and Crunch Layer:
- 2 cups graham cracker crumbs
- 1/2 cup chopped walnuts (plus extra for garnish)
- 1/4 cup brown sugar
- 1/2 tsp ground cinnamon
- 1/4 tsp ground nutmeg
- 1/4 cup melted butter
For the Pumpkin Cheesecake Layer:
- 8 oz cream cheese, softened
- 1 cup canned pumpkin puree
- 1/2 cup granulated sugar
- 1 tsp pumpkin pie spice
- 1 tsp vanilla extract
- 2 large eggs
For the Topping:
- 1 cup heavy whipping cream
- 2 tbsp powdered sugar
- 1/2 tsp vanilla extract
- Ground cinnamon, for dusting
How Much Time Will You Need?
This delicious treat will take about 20 minutes of prep time and around 1 hour of total baking time. Plus, don’t forget to let it cool and chill for at least 3 hours before serving. So, you’re looking at about 4 hours and 20 minutes from start to finish, but most of that is just chilling time while you eagerly wait to dig in!
Step-by-Step Instructions:
1. Prepare the Baking Dish:
Start by preheating your oven to 350°F (175°C). Grease or line an 8×8 inch baking dish with parchment paper to prevent sticking.
2. Make the Crust and Crunch Layer:
In a medium bowl, combine the graham cracker crumbs, chopped walnuts, brown sugar, cinnamon, nutmeg, and melted butter. Stir until everything is well mixed and the crumbs are evenly coated. Then, press about two-thirds of this mixture firmly into the bottom of your prepared baking dish to form a sturdy crust. Save the remaining crumb mix for later!
3. Bake the Crust:
Pop the crust into your oven and bake for about 8-10 minutes. Once it’s lightly golden, take it out and let it cool a bit.
4. Prepare the Pumpkin Cheesecake Filling:
In a large bowl, beat the softened cream cheese with a hand mixer until smooth. Add in the pumpkin puree, granulated sugar, pumpkin pie spice, and vanilla extract. Mix until everything is creamy and well combined. Then, add the eggs one at a time, mixing well after each addition until the batter is completely smooth.
5. Layer the Filling and Crust:
Pour the pumpkin cheesecake filling over the baked crust in your dish and spread it out evenly. Now, take your reserved crumb mixture and sprinkle it evenly over the top of the pumpkin filling.
6. Bake the Delight:
Return the dish to the oven and bake for 35-40 minutes, or until the pumpkin filling is set and the topping turns a lovely golden brown.
7. Let it Cool:
Once baked, remove it from the oven and let the Pumpkin Autumn Crunch Delight cool completely at room temperature. Then, refrigerate it for at least 3 hours to set fully.
8. Prepare the Topping:
Just before you’re ready to serve, whip the heavy cream with the powdered sugar and vanilla extract until stiff peaks form. This will be your fluffy topping!
9. Assemble and Serve:
Spread or pipe the whipped cream on top of the chilled dessert. Garnish with whole walnuts and a light dusting of ground cinnamon for that extra autumn touch. Finally, slice into squares and serve chilled!
Enjoy your Pumpkin Autumn Crunch Delight, the perfect blend of creamy pumpkin flavors with a deliciously satisfying crunchy topping! It’s sure to impress family and friends alike!
Can I Use a Different Type of Nut?
Absolutely! If you prefer, you can substitute walnuts with pecans or almonds for a different flavor and crunch. If you have nut allergies, consider using sunflower seeds or just omitting them altogether!
Can I Make This Dessert Gluten-Free?
Yes! You can easily make this dessert gluten-free by using gluten-free graham cracker crumbs or any similar gluten-free cookie base for the crust. Just double-check the labels to ensure all your ingredients are gluten-free.
How Should I Store Leftovers?
Store any leftovers in an airtight container in the refrigerator for up to 4 days. If you’d like to keep it longer, you can freeze it. Just make sure to wrap it well in plastic wrap and foil to protect it from freezer burn—thaw it in the fridge before serving!
Can I Make This Dessert Ahead of Time?
Yes! This Pumpkin Autumn Crunch Delight is perfect for making ahead. You can prepare it a day or two in advance, store it in the refrigerator, and serve it chilled when you’re ready. The flavors have time to meld, making it even more delicious!