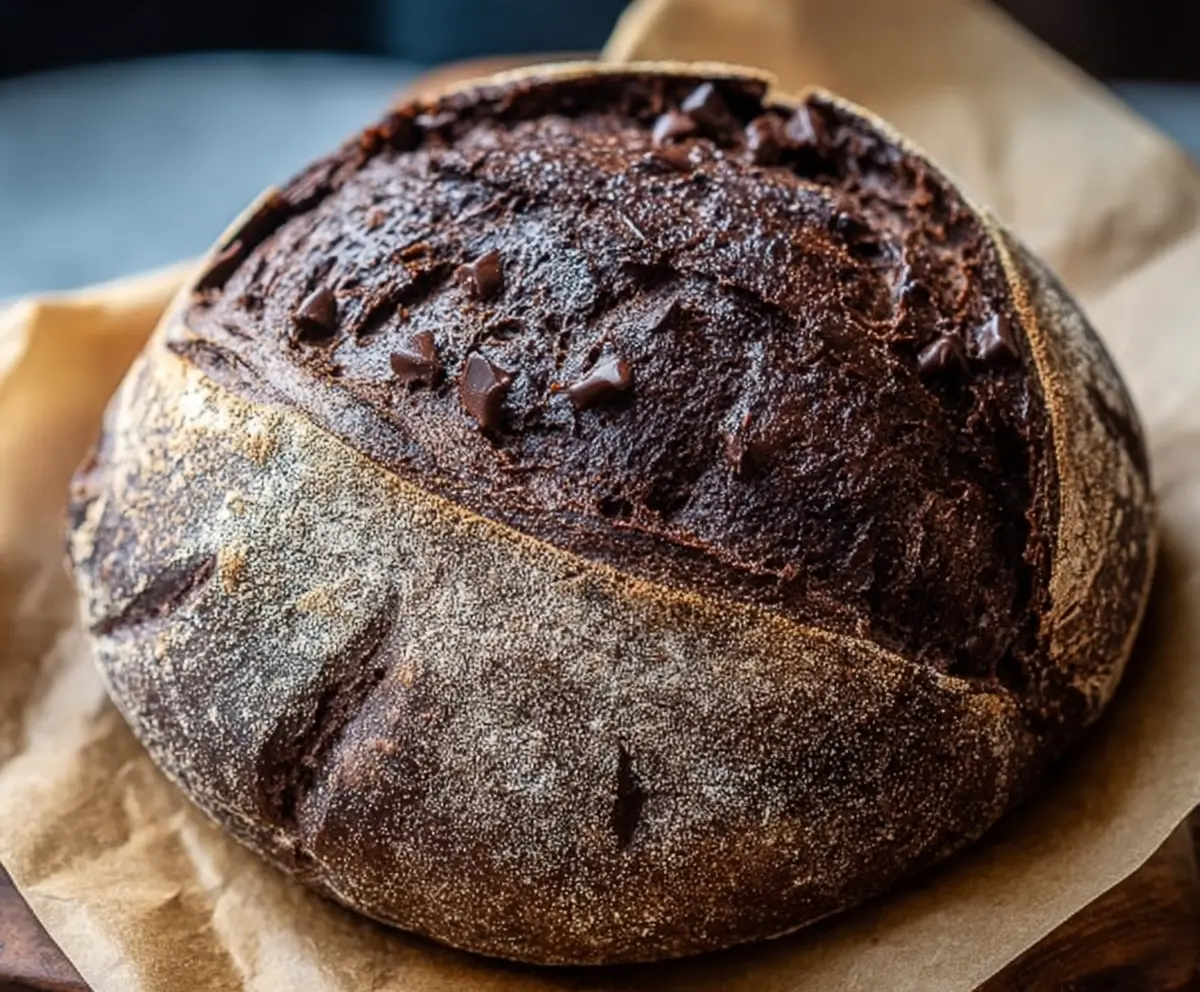
This Double Chocolate Sourdough Bread is a dream come true for chocolate lovers! With rich cocoa and sweet chocolate chunks, every slice is a warm hug for your taste buds.
Making this bread feels like a fun science project. The sourdough adds a tasty twist, and honestly, who can resist that chocolatey goodness? I love to enjoy it toasted with a bit of butter—so yummy!
Key Ingredients & Substitutions
Bread Flour: Use high protein bread flour for a perfect chewy texture. If you don’t have bread flour, all-purpose flour can work, but the bread may be less chewy.
Cocoa Powder: Unsweetened cocoa gives the bread its deep chocolate flavor. Make sure to use high-quality cocoa for the best results. You can also substitute with Dutch-processed cocoa for a smoother taste.
Sourdough Starter: An active starter is crucial for flavor and rise. If you don’t have one, consider using a commercial yeast. Use about 1.5 teaspoons of instant yeast for similar results.
Dark Chocolate: I prefer using chocolate chunks for that melty experience. You could use chocolate chips, but go for high-quality chocolate over the standard mix for a richer flavor.
How Can You Shape Your Bread Like a Pro?
Shaping the dough can be tricky but makes a big difference. Here’s a simple method to get it right:
- Transfer the dough to a floured surface and lightly flour the top to prevent sticking.
- Using your hands, gently stretch each edge toward the center, folding over a bit at a time.
- Once you have all edges folded in, flip the dough seam-side down.
- Using your hands, gently pull the dough towards you to create tension on the surface.
- Rest the shaped dough for about 10 minutes before placing it into the banneton.
With a little practice, your dough will have a beautiful shape and great structure ready for baking!
How to Make Double Chocolate Sourdough Bread
Ingredients You’ll Need:
For the Bread:
- 500g bread flour (high protein)
- 50g cocoa powder (unsweetened)
- 350g water (room temperature)
- 100g active sourdough starter (100% hydration)
- 10g salt
- 100g dark chocolate chunks or chips (at least 70% cocoa)
How Much Time Will You Need?
This delightful bread takes about 15 minutes of active prep time, plus 3 to 4 hours of fermentation time and 12 to 18 hours of proofing in the fridge. So, plan ahead! It’s worth the wait for that yummy chocolatey bread. The total time from start to finish could be around 16 to 24 hours, including the overnight proofing.
Step-by-Step Instructions:
1. Mixing the Dough:
In a large mixing bowl, mix together the bread flour and cocoa powder until they are well combined. This ensures that the cocoa is evenly distributed throughout the flour. Next, add the water and your active sourdough starter to this mixture. Mix until everything is just combined. You’ll notice the dough will be shaggy and sticky. Cover the bowl and let it rest for about 30 to 45 minutes. This is called the autolyse, and it helps with gluten development!
2. Adding the Salt:
Once the dough has rested, sprinkle the salt on top. Now mix thoroughly by folding and stretching the dough within the bowl. This will help to incorporate the salt evenly and strengthen the dough.
3. Fermentation:
Now it’s time to let the dough ferment at room temperature for about 3 to 4 hours. During this time, perform 3 to 4 sets of stretch and folds every 30 minutes. To do this, grab the dough from one side, stretch it up, and fold it over itself—repeat this on all sides. After the final stretch and fold, gently fold in the dark chocolate chunks so they are evenly distributed.
4. Shaping the Dough:
Once the bulk fermentation is complete, turn the dough out onto a floured surface. Shape it gently into a tight round boule. You can do this by folding the edges of the dough toward the center to create surface tension. Once shaped, place the dough seam-side up into a floured banneton or bowl lined with a floured towel.
5. Proofing in the Refrigerator:
Cover the shaped dough and place it in the refrigerator to proof for 12 to 18 hours (overnight is great!). This slow proof allows for incredible flavor development and gives the bread time to rise slowly.
6. Baking the Bread:
When you’re ready to bake, preheat your oven to 250°C (480°F). Place a Dutch oven or baking stone inside during the preheating. After preheating, carefully transfer the dough onto a piece of parchment paper. Score the top of the dough with a sharp knife or razor to help with oven spring—a fancy term for the rise that happens in the oven!
7. Baking Time:
Place the dough (with parchment) into the preheated Dutch oven, cover it with the lid, and bake for 20 minutes. After 20 minutes, remove the lid and bake for an additional 20 to 25 minutes until the crust is dark and crisp, with the delicious chocolate chunks melted and visible on top.
8. Cooling Before Slicing:
Once your bread is done baking, remove it from the oven and cool it on a wire rack for at least 1 hour before slicing. This helps the crumb develop and ensures a great texture. Enjoy your rich, chocolaty sourdough bread warm or toasted!
Can I Use All-Purpose Flour Instead of Bread Flour?
Yes, you can! While using all-purpose flour will result in a softer texture, it will still work. Just keep in mind that the bread might not have the same chewiness that bread flour provides.
What Should I Do If My Sourdough Starter Isn’t Active?
If your starter isn’t active, give it a few feedings to become bubbly and strong before using it in the recipe. Make sure it has risen and fallen within a few hours before incorporating it into the dough for the best results.
Can I Add Other Ingredients Like Nuts or Dried Fruits?
Absolutely! Feel free to mix in your favorite nuts or dried fruits along with the chocolate chunks. Just be mindful of the overall balance of ingredients and adjust the dough hydration slightly if adding significant dry ingredients.
How Should I Store Leftover Bread?
Store any leftover bread in an airtight container or a plastic bag at room temperature for up to 3 days. For longer storage, consider slicing the bread and freezing it. Wrap slices individually before placing them in a freezer bag, and toast them directly from the freezer when you want to enjoy!