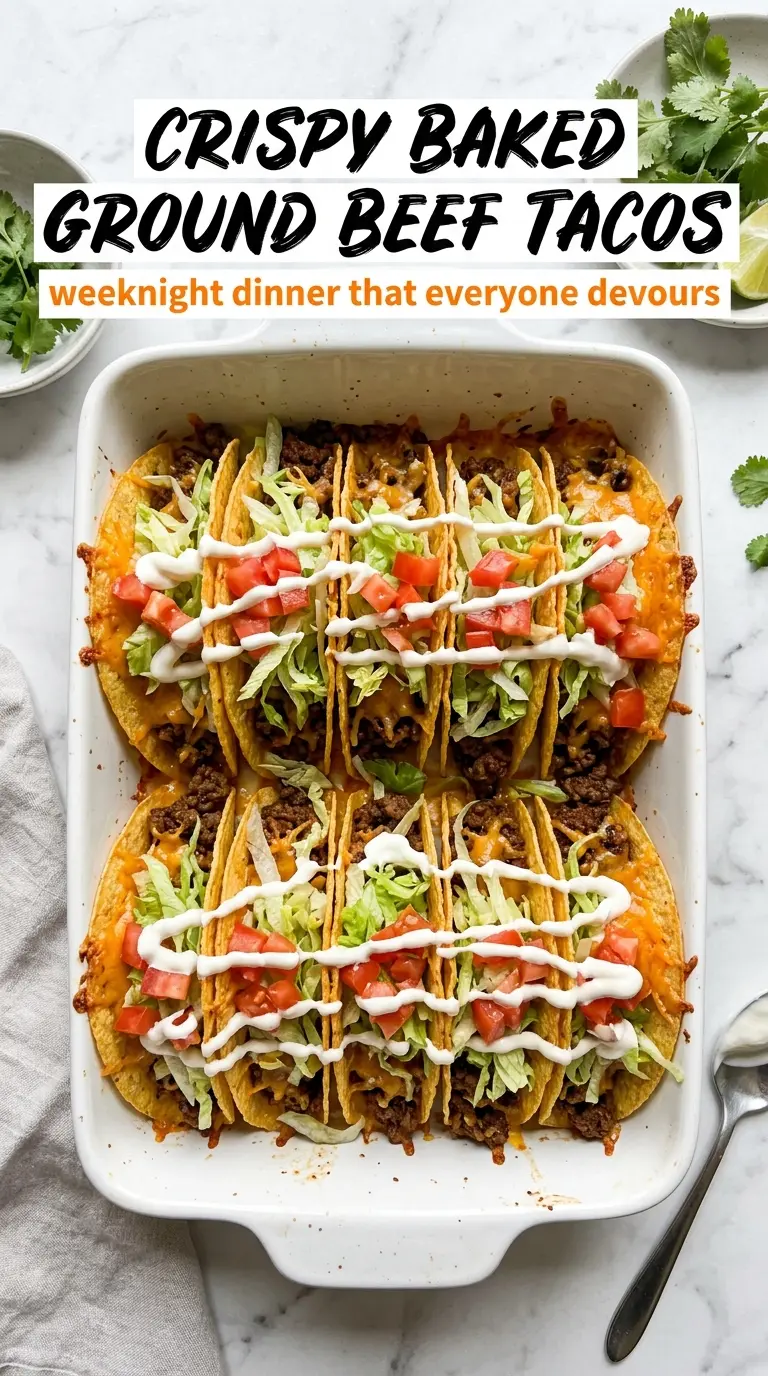
Golden, shatter-crisp taco shells filled with juicy seasoned beef are the kind of dinner that disappears fast. The oven does the work here, and that matters: baked tortillas get crisp all the way through instead of turning greasy or staying limp in the middle. With the right amount of oil and a hot sheet pan, each shell comes out sturdy enough to hold the filling but still light when you bite into it.
The ground beef gets browned first, then simmered with taco seasoning and just enough water to coat every crumb without turning the pan soupy. That little simmer is what keeps the meat from tasting dry or dusty. Brushing both sides of the tortillas with oil is the other key move. Skip that, and you’ll get dry edges before the center has a chance to crisp.
Below, you’ll find the timing that keeps the shells crisp after filling, plus a few smart swaps for different tortillas and toppings.
The tortillas crisped up beautifully in the oven and held the filling without cracking. I liked that the beef stayed saucy but not watery, and the cheese melted just enough from the heat of the meat.
These Crispy Baked Ground Beef Tacos turn out with golden shells and saucy beef every time.
The Trick Behind Crispy Tortillas That Don't Crack
Most baked tacos fail in one of two ways: the shells stay pale and soft, or they dry out and split the second you add filling. The fix is a thin coat of oil on both sides and a hot oven. That oil helps the tortillas blister and brown instead of turning brittle, and the heat sets the shape fast enough that the fold holds.
Corn tortillas are the right choice here because they crisp instead of going leathery. If they feel stiff out of the package, warm them briefly before brushing with oil so they bend without tearing. The biggest mistake is overbaking in hopes of extra crunch. Once the edges are golden and the tortillas hold their shape, they’re done.
What Each Ingredient Is Actually Doing In These Tacos
- Ground beef — This is the base of the filling, and a little fat helps carry the taco seasoning. If yours is very lean, the beef can taste a little dry after baking, so don’t be afraid to leave a small amount of moisture in the pan after draining.
- Taco seasoning — A packet gives you salt, chiles, cumin, and garlic in one shot, which keeps the filling quick and balanced. Homemade seasoning works too, but if you swap it in, season assertively so the meat doesn’t taste flat after the tortillas bake.
- Water — This loosens the seasoning into a sauce that clings to the beef instead of dusting the pan. Less water makes the meat dry; more water turns it soupy and can soak the shells.
- Corn tortillas — They’re the reason these tacos get crisp. Flour tortillas won’t crackle the same way, and they tend to bake up softer and chewier.
- Olive oil — The light coating on the tortillas is what helps them turn golden in the oven. A neutral oil works fine too, but skip the oil altogether and the shells won’t brown evenly.
- Cheddar cheese — It melts into the hot beef and gives the tacos that gooey, salty finish. Monterey Jack is a good swap if you want a milder melt.
- Lettuce, tomatoes, onion, sour cream, salsa — These are the cool, fresh contrast to the hot crisp shells and savory beef. Add them after baking so they stay bright and don’t steam the tortillas from the inside.
Building The Beef And Baking The Shells
Brown The Meat Until It Really Cooks Down
Set the skillet over medium-high heat and break the beef into small pieces as it cooks. You’re looking for deep browning, not just gray meat, because that color is where the flavor starts. If there’s a lot of fat in the pan, drain it off once the beef is cooked through, but leave enough behind that the meat doesn’t turn chalky.
Simmer The Seasoning Into A Coating
Stir in the taco seasoning and water, then let it bubble for about five minutes. The liquid should reduce to a thick, glossy coating that clings to the beef. If it still looks loose, keep simmering for a minute or two more; if it dries out too fast, splash in a tablespoon of water so the seasoning doesn’t scorch.
Shape And Bake The Tortillas
Brush both sides of each tortilla with a thin layer of olive oil, then fold them in half on the baking sheet. Keep them in a single layer so air can move around them. At 400°F, they should turn golden and crisp in 8 to 10 minutes. Pull them when they’re set and lightly browned, because they’ll keep firming up as they cool for a minute or two.
Fill Fast While The Shells Are Crisp
Spoon the beef into the shells right before serving, then top with cheese, lettuce, tomatoes, onion, sour cream, and salsa. The shells are at their best in the first few minutes after baking, before steam from the filling starts softening the inside. If you’re feeding a group, keep the tacos unfilled on the sheet pan and set out the toppings buffet-style so everyone can build theirs at once.
Ways To Adjust These Tacos Without Losing The Crunch
Make Them Dairy-Free
Skip the cheddar and sour cream, then finish with salsa, diced avocado, or a dairy-free crema. The tacos still taste full because the beef carries the main seasoning, and the crisp shells keep the texture interesting even without cheese.
Use Ground Turkey Instead Of Beef
Ground turkey works well, but it needs a little more help to stay juicy. Add a teaspoon of oil to the pan while browning and don’t skip the simmer with the seasoning, or the filling can taste lean and dry after baking.
Go Gluten-Free Without Changing The Method
These tacos are naturally gluten-free as long as your taco seasoning is certified gluten-free. Check the packet, because some blends use fillers or malt vinegar that don’t belong in a gluten-free kitchen.
Storage And Reheating
- Refrigerator: Store the beef separately for up to 4 days. The tortillas soften once assembled, so keep the toppings and shells apart if you want any crunch left.
- Freezer: The beef freezes well for up to 2 months. The tortillas and toppings don't freeze well, so build fresh shells when you’re ready to serve.
- Reheating: Reheat the beef in a skillet over medium heat or in the microwave until hot. Crisp the tortillas in the oven again for a few minutes before filling them, because a filled taco will steam and go limp if you try to reheat it assembled.
Questions I Get Asked About This Recipe

Crispy Baked Ground Beef Tacos
Ingredients
Equipment
Method
- Brown the ground beef in a skillet over medium-high heat, breaking it apart as it cooks for 8 minutes until no longer pink. Drain excess fat, then season to taste with salt and black pepper.
- Stir in the taco seasoning and water, then simmer for 5 minutes until the mixture thickens slightly and looks glossy.
- Brush both sides of the corn tortillas lightly with olive oil. Fold each tortilla in half and arrange on a sheet pan in a single layer with the fold facing up.
- Bake at 400°F for 8-10 minutes until the shells are crispy and golden at the edges. Let them stand 1 minute so they set before filling.
- Fill each taco shell with the seasoned ground beef. Top with shredded cheddar cheese, shredded lettuce, diced tomatoes, and diced onion.
- Drizzle with sour cream and salsa to taste, then serve immediately while the shells stay crisp.