These Brown Butter Sage Dinner Rolls are warm, fluffy, and bursting with flavor! The nutty taste of brown butter mixes perfectly with fresh sage for a tasty twist.
Making these rolls is a fun activity. I love watching the dough rise and smelling that delicious scent of sage wafting through the kitchen. So cozy and inviting!
They are perfect for holidays or any meal. Serve them warm and watch everyone go back for seconds. Trust me, you’ll want to make these again and again!
Key Ingredients & Substitutions
Whole Milk: You need warm whole milk for the yeast to activate properly. If you only have 2% milk, that works too, or try almond or oat milk for a dairy-free option, just ensure it’s warmed.
Active Dry Yeast: This recipe calls for active dry yeast. If you have instant yeast, you can use that as a substitute. Just mix it directly into the flour without proofing it first!
Fresh Sage: Fresh sage adds a wonderful flavor. If you can’t find it, try substituting with dried sage—use about 1 teaspoon for every tablespoon of fresh sage.
Unsalted Butter: Unsalted butter is best since you can control the saltiness. If you’re in a pinch, salted butter will work; just be mindful of the extra salt in the recipe.
All-Purpose Flour: This flour gives the rolls their fluffy texture. If you want a healthier option, you can swap some of the all-purpose flour for whole wheat flour, but keep in mind the texture will change slightly.
How Do You Get a Nice Rise in Your Rolls?
The key to achieving a nice rise in your dinner rolls is all about temperature and patience. Yeast loves warmth, so make sure your dough rises in a cozy spot. Here are a few tips:
- Warm milk is crucial. Too hot can kill the yeast, and too cold won’t activate it.
- After mixing the dough, let it rise in a warm area, like near an oven or in a sunny spot.
- Cover the dough with a damp towel or plastic wrap to keep moisture in, helping it rise better.
Remember, when the dough has doubled in size, that’s when you know it’s ready for shaping!

Brown Butter Sage Dinner Rolls
Ingredients You’ll Need:
- 1 cup whole milk (warm, about 110°F)
- 2 1/4 tsp (1 packet) active dry yeast
- 3 tbsp granulated sugar
- 4 tbsp unsalted butter (softened)
- 1/4 cup unsalted butter (for browning)
- 2 tbsp fresh sage leaves, finely chopped (plus extra whole leaves for garnish)
- 3 1/2 to 4 cups all-purpose flour
- 1 tsp salt
- 1 large egg
- 1 tsp olive oil (for greasing)
- Extra melted browned butter for brushing after baking
- Coarse sea salt or flaky salt for sprinkling
How Much Time Will You Need?
This recipe will take about 2 to 2.5 hours in total, including preparation and rising times. The actual hands-on time is about 30-45 minutes. So, grab a cozy spot in your kitchen, and let’s get baking!
Step-by-Step Instructions:
1. Prepare the Yeast Mixture:
Start by warming the milk to about 110°F—it should feel warm but not hot. Pour the warm milk into a small bowl and sprinkle the yeast and 1 tablespoon of sugar over the top. Let it sit for about 5-10 minutes until it’s foamy. This shows that your yeast is active and ready to work!
2. Brown the Butter and Infuse it with Sage:
In a small saucepan, melt 1/4 cup of butter over medium heat. Keep an eye on it and swirl occasionally—you’re looking for a golden brown color and a nutty aroma (this should take about 4-5 minutes). Once it’s ready, remove it from the heat and stir in the chopped sage leaves. Let this sit until it cools to a warm temperature.
3. Make the Dough:
In a large mixing bowl, combine the remaining 4 tablespoons of softened butter, the remaining 2 tablespoons of sugar, salt, and the egg. Next, stir in the foamy yeast mixture and the browned butter with sage (it’s up to you if you want to strain the sage or leave it in for texture!). Gradually mix in 3 1/2 cups of flour until a soft, slightly tacky dough forms. If your dough is still sticky, you can add more flour, a tablespoon at a time, until it pulls away from the sides of the bowl.
4. Knead the Dough:
Turn your dough out onto a lightly floured surface and knead for about 8-10 minutes until it’s smooth and elastic. If you prefer using a stand mixer, knead it on medium speed with a dough hook for about 6-7 minutes.
5. First Rise:
Lightly oil a large bowl with olive oil and place your kneaded dough inside, turning it to coat with the oil. Cover the bowl with a clean kitchen towel or plastic wrap and let it rise in a warm place for about 1 to 1 1/2 hours, or until it has doubled in size.
6. Shape the Rolls:
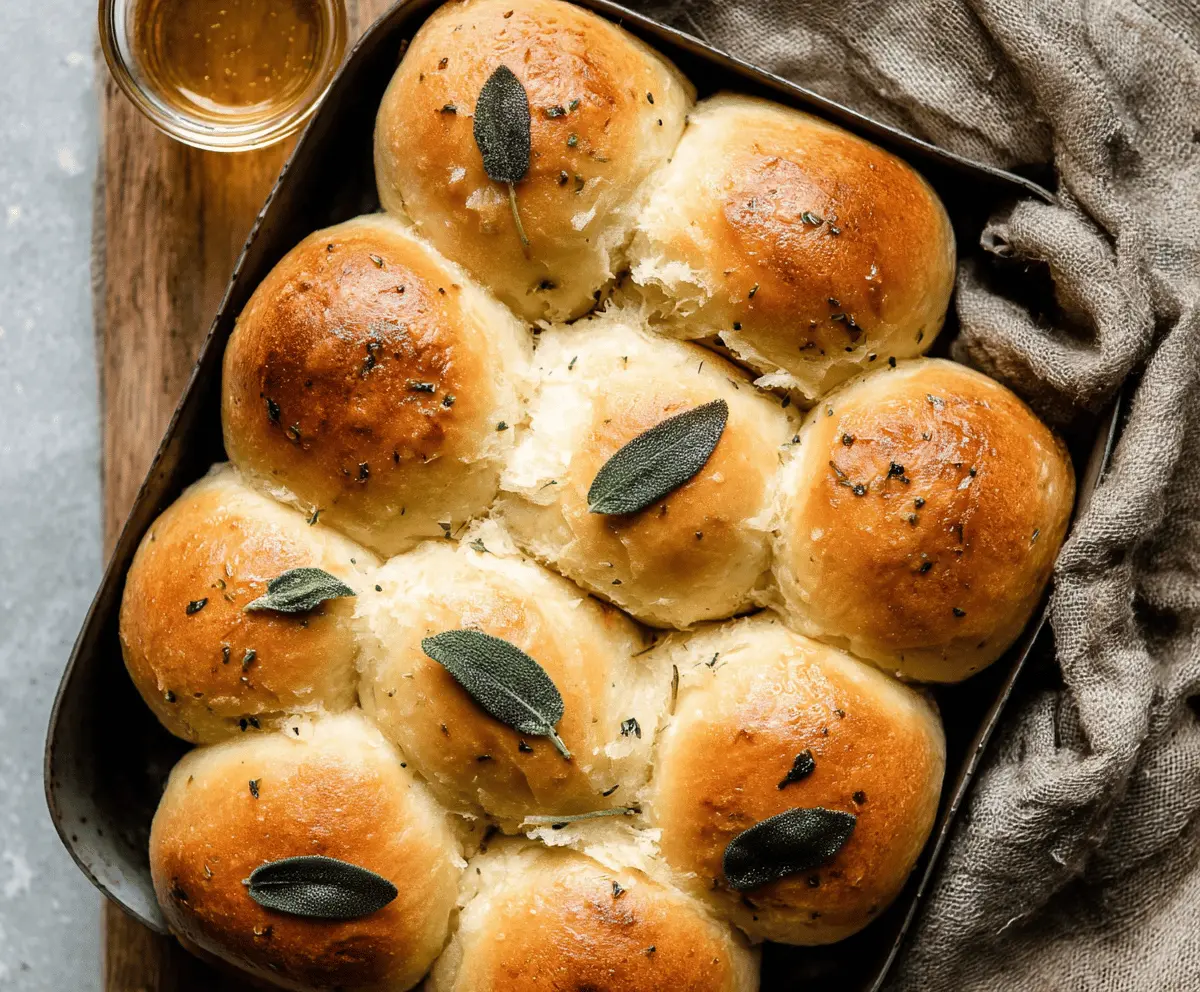
After the first rise, gently punch down the dough to release some of the air. Divide the dough into 9 equal pieces (about 3 oz each) and shape each piece into a smooth ball. Place the dough balls into a greased 8×8 inch or similar square baking pan, spacing them evenly apart.
7. Second Rise:
Cover the pan loosely with plastic wrap or a kitchen towel and let the rolls rise again until puffed and touching, about 45 minutes to 1 hour.
8. Preheat the Oven:
While the rolls are rising, preheat your oven to 375°F (190°C) so it’s ready once the rolls are done rising.
9. Bake:
Once the rolls have risen, remove the cover and lightly brush the tops with some melted browned butter. Bake them in your preheated oven for 20-25 minutes, or until they are golden brown on top and baked all the way through.
10. Finishing Touches:
After taking the rolls out of the oven, brush them immediately with more melted butter. Sprinkle with flaky sea salt and add whole sage leaves for garnish, making them look beautiful!
11. Serve Warm:
Let the rolls cool slightly, then serve warm with melted butter or honey on the side. Enjoy every bite of these delightful, aromatic Brown Butter Sage Dinner Rolls, perfect for any occasion!
Can I Use Dried Sage Instead of Fresh?
Yes, you can! If you don’t have fresh sage, use about 1 teaspoon of dried sage for every tablespoon of fresh sage. Just remember that dried herbs are more concentrated, so use sparingly!
How Can I Make the Dough Rise Faster?
If you’re short on time, you can place the covered dough in a warm oven (turned off) to help it rise faster. Just be sure the oven is only slightly warm—around 100°F—to avoid killing the yeast!
Can I Freeze the Rolls Before Baking?
Absolutely! After shaping the rolls and placing them in the baking pan, cover them tightly and freeze. When you’re ready to bake, let them thaw and rise at room temperature for about 1-2 hours, then bake as directed.
What Should I Do If the Dough Is Too Sticky?
If your dough is too sticky after mixing, simply add more flour, one tablespoon at a time, until it becomes smooth and can pull away from the sides of the bowl. The dough should be soft but not overly tacky.