This Crust Sourdough Bread Coffee is a fun twist on your morning routine! Imagine fresh sourdough bread served with a side of coffee—perfectly cozy and delicious.
Who knew combining bread and coffee could be so delightful? I like enjoying a slice with my coffee while pretending I’m at a fancy café. Plus, it’s a great way to start the day!
Key Ingredients & Substitutions
Bread Flour: Strong bread flour is ideal as it has a higher protein content, which helps in gluten development. If you can’t find it, all-purpose flour can work, but your bread might be denser.
Sourdough Starter: An active sourdough starter is key to getting that beautiful rise. If yours isn’t ready yet, you can try using store-bought starter or a pinch of instant yeast, though it won’t have the same flavor.
Water: Use room temperature water for mixing the dough. Avoid hot water as it can kill the yeast. If you prefer, filtered water can help achieve a better rise by removing chlorine from tap water.
Salt: Sea salt is great for flavor. If you’re looking for a lower-sodium option, try reducing the amount slightly, but be careful not to skip it entirely as it plays a role in fermentation.
Dusting Flour: Extra flour or rice flour is used for dusting your surface and banneton. Rice flour prevents sticking better, but regular flour works too. Just ensure your work surface is well-floured.
How Do You Get the Right Texture in Your Sourdough?
The key to achieving that lovely crust and open crumb lies in the fermentation and shaping process. Focus on the stretch and fold technique during bulk fermentation; it helps build strength in the dough.
- After mixing, let the dough rest (autolyse) without salt and starter for about 30-45 minutes. This step hydrates the flour and helps gluten develop.
- During bulk fermentation, perform 3-4 sets of stretch and folds. Gently reach under, pull up, and fold it over the dough. This should be done every 30-45 minutes.
Shaping is equally important. When shaping into a boule, create surface tension by pulling the dough towards you on a floured surface. It ensures a nice rise in the oven!
Why Is the Cold Proof Beneficial?
Cold proofing the shaped dough overnight enhances the flavor and texture. The slow fermentation allows for better development of the sourdough taste. This also helps in easier handling and shaping the next day.
How to Make Crusty Sourdough Bread
Ingredients You’ll Need:
Main Ingredients:
- 500g bread flour (preferably strong bread flour)
- 350g water (room temperature)
- 100g active sourdough starter (fed and bubbly)
- 10g salt
For Dusting:
- Extra flour or rice flour for dusting
How Much Time Will You Need?
This recipe takes about 30 minutes of active prep time, plus 4 to 6 hours for bulk fermentation and 8 to 12 hours for cold proofing overnight. The baking time is roughly 40-45 minutes. In total, you’ll spend a bit of time today and a little bit of time tomorrow to enjoy your delicious homemade sourdough bread!
Step-by-Step Instructions:
1. Mix the Dough:
In a large bowl, combine the bread flour and water. Use your hands or a spoon to mix them together until there’s no dry flour left. Once mixed, cover the bowl with a cloth or plastic wrap and let it rest for about 30 to 45 minutes. This rest period helps prepare the gluten structure!
2. Add Starter and Salt:
Now, it’s time to add flavor and life to your dough! Add your bubbly active sourdough starter along with the salt. Mix everything together either by hand or with a dough scraper. Your goal is to ensure that the starter and salt are fully incorporated into the dough.
3. Bulk Fermentation with Folds:
Cover the bowl and let the dough rise at room temperature for about 4 to 6 hours. During this time, perform 3 to 4 sets of stretch and folds to help develop gluten. To do this, every 30-45 minutes, reach under the dough, lift it up, and fold it over itself. This should become a delightful rhythm in your baking process!
4. Shape the Dough:
Once the dough has risen and looks puffy, it’s ready to be shaped. Gently turn it out onto a lightly floured surface. Shape the dough into a tight round boule by pulling the edges towards the center and creating surface tension on top. This will help it rise beautifully in the oven!
5. Proof:
Place your shaped dough, seam-side up, into a well-floured banneton or a bowl lined with a floured kitchen towel. Cover it up to keep it cozy, then refrigerate it overnight for an 8 to 12-hour cold proof. This step is key for developing flavor and improving the bread’s structure!
6. Preheat Oven and Pot:
The next day, around 30 minutes before you’re ready to bake, preheat your oven to 250°C (480°F) with your Dutch oven or heavy covered baking pot inside. This helps create a steamy environment for baking, which contributes to that lovely crust!
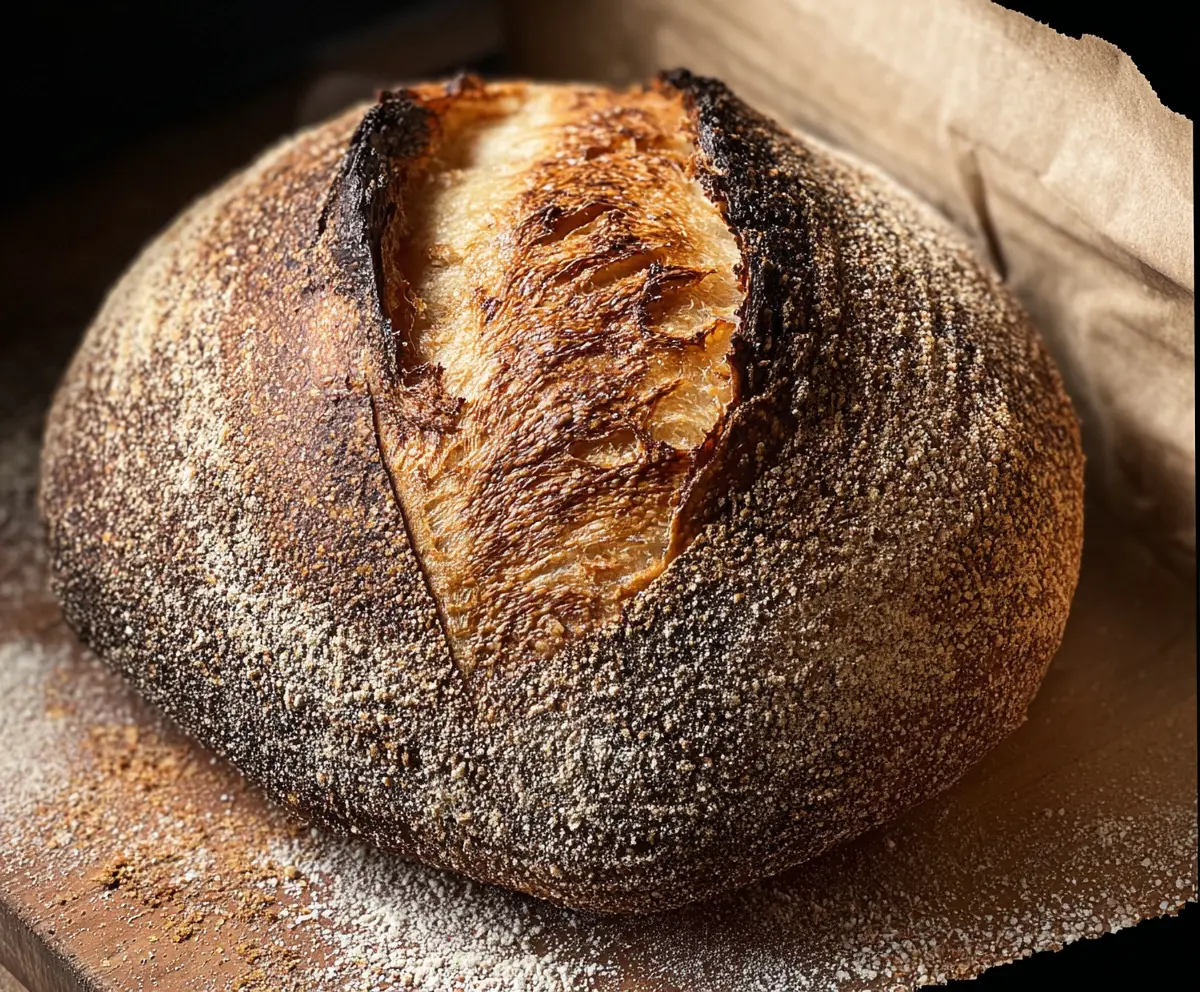
7. Score and Bake:
Carefully take the dough out of the refrigerator and turn it out onto a piece of parchment paper, seam side down. Using a sharp razor or bread lame, score a deep slash across the top. This allows the bread to expand and rise in the oven! Gently transfer the parchment with the dough into the preheated pot, cover it with the lid, and bake for 20 minutes.
8. Bake Uncovered:
After 20 minutes, carefully remove the lid and reduce the oven temperature to 230°C (450°F). Bake for an additional 20-25 minutes, or until the crust turns deeply browned and crisp. Your kitchen will now smell amazing!
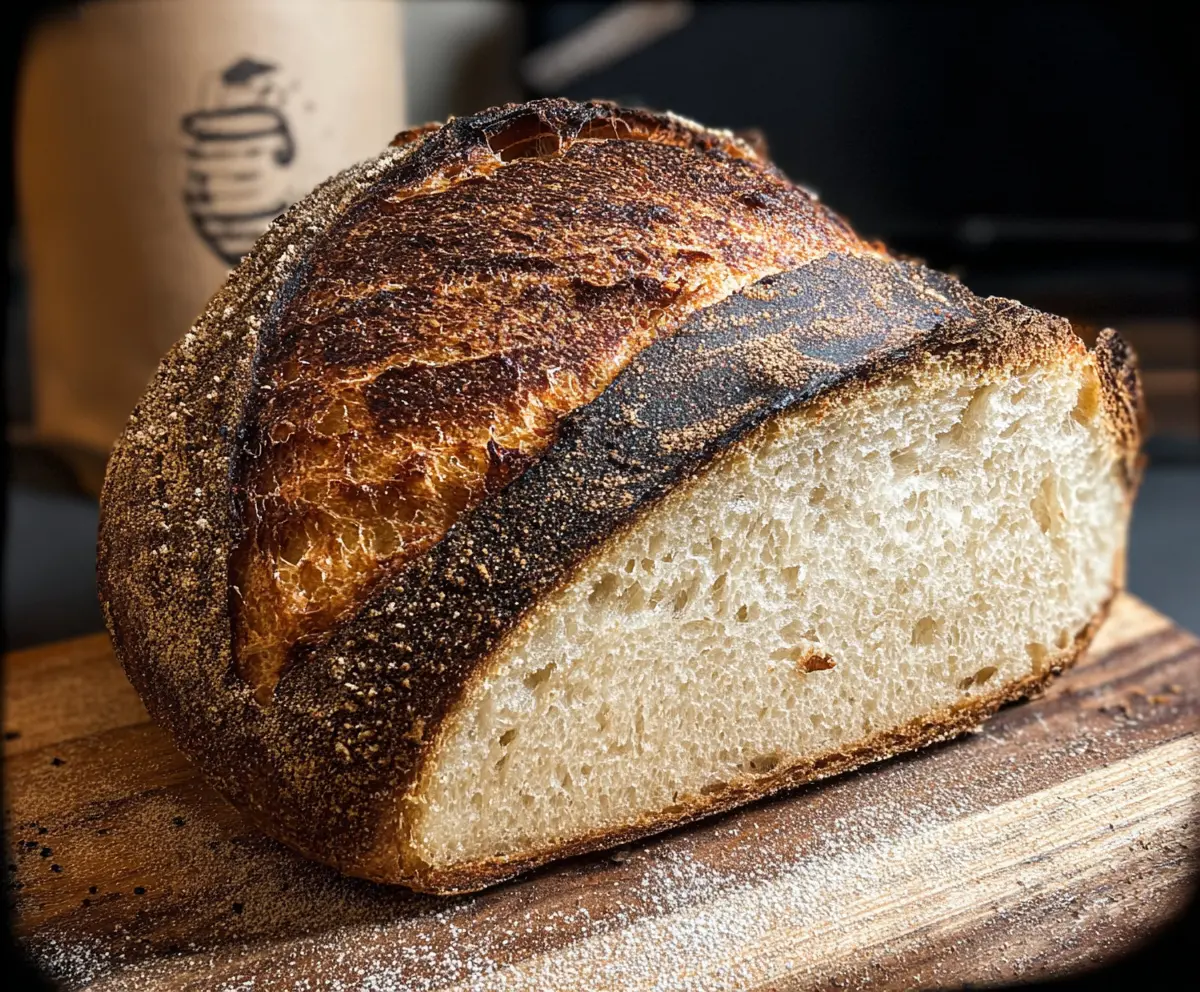
9. Cool:
Once baked, take the bread out of the pot and place it on a wire rack to cool completely before slicing. This is super important as it sets the crumb and the crust. Wait for about an hour to let it fully cool and enjoy the anticipation!
And there you have it! You’ve made a beautifully crusty sourdough loaf that’s perfect for any meal or just with a cup of coffee. Enjoy your baking adventure!
Can I Use All-Purpose Flour Instead of Bread Flour?
Yes, you can use all-purpose flour, but the bread might not rise as much and may have a denser texture. Bread flour has a higher protein content which helps develop gluten for better structure.
What If My Sourdough Starter Isn’t Active?
Your sourdough starter needs to be active and bubbly for the best result. If it’s not ready, try feeding it and waiting a few hours until it has risen and is full of bubbles. Alternatively, you can use a bit of instant yeast, but it will change the flavor profile somewhat.
How Can I Tell When My Dough is Ready to Bake?
When the dough has doubled in size and has a puffy appearance, it’s ready to bake. You can also do the poke test: gently poke the dough, and if it slowly springs back, it’s good to go!
How Should I Store Leftover Bread?
Store leftover bread in a paper bag at room temperature for the best texture. For longer storage, you can wrap it in plastic wrap and freeze it for up to three months. Just make sure to let it cool completely before wrapping it!