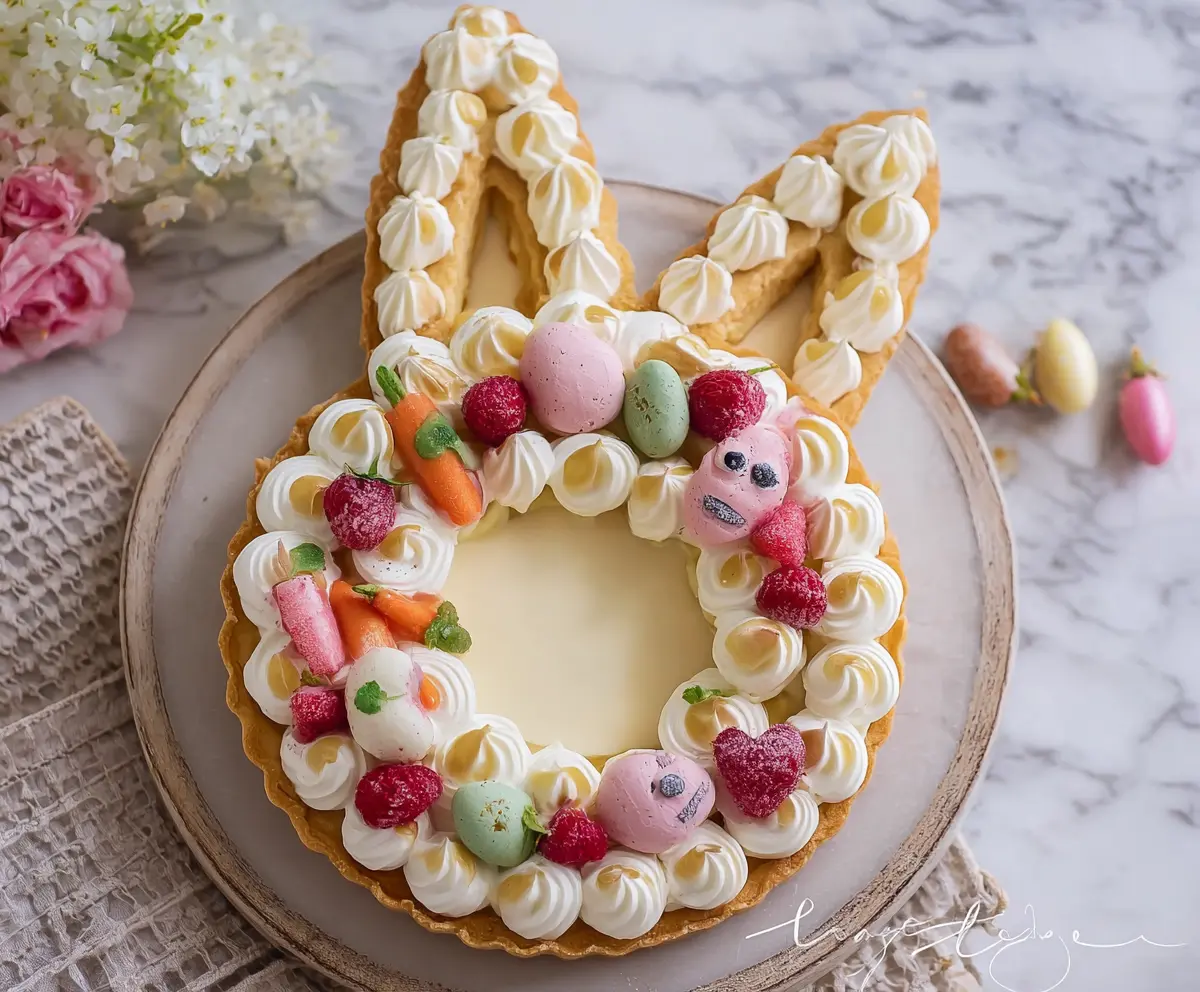
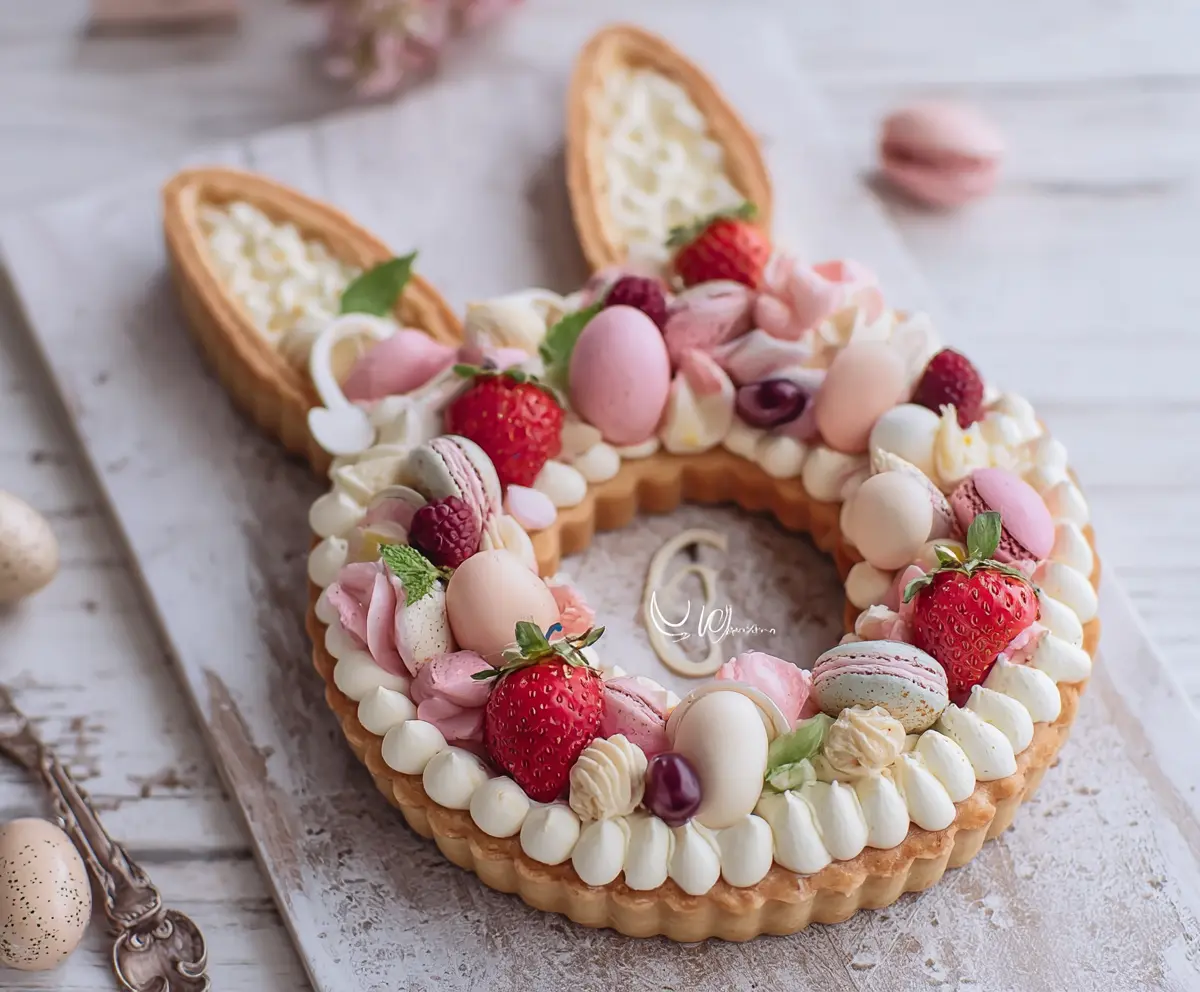
This Easter Bunny Cream Tart is a fun and cheerful dessert, perfect for celebrating the holiday! With a creamy filling and a sweet, crisp crust, it’s simply delightful.
And let’s be real, who can resist a bunny-shaped treat? I love how festive it looks on the table, and it’s so easy to slice and share with family. Hop to it and enjoy!
Key Ingredients & Substitutions
All-purpose flour: This is your base for the tart crust. If you’re gluten-free, a 1:1 gluten-free flour blend can work well as a substitute. I’ve had good experiences using it, but make sure it includes xanthan gum.
Unsalted butter: I prefer unsalted to control the saltiness of the tart. If you’re dairy-free, try using coconut oil or a plant-based butter instead. Just make sure it’s cold for the crust!
Whole milk: For a richer filling, I recommend whole milk. If you’re lactose intolerant, go for lactose-free milk or even almond milk, though it may change the flavor a bit.
Heavy cream: This is crucial for fluffy whipped cream. If you’re looking for a lower-fat option, you can use a mix of heavy cream and milk, but the texture will be lighter.
Vanilla: Using a whole vanilla bean adds wonderful flavor. If you don’t have one, vanilla extract is perfectly fine. Use 1 teaspoon for every vanilla bean.
How Do You Get the Perfect Tart Crust?
Making a tart crust can be tricky, but it’s all about handling the dough gently and keeping it cold. Here’s how to get it just right:
- Combine dry ingredients in a food processor for even mixing.
- When adding the butter, make sure it’s cold and cubed. This helps create that nice flaky texture.
- Don’t overmix the dough. Just pulse until it resembles coarse crumbs before adding the egg yolk and water.
- Chill the dough! This firms it up and prevents shrinkage while baking.
- Prick the bottom of the crust before baking. It helps avoid bubbles and keeps it flat.
Follow these tips, and your tart crust will be both tasty and visually appealing! Enjoy making your Easter Bunny Cream Tart!
How to Make an Easter Bunny Cream Tart
Ingredients You’ll Need:
For the Tart Crust:
- 1 1/4 cups all-purpose flour
- 1/4 cup powdered sugar
- 1/4 teaspoon salt
- 1/2 cup unsalted butter, cold and cubed
- 1 large egg yolk
- 2 tablespoons ice-cold water (adjust as needed)
For the Pastry Cream:
- 2 cups whole milk
- 1/2 cup granulated sugar
- 1 vanilla bean or 1 teaspoon vanilla extract
- 4 large egg yolks
- 1/4 cup cornstarch
- 2 tablespoons unsalted butter
For the Whipped Cream Topping:
- 1 cup heavy cream, cold
- 2 tablespoons powdered sugar
- 1 teaspoon vanilla extract
Decorations:
- Mini meringues (some shaped or decorated as Easter-themed figures, e.g., bunnies or hearts)
- Fresh raspberries
- Small marzipan or fondant carrots
- Colored candy eggs (pink, green, pastel colors)
- Light drizzle of honey or syrup for shine (optional)
How Much Time Will You Need?
This delightful Easter Bunny Cream Tart takes about 30 minutes of prep time, plus about 40 minutes for baking and chilling. You’ll want to set it aside for at least one hour to cool and firm up in the fridge before serving, making it approximately 2 hours in total!
Step-by-Step Instructions:
1. Prepare the Tart Crust:
Using a food processor, mix together the flour, powdered sugar, and salt. Then, add the cold, cubed butter. Pulse the mixture until it resembles coarse crumbs. Next, add the egg yolk and ice-cold water gradually while pulsing until the dough starts to come together. Once ready, shape the dough into a disk, wrap it in plastic wrap, and chill in the refrigerator for at least 30 minutes.
2. Bake the Tart Shell:
Preheat your oven to 350°F (175°C). Roll out the chilled dough on a lightly floured surface. If you have a bunny-shaped tart pan or cookie cutter, use it to cut out the dough with two ears. Place the dough in the tart pan (or on a baking sheet) and prick the bottom with a fork to prevent bubbling. Bake the crust for 15 to 20 minutes or until it turns golden and firm. Allow it to cool completely.
3. Make the Pastry Cream:
In a saucepan, heat the milk along with the split and scraped vanilla bean to just below boiling. While that heats, whisk together the egg yolks, sugar, and cornstarch in a separate bowl until smooth. Slowly pour the hot milk into the egg mixture while whisking continuously. Pour the mixture back into the saucepan and cook over medium heat, stirring constantly, until it thickens and bubbles. Once thick, remove it from heat and whisk in the butter until smooth. Transfer the pastry cream to a bowl, cover it with plastic wrap resting directly on the surface, and let it chill in the fridge until cold.
4. Prepare Whipped Cream:
In a mixing bowl, beat the cold heavy cream, powdered sugar, and vanilla extract until stiff peaks form. For a pretty presentation, transfer this whipped cream to a piping bag fitted with a round or star tip.
5. Assemble the Tart:
Take the cooled tart shell and fill it with the chilled pastry cream, smoothing the top evenly. Use your piping bag to pipe dollops of whipped cream around the tart’s edge and on the bunny ears. Now for the fun part: decorate your tart with mini meringues shaped like bunnies and hearts, fresh raspberries, marzipan or fondant carrots, and colorful candy eggs. If you want a nice shiny finish, drizzle a little honey or syrup over the whipped cream.
6. Serving:
Chill the assembled tart in the fridge for at least 1 hour before serving. Once chilled, slice, serve, and enjoy your festive Easter Bunny Cream Tart!
Can I Use a Different Type of Milk for the Pastry Cream?
Absolutely! While whole milk creates a rich and creamy texture, you can substitute it with lactose-free milk or plant-based options like almond milk. Just note that the flavor and consistency may vary slightly.
How Can I Make This Tart Gluten-Free?
You can easily make a gluten-free version by substituting all-purpose flour with a 1:1 gluten-free flour blend. Make sure it contains xanthan gum, or add a teaspoon to help improve the texture.
How Should I Store Leftovers?
Any leftover tart can be stored in an airtight container in the refrigerator for up to 3 days. To ensure the whipped cream stays fluffy, avoid covering it tightly, which can cause it to wilt.
Can I Make the Pastry Cream in Advance?
Yes! You can prepare the pastry cream a day ahead. Just make sure to cover it with plastic wrap pressed against the surface to prevent a skin from forming as it chills. Assemble the tart the day you’re ready to serve for the freshest results!