These No Bake Oreo Protein Bars are a tasty treat that’s super easy to make! With creamy peanut butter, sweet Oreos, and a boost of protein, they’re perfect for a snack or dessert.
Honestly, who can resist a dessert with Oreos in it? I stash these bars in my fridge, and they disappear faster than I can say “Oreo”! They’re great before a workout or when I need a little pick-me-up.
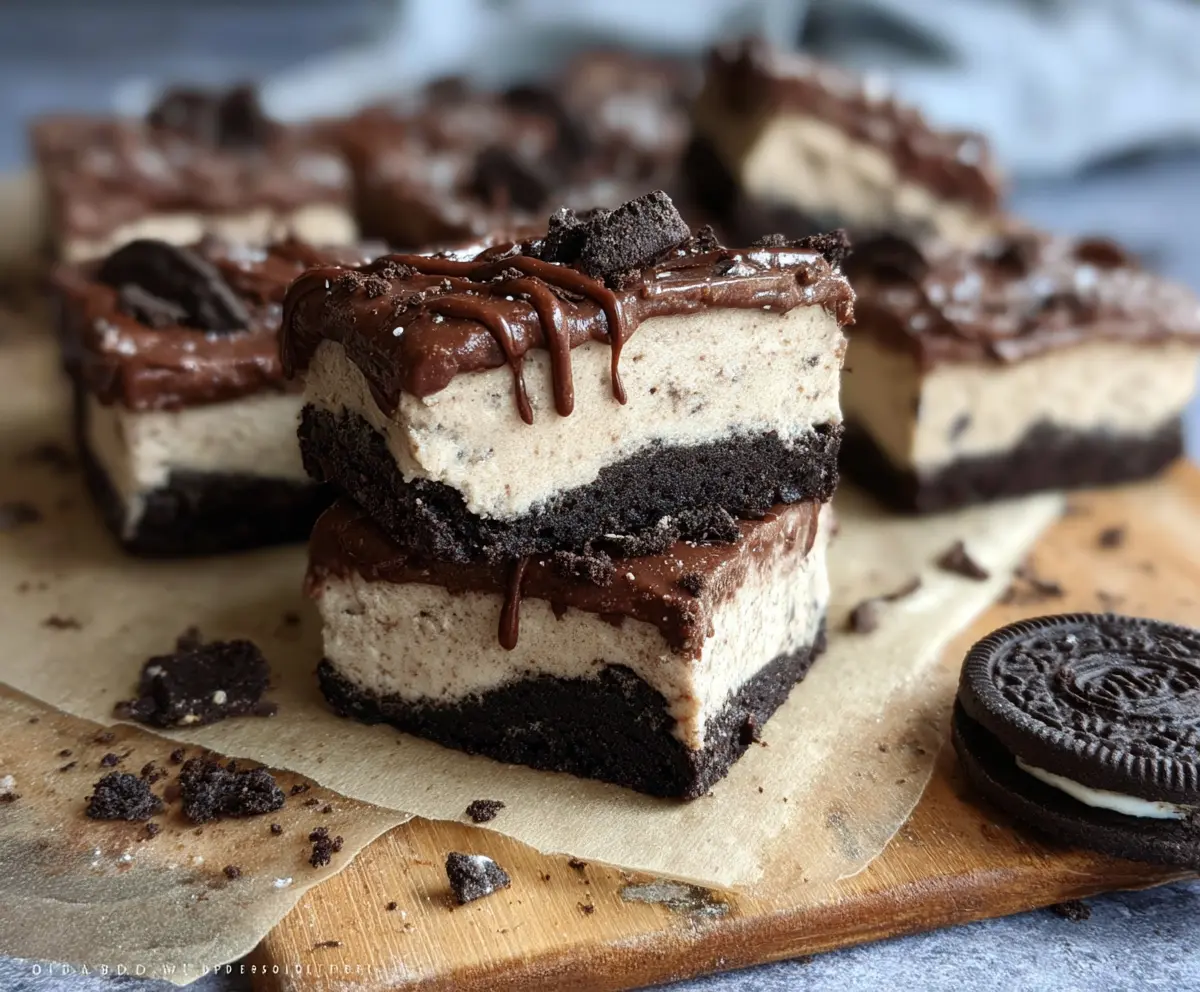
Key Ingredients & Substitutions
Oreo Cookies: Oreos are the star of this recipe! They give a chocolatey crunch. You could swap with any chocolate sandwich cookie if needed, like Hydrox or other brands.
Cream Cheese: Low-fat cream cheese keeps these bars creamy and rich. If you’re looking for dairy-free options, try vegan cream cheese or silken tofu for a smooth texture.
Vanilla Protein Powder: This adds protein to the bars. If you don’t have vanilla, chocolate protein powder works too, just keep in mind it will change the flavor a bit!
Peanut Butter: Creamy peanut butter gives a great texture and flavor. If you have nut allergies, sunflower seed butter or tahini can be good substitutes.
Honey or Maple Syrup: Both act as sweeteners. If you’re looking for a lower sugar option, try agave syrup or a sugar-free sweetener that measures like sugar.
How Do I Make Sure My Bars Are Firm?
Getting the bars to set well is key! Make sure you mix the ingredients thoroughly, as this helps them combine better. After layering in the pan, placing them in the fridge is essential.
- Let them chill for at least 2-3 hours. This cooling time allows them to firm up.
- To test firmness, gently press your finger on the top. If it holds its shape, they’re ready!
- Cut them into bars after they’ve set for a clean slice. Use a hot knife for smoother cuts.

No Bake Oreo Protein Bars
Ingredients You’ll Need:
For the Base Layer:
- 20 Oreo cookies (divided)
For the Protein Filling:
- 1 cup low-fat cream cheese, softened
- 1 cup vanilla protein powder
- ½ cup creamy peanut butter
- ¼ cup honey or maple syrup
- ½ cup Greek yogurt
- 1 teaspoon vanilla extract
For the Topping:
- ½ cup dark chocolate chips
- 1 tablespoon coconut oil
How Much Time Will You Need?
This recipe will take about 15 minutes to prepare, plus 2-3 hours to chill in the refrigerator. So, grab a snack, relax, and let the fridge do its magic while your delicious bars set!
Step-by-Step Instructions:
1. Prepare the Pan:
First, line an 8×8 inch baking pan with parchment paper. This will help you remove the bars easily once they’ve set. Make sure the paper hangs over the edges for easy lifting!
2. Make the Base Layer:
Pop 15 Oreo cookies into a food processor and pulse them until you get fine crumbs. If you don’t have a food processor, you can put them in a zip-lock bag and crush them with a rolling pin. Once crushed, press the mixture firmly into the bottom of your prepared pan—this is your base layer!
3. Mix the Protein Filling:
In a mixing bowl, combine the softened cream cheese, vanilla protein powder, creamy peanut butter, honey (or maple syrup), Greek yogurt, and vanilla extract. Use a hand mixer or a spatula to mix everything until it’s nice and smooth. This is where the magic happens!
4. Add More Oreos:
Chop the remaining 5 Oreos into small pieces and gently fold them into the protein mixture. This will give your bars that extra Oreo goodness!
5. Assemble the Bars:
Spread the protein and Oreo mixture evenly over your Oreo crust in the pan. Use a spatula to smooth the top so it looks nice and neat.
6. Melt the Topping:
In a microwave-safe bowl, melt the dark chocolate chips along with the coconut oil in 20-second intervals. Stir between each interval until it’s completely smooth and melted. This will be your delicious chocolate drizzle!
7. Drizzle and Chill:
Once the chocolate is melted, drizzle it evenly over the top of the protein layer. Get creative with your drizzle! Then, place the pan in the refrigerator and let it chill for at least 2-3 hours, or until the bars are set.
8. Cut and Serve:
After the bars have chilled, carefully lift them from the pan using the edges of the parchment paper. Slice them into bars or squares, and they’re ready to be enjoyed! Store any leftovers in an airtight container in the fridge to keep them fresh.
These No Bake Oreo Protein Bars are not only delicious but also packed with protein, making them a perfect snack or treat after a workout. Enjoy every bite!
Can I Use Different Types of Protein Powder?
Absolutely! While vanilla protein powder works great for this recipe, you can use chocolate or any other flavor you prefer. Just keep in mind that it will slightly alter the flavor profile of the bars, but it’ll still be delicious!
What Can I Substitute for Cream Cheese?
If you’re looking for a dairy-free alternative, you can use vegan cream cheese or silken tofu blended until smooth. Both will maintain a creamy texture without sacrificing taste!
How Should I Store the Bars?
Store any leftovers in an airtight container in the fridge for up to a week. You can also freeze them for up to 3 months; just thaw them in the fridge before enjoying!
Can I Add Other Toppings?
Definitely! Feel free to get creative with toppings. You could add chopped nuts, a sprinkle of sea salt, or even drizzle some nut butter on top along with the chocolate for extra flavor!