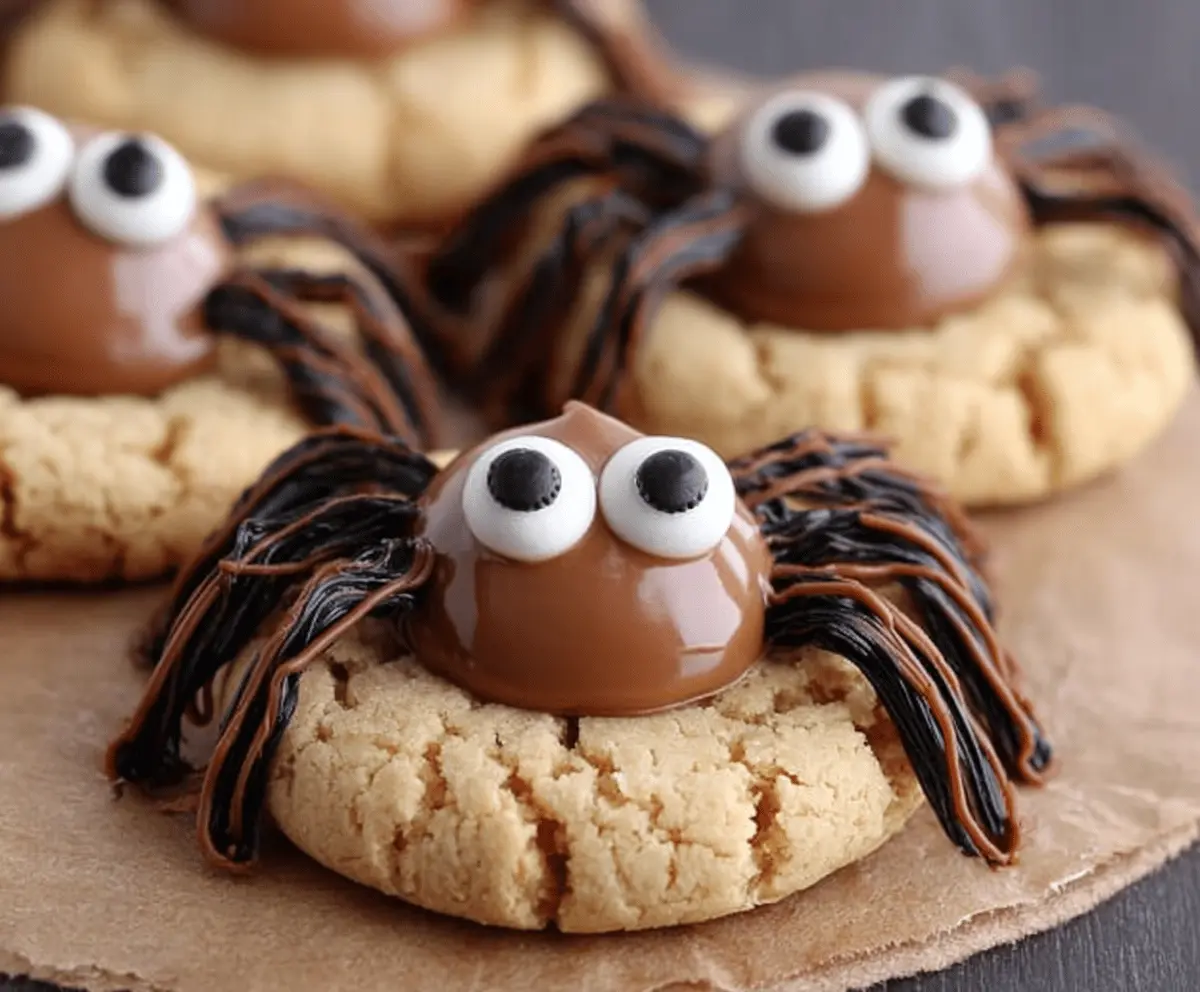
Peanut Butter Spider Cookies are as fun as they sound! These chewy cookies are made with creamy peanut butter and covered in chocolate to create adorable spider shapes. 🕷️
These cookies are perfect for a Halloween treat and fun to make with kids. I love adding extra chocolate for “legs.” Who can resist a cookie that looks this cute? They vanish quickly at my house!
Key Ingredients & Substitutions
Peanut Butter: Creamy peanut butter is essential for flavor and texture. If you’re looking for a nut-free option, sunflower seed butter works great too!
Butter: Unsalted butter adds a rich flavor. If you’re dairy-free, you might use a plant-based butter or coconut oil instead.
Sugars: Both granulated sugar and brown sugar create the perfect balance of sweetness. Coconut sugar or a sugar substitute can also work if you’re looking for healthier options.
Chocolate Chips: Semi-sweet chips are classic for chocolate lovers. You can use milk chocolate or even white chocolate depending on your preference.
How Do I Melt Chocolate for Coating?
Melted chocolate allows you to create those cute spider legs! The key is to go slow so you don’t burn the chocolate.
- Use a microwave-safe bowl; heat chocolate chips in 20-second intervals.
- Stir well between each heating until smooth.
- Add vegetable oil to help the chocolate flow better when piping.
Taking your time will ensure a smooth melt, making your legs look perfect!
What’s the Best Way to Shape the Cookie Dough?
Shaping the dough correctly ensures that your cookies bake evenly and have that nice chewy texture.
- Roll the dough into 1-inch balls; this keeps them uniform.
- Use the bottom of a glass or your hand to gently flatten each ball before baking.
- Watch for golden edges and slight cracks to know they’re done.
The right shape makes a big difference in the final cookie.
Enjoy making your Peanut Butter Spider Cookies and have fun!
Peanut Butter Spider Cookies
Ingredients You’ll Need:
For the Cookie Dough:
- 1/2 cup unsalted butter, softened
- 1/2 cup granulated sugar
- 1/2 cup packed brown sugar
- 1/2 cup creamy peanut butter
- 1 large egg
- 1/2 teaspoon vanilla extract
- 1 cup all-purpose flour
- 1/2 teaspoon baking soda
- 1/4 teaspoon salt
For the Spider Decoration:
- 1 cup creamy peanut butter (for spider “body” topping)
- Candy eyes (about 2 eyes per cookie)
- 1 cup semi-sweet chocolate chips or melting chocolate
- 2 teaspoons vegetable oil (for melting chocolate)
How Much Time Will You Need?
This recipe will take about 15 minutes to prepare and another 10 minutes to bake. After that, you’ll want to allow some time for the chocolate to set. Total time is around 30 to 40 minutes, making this a quick and fun activity!
Step-by-Step Instructions:
1. Preheat the Oven:
First, preheat your oven to 350°F (175°C). Don’t forget to line a baking sheet with parchment paper to make cleanup easier and prevent sticking.
2. Make the Dough:
In a large bowl, cream together the softened butter, granulated sugar, and brown sugar until the mixture is light and fluffy. This usually takes about 2-3 minutes with a hand mixer or whisk.
Next, mix in the 1/2 cup of creamy peanut butter, egg, and vanilla extract until everything is fully combined and smooth.
3. Mix the Dry Ingredients:
In another bowl, whisk together the flour, baking soda, and salt until they’re mixed well. Gradually add this mixture to the wet ingredients, stirring until just combined to form a dough.
4. Shape the Cookies:
Roll the dough into 1-inch balls and place them on the prepared baking sheet about 2 inches apart. Gently flatten each ball with the bottom of a glass or your hand.
5. Bake the Cookies:
Put the baking sheet in the oven and bake the cookies for 8-10 minutes, or until the edges are golden and the tops are slightly cracked. When they’re done, let them cool on the baking sheet for about 5 minutes before transferring them to a wire rack to cool completely.
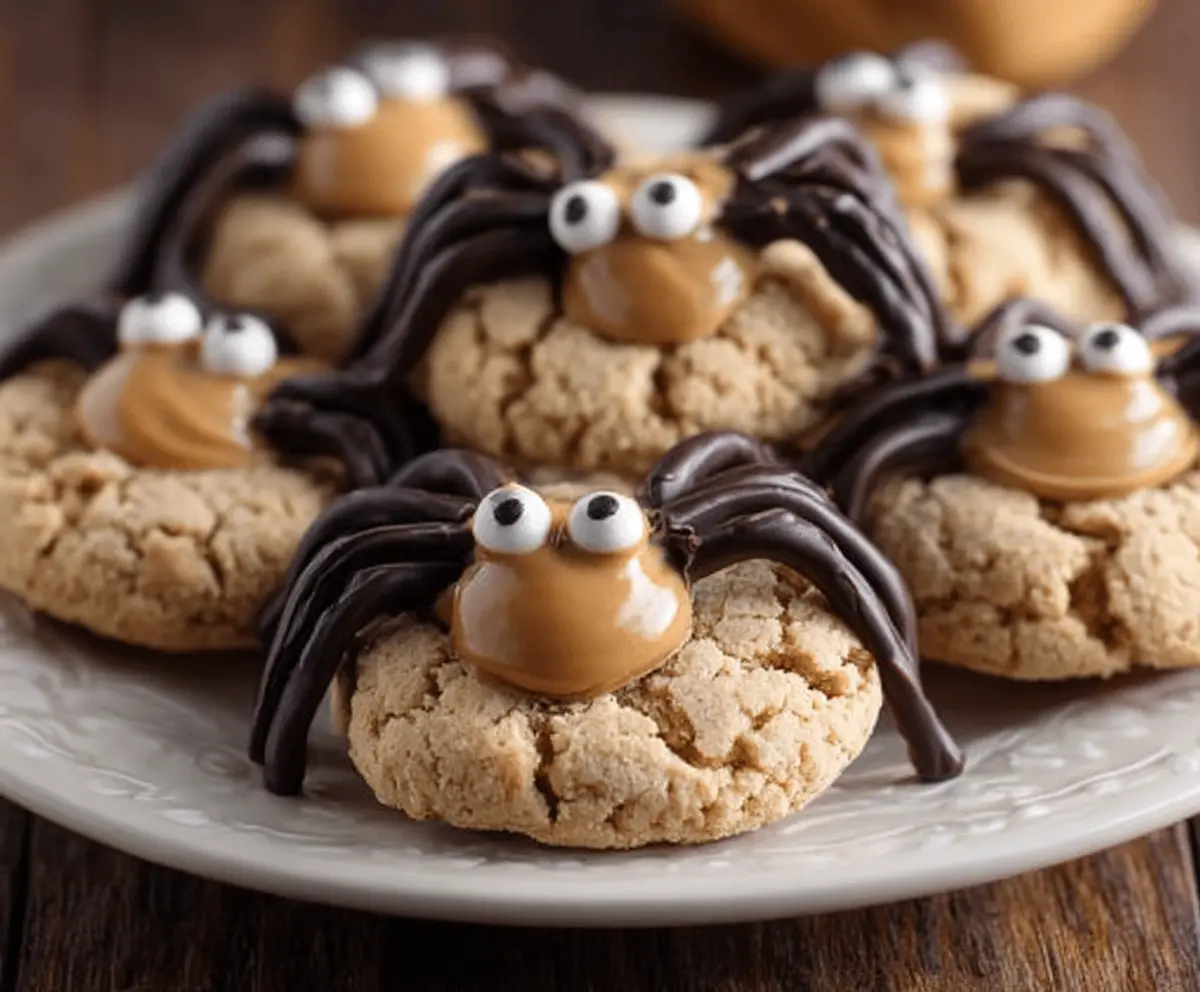
6. Create the Spider Bodies:
While the cookies are cooling, warm the 1 cup of peanut butter in the microwave for about 20 seconds to make it easier to work with. Place a dollop of this softened peanut butter near the top center of each cookie to create the spider’s body.
7. Add the Eyes:
Use candy eyes to place two eyes on each peanut butter dollop, making sure they stick well.
8. Make the Spider Legs:
In a microwave-safe bowl, melt the chocolate chips with 2 teaspoons of vegetable oil. Heat it in 20-second intervals, stirring in between until it’s fully melted and smooth.
9. Pipe the Legs:
Transfer the melted chocolate to a piping bag or a plastic sandwich bag with a small corner cut off. Pipe 8 legs (4 on each side) extending from the peanut butter body onto each cookie.
10. Let Them Set:
Allow the chocolate legs to set completely at room temperature or in the fridge before serving. This will ensure they hold their shape and look adorable!
Now enjoy your cute and tasty Peanut Butter Spider Cookies! 🕷️ They make a fun treat for Halloween or any day that needs a bit of cheer!
Can I Use Natural Peanut Butter Instead of Creamy Peanut Butter?
Yes, you can use natural peanut butter, but keep in mind it may result in a different texture or taste. Natural peanut butter can be oilier, so you might want to stir it well before using!
How Do I Store Leftover Cookies?
Store leftover cookies in an airtight container at room temperature for up to 3 days. To keep them fresh longer, you can refrigerate them, but adding a piece of bread in the container helps retain moisture.
Can I Freeze These Cookies?
Absolutely! You can freeze the baked cookies for up to 3 months. Just make sure they are completely cooled, then place them in a freezer-safe container or bag. Thaw in the fridge before serving.
What Can I Use Instead of Candy Eyes?
If you can’t find candy eyes, you can use mini chocolate chips, M&M’s, or even small dots of melted white chocolate to create the eyes instead!