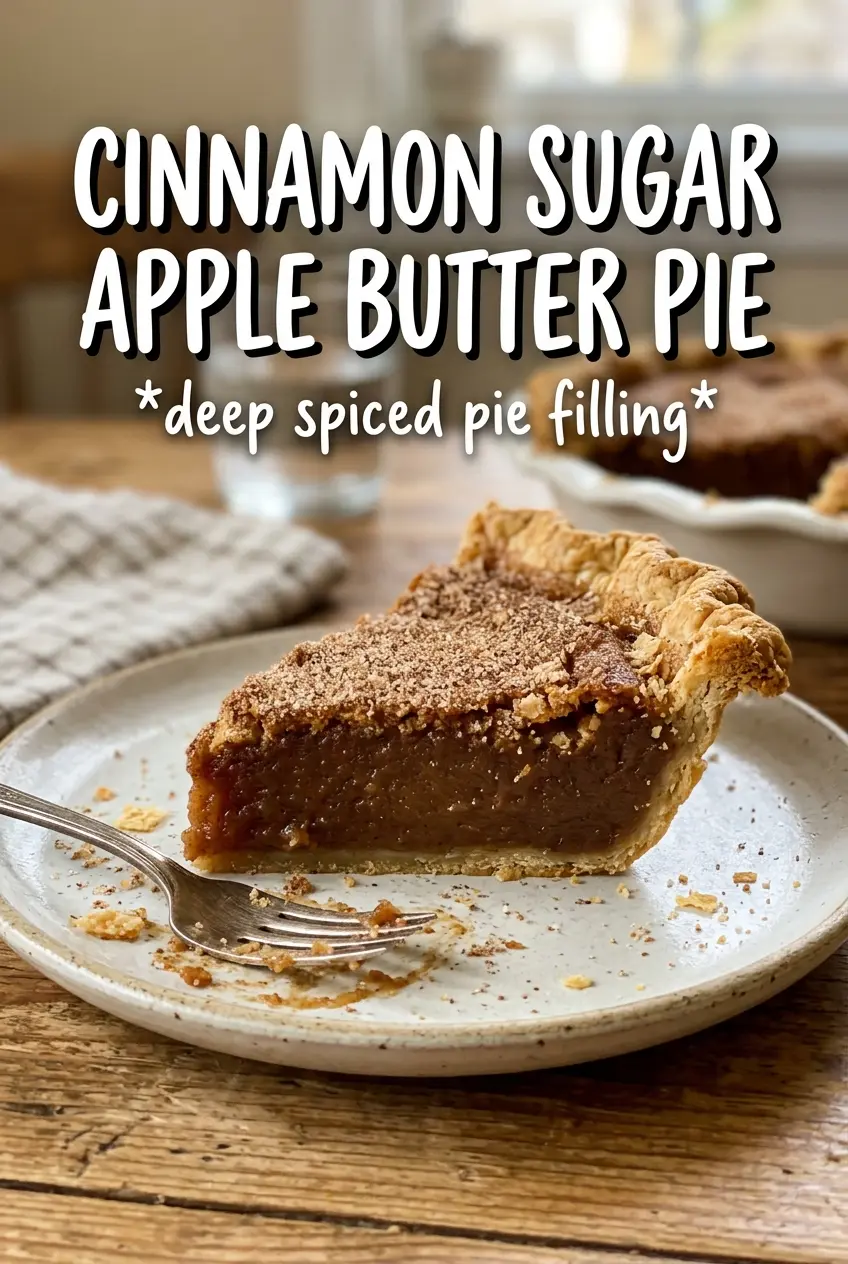
Flaky pastry, a thick spiced apple filling, and a cinnamon-sugar crust come together in this pie that slices cleanly and tastes like it took far more effort than it did. The apple butter does a lot of the heavy lifting here. It gives the filling a deep cooked-apple flavor before the pie even goes into the oven, so you don’t have to rely on extra spices or a long bake to get that rich, rounded taste.
The trick is keeping the filling balanced: fresh apples bring structure and a little bite, while cornstarch and apple butter turn the juices into a glossy, spoonable layer instead of a watery mess. I also like using a top crust rather than a crumble here, because it traps the steam just enough to soften the apples without letting the filling turn loose. The cinnamon sugar on top finishes the pie with a crisp, fragrant crust that crackles when you cut into it.
Below you’ll find the one step that keeps the bottom crust from getting soggy, plus a few simple swaps if you need to work with what you already have in the kitchen.
The filling set up beautifully after cooling, and the cinnamon sugar on top gave the crust this crisp, bakery-style finish. I used Granny Smith apples and it held its shape instead of turning mushy.
Save this Cinnamon Sugar Apple Butter Pie for the kind of dessert that bakes up with a flaky crust, bubbling filling, and a cinnamon-sugar finish.
The Trick to Keeping the Bottom Crust Crisp Under Apple Butter
The most common failure in a pie like this is a soggy base. Apple butter adds moisture even though it tastes thick, and the sliced apples release plenty of juice as they bake. The fix is not a complicated technique; it’s giving the filling structure before it goes into the shell. Cornstarch grabs the juices as they heat, and the top crust traps enough steam to soften the apples without flooding the bottom.
There’s one more thing that matters here: don’t skip the lemon juice. It doesn’t make the pie taste lemony. It keeps the apples tasting bright and helps prevent the filling from reading flat against the sweetness of the apple butter and cinnamon sugar. If your apples are very juicy, lean toward a firmer variety so they hold their shape long enough to slice cleanly.
What Each Ingredient Is Actually Doing in This Pie

- Apple butter — This is the flavor backbone. It gives you concentrated cooked-apple depth and a silky base that fresh apples alone can’t match. If you swap it for applesauce, the filling turns looser and less intense.
- Fresh apples — They provide texture and keep the pie from becoming one-note. Granny Smith gives the best contrast, but Honeycrisp or Braeburn also work if you want a sweeter slice. Cut them thin so they soften evenly in the oven.
- Cornstarch — This is what turns the apple juices into a thick filling instead of a puddle. Flour can work in a pinch, but it won’t set quite as cleanly or look as glossy.
- Refrigerated pie crusts — A good shortcut when you want this pie on the table without making dough from scratch. Homemade crust is great if you already have it, but the store-bought version bakes up nicely here because the filling is the star.
- Egg wash and cinnamon sugar — The egg wash gives the top crust color and a little shine, while the cinnamon sugar bakes into a crisp, fragrant shell. That topping is what makes the pie smell like it came straight from a bakery.
Building the Pie So the Filling Sets, Not Runs
Coating the Apples First
Toss the sliced apples with the sugars, spices, cornstarch, and lemon juice before anything touches the crust. You want every slice lightly coated so the thickener is distributed evenly and doesn’t clump in one spot. The mixture should look glossy and a little damp, not soupy. If a pool of liquid forms in the bowl right away, the apples are very wet, and a firmer apple variety will help next time.
Layering the Apple Butter
Spread the apple butter over the bottom crust in a thin, even layer before adding the apples. This keeps the flavor from sitting only on top and gives the filling a more unified taste from the first bite to the last. Drop the apple slices over it in a mound, then press them down gently so there aren’t big air pockets. Those pockets can collapse as the pie bakes and leave an uneven center.
Crimping and Venting
Place the top crust over the filling, crimp the edges firmly, and cut steam vents before brushing with egg wash. The vents are not just decoration; they let excess steam escape so the crust stays crisp instead of puffing into a hard dome. Brush the egg wash all the way to the edges, then sprinkle the cinnamon sugar while the surface is still tacky so it sticks evenly.
Baking Until the Filling Is Bubbling
Bake until the crust is deeply golden and you can see the filling bubbling through the vents. That bubbling is the real sign the cornstarch has activated and the center has thickened. If you pull the pie early because the crust looks done, the filling will slump when it cools. Let it rest for at least an hour before slicing so the juices settle into clean layers instead of running out onto the plate.
Three Ways to Adapt This Pie Without Losing the Good Part
Gluten-Free Crust Swap
Use a gluten-free pie crust that rolls and bakes well, not a crumb crust. The filling itself is naturally gluten-free, so the swap is mostly about keeping the structure intact. Expect the crust to brown a little faster, so check it a few minutes early.
Lower-Sugar Version
Cut the granulated sugar back by a third and keep the brown sugar for depth. You still want enough sugar to pull juice from the apples and help the cornstarch do its job, so don’t reduce it too aggressively. The pie will taste a little sharper and more apple-forward, which works nicely if your apple butter is already sweet.
Dairy-Free Finish
Skip the butter dotting the filling and use a dairy-free pie crust if needed. The butter mainly adds a little richness, so losing it won’t break the pie. If you want a similar effect, brush the top crust with extra egg wash and don’t overbake, which keeps the pastry tender.
Make-Ahead Bake
Assemble the pie up to a day ahead, cover it tightly, and refrigerate it unbaked. Bake it straight from the fridge, adding a few extra minutes if needed. Cold filling helps the crust keep its shape, but don’t let the pie sit at room temperature too long before baking or the bottom can turn greasy.
Storage and Reheating
- Refrigerator: Store covered for up to 4 days. The crust softens a little in the fridge, but the filling stays nicely set.
- Freezer: Freeze baked pie slices tightly wrapped for up to 2 months. The texture of the apples softens after thawing, but it still reheats well.
- Reheating: Warm slices in a 325F oven until the crust crisps back up and the center is just heated through. Microwaving makes the crust soggy, which is the fastest way to lose what makes this pie good.
Answers to the Questions Worth Asking
Cinnamon Sugar Apple Butter Pie
Ingredients
Equipment
Method
- Preheat the oven to 375F and place a sheet pan in the oven to help the bottom crust bake evenly. Fit one pie crust into a 9-inch pie dish.
- Toss the sliced apples with granulated sugar, brown sugar, cinnamon, nutmeg, cornstarch, and lemon juice until the slices are evenly coated and glossy.
- Spread the apple butter over the bottom crust, making an even layer to seal the crust. Layer the spiced apple slices over the apple butter.
- Dot the top of the apple layer with diced unsalted butter, then lay the second crust on top and crimp the edges.
- Cut steam vents in the top crust, then brush the crust with the beaten egg wash for color.
- Mix the remaining cinnamon and sugar, then sprinkle it over the top crust for a crisp, fragrant finish. Bake for 45-50 minutes at 375F until the crust is deeply golden and the filling is bubbling through the vents.
- Cool the pie for at least 1 hour so the apple butter filling sets and slices cleanly.


