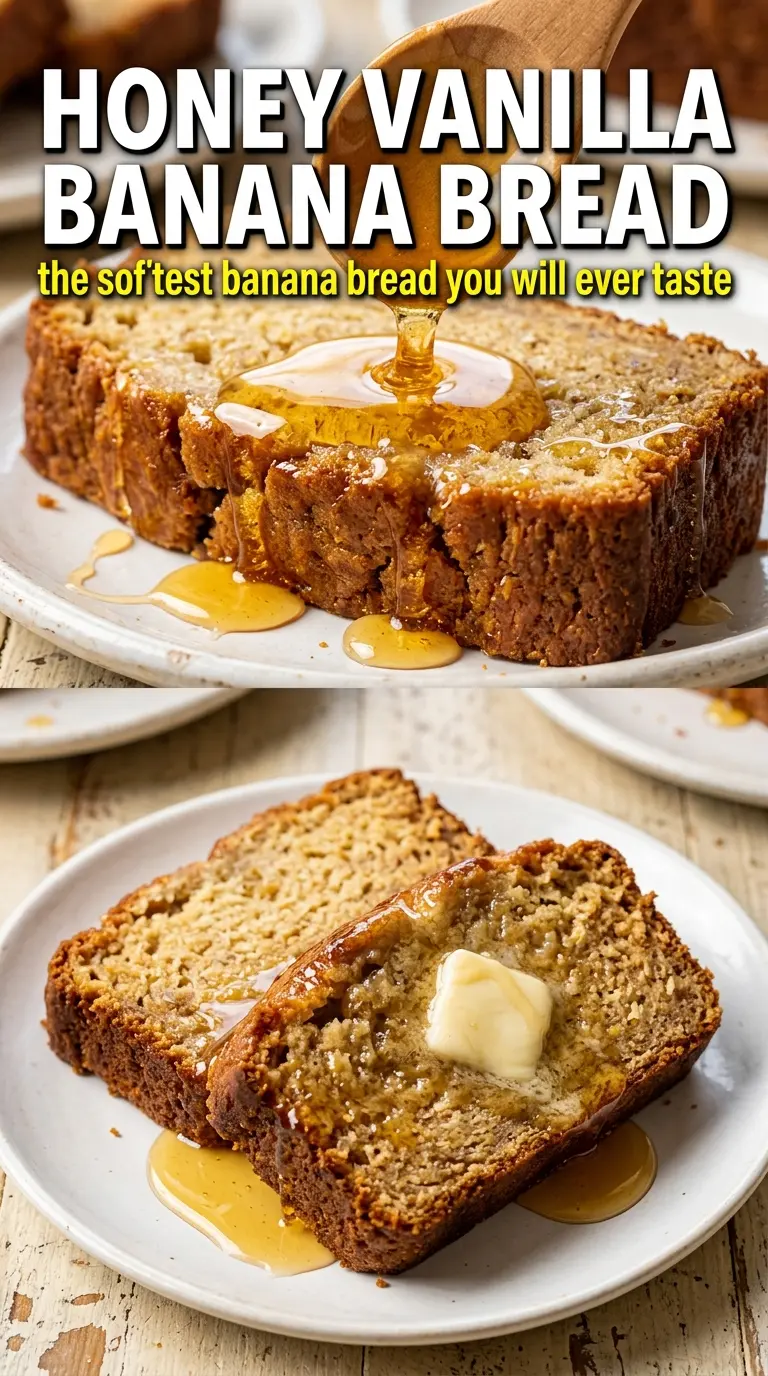
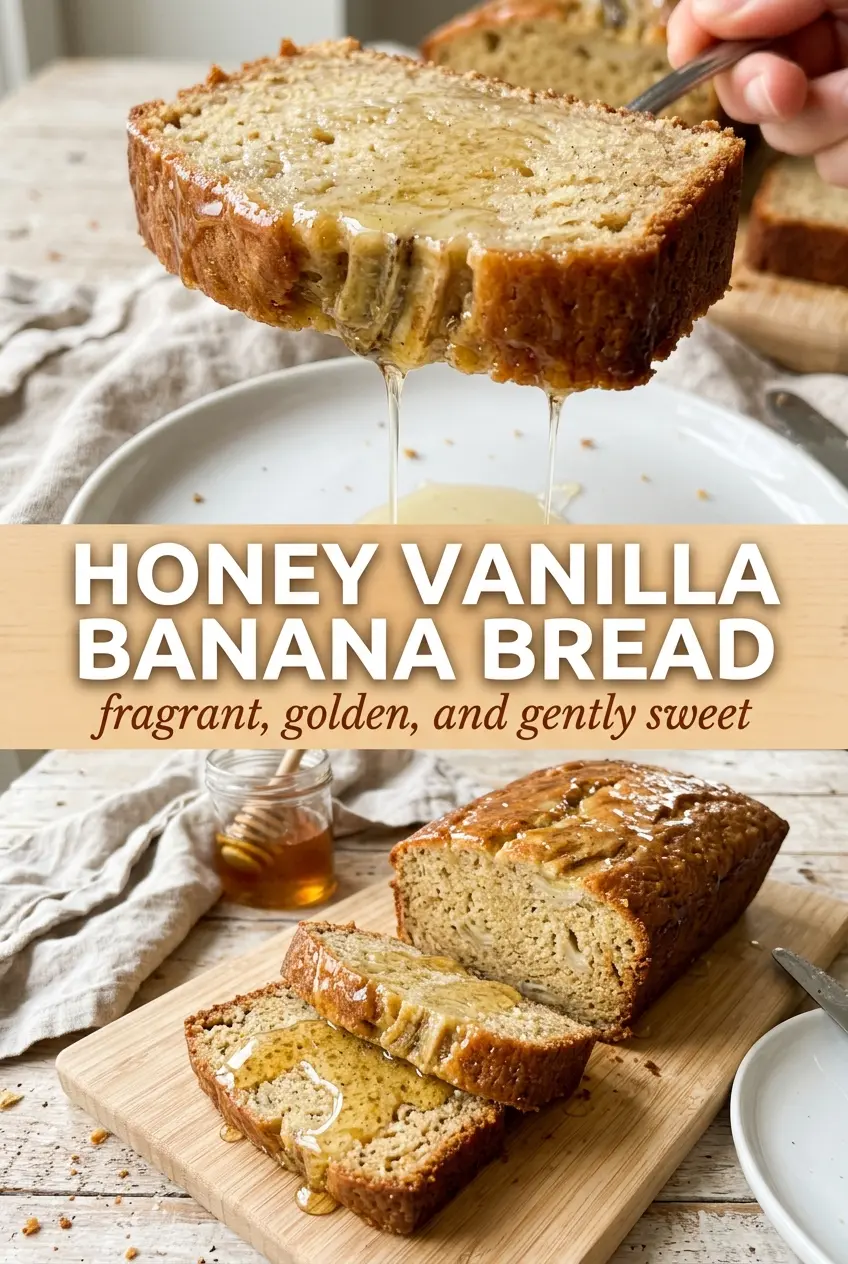
Honey vanilla banana bread bakes up with a tender crumb, a softly caramelized crust, and that unmistakable banana-bread comfort that disappears faster than you expect. The honey gives it a round, floral sweetness that feels gentler than plain white sugar, and the vanilla keeps the flavor from leaning one-note or flat. Brushing the top with honey while the loaf is still warm gives it a glossy finish and a little extra stickiness on the crust that makes each slice feel bakery-made.
The trick here is keeping the batter just mixed. Bananas, honey, and melted butter already bring plenty of moisture, so overworking the flour is the fastest way to end up with a dense loaf instead of one that slices cleanly and stays soft for days. If you’re using a vanilla bean instead of extract, the little specks in the crumb are worth it — they signal real vanilla flavor in every bite, not just sweetness.
Below, I’ve included the details that matter most: how to keep the loaf from turning gummy in the center, why the honey glaze goes on after baking, and a few smart swaps if you need to work with what’s already in your pantry.
The loaf came out incredibly moist, and the honey glaze on top gave it this shiny, almost sticky crust that made the slices taste like something from a coffee shop. I used the vanilla bean option and the specks looked beautiful through the crumb.
Pin this honey vanilla banana bread for the days when you want a moist loaf with a honey-brushed crust and real vanilla in every slice.
The Reason This Loaf Stays Moist Instead of Muddy
The biggest mistake with banana bread is treating it like a quick cake batter and stirring until it looks perfectly smooth. That’s how you end up with a loaf that rises a little, then sinks into a heavy middle. Here, the bananas and honey already bring a lot of moisture, so the flour only needs to disappear into the batter — not be beaten into it.
Honey changes the texture in a good way, but it also means the loaf browns faster than a sugar-based version. That’s why the oven temp stays moderate and the bake time is long enough for the center to set fully. If the top looks done early, don’t pull it too soon. A toothpick should come out clean, not with wet batter clinging to it.
- Bananas — Use very ripe bananas with plenty of brown spotting. They mash smoothly and bring the strongest banana flavor, while underripe fruit leaves the loaf bland and tight.
- Honey — This is the main sweetener, so the flavor matters. A mild honey works best here; buckwheat or strongly flavored honey can overpower the vanilla.
- Butter — Melted butter adds richness without making the crumb greasy. Oil will work in a pinch, but the loaf loses some of its classic banana-bread flavor.
- Vanilla extract or vanilla bean — Real vanilla gives the bread its warm, floral finish. If you use a bean, scrape the seeds into the wet ingredients so the specks distribute evenly.
What Each Ingredient Is Doing in the Batter
The flour here is just enough to hold the loaf together. Too much, or too much stirring, turns the crumb chewy and dense. The baking soda does the lifting work, reacting with the bananas and honey to help the bread rise into a soft dome instead of a flat slab.
The cinnamon is subtle, not dominant. It rounds out the banana and honey without making the loaf taste like spice bread. If you skip it, the bread still works, but it loses a little warmth. For the honey brush on top, use the full tablespoon while the loaf is hot from the oven so it melts in instead of sitting on the crust.
Building the Batter and Finishing the Crust
Mix the Wet Ingredients First
Start by mashing the bananas until they’re mostly smooth, with a few small soft bits left for texture. Whisk in the melted butter, honey, egg, and vanilla until the mixture looks glossy and unified. If the butter is hot, let it cool for a minute before adding the egg so you don’t scramble it.
Fold in the Flour Without Overworking It
Add the flour, baking soda, salt, and cinnamon all at once, then stir just until the streaks of flour disappear. The batter should look thick and a little lumpy. If you keep stirring for a smooth finish, the loaf will bake up compact instead of tender.
Bake Until the Center Sets
Pour the batter into the greased loaf pan and bake until the top is deeply golden and a toothpick inserted in the center comes out clean. The loaf may look finished before it really is, especially around the edges, so test the middle rather than trusting the color alone. If the top starts getting too dark before the center is done, lay a loose piece of foil over it for the last part of the bake.
Brush the Honey While It’s Hot
The final tablespoon of honey goes on as soon as the loaf leaves the oven. The heat softens it and helps it soak into the crust, which gives the bread that shiny, lightly sticky top. Let the loaf cool in the pan for 10 minutes before turning it out, then wait until it reaches room temperature before slicing or the crumb can compress and look gummy.
How to Adapt This for Different Pantry Situations
Dairy-Free Swap
Use melted coconut oil or a neutral oil instead of butter. The loaf will still be moist, but the flavor loses a little of that classic buttery banana-bread depth. Coconut oil adds a faint tropical note; neutral oil keeps the taste closer to the original.
Make It More Whole-Grain
Swap up to half the all-purpose flour for white whole wheat flour. That adds a nuttier flavor and a slightly firmer crumb, but going all the way to 100% whole grain can make the bread heavier than it should be.
Less Sweet Version
Cut the honey in the batter to 1/3 cup and keep the brushed topping. The crumb will be a little less tender and the banana flavor will come forward more sharply, which works well if your bananas are extremely ripe.
Storage and Reheating
- Refrigerator: Store covered for up to 4 days. The crumb firms up a little in the fridge, but the flavor stays good.
- Freezer: Freeze sliced or whole, wrapped tightly, for up to 3 months. Wrap again in foil or place in a freezer bag so it doesn’t pick up freezer smells.
- Reheating: Warm slices in a toaster oven or low oven until just heated through. Microwaving too long makes the banana bread rubbery and can soften the honey glaze into a sticky patch.
Answers to the Questions Worth Asking
Honey Vanilla Banana Bread
Ingredients
Equipment
Method
- Preheat the oven to 350°F and grease a 9x5 loaf pan.
- Whisk the melted butter, 1/2 cup honey, egg, and vanilla into the mashed bananas until smooth and well combined.
- Fold in the all-purpose flour, baking soda, salt, and cinnamon until just combined—do not overmix.
- Pour the batter into the prepared pan.
- Bake for 60–70 minutes at 350°F until the top is deeply golden and a toothpick comes out clean.
- Remove from the oven and immediately brush the top with 1 tablespoon of honey while still warm.
- Cool in the pan for 10 minutes, then turn out and slice only when cooled to room temperature.