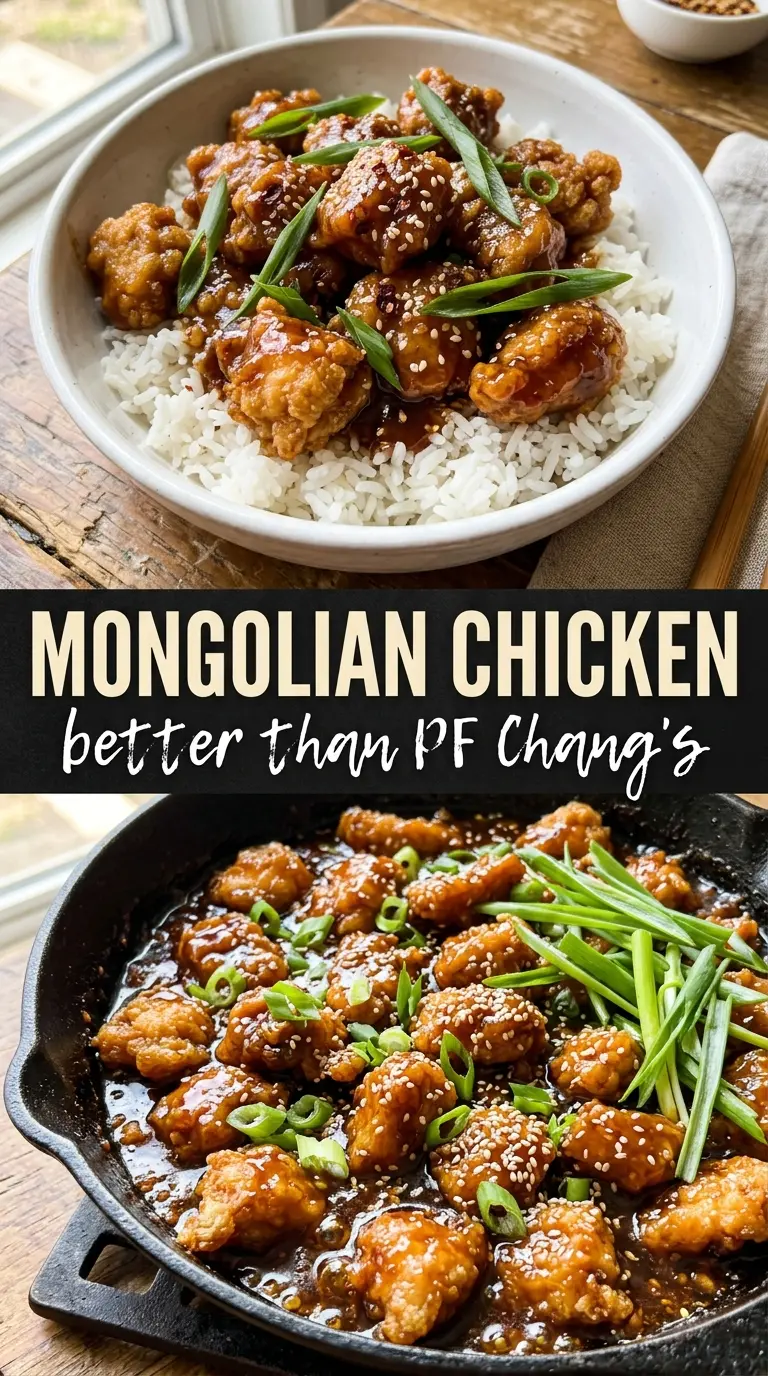
Crispy-edged chicken coated in a dark, sticky Mongolian sauce has a way of disappearing fast once it hits the table. The best versions have contrast in every bite: seared chicken that stays tender inside, a glossy sauce that clings instead of pooling, and just enough garlic, ginger, and brown sugar to keep the whole dish balanced. Served over hot rice, it lands somewhere between takeout comfort and a weeknight dinner you’d actually want to make again.
This version gets its texture from a cornstarch toss before the chicken ever touches the pan. That thin coating helps the chicken brown quickly and gives the sauce something to grab onto later. The sauce itself is built in layers: soy sauce for salt, brown sugar for that deep caramel note, hoisin for body, and a quick cornstarch slurry at the end so it turns glossy instead of watery.
Below, I’ll walk through the part that matters most — getting the chicken browned without steaming it, then finishing the sauce so it stays silky and clings to every piece. I’ve also included the substitutions that work when you need them, plus the small timing details that keep the green onions bright instead of limp.
The chicken browned up beautifully and the sauce thickened in minutes without turning gummy. I used the full amount of ginger and the flavor was spot on with rice.
Save this Mongolian chicken for the nights when you want sticky soy-ginger sauce, crisp-edged chicken, and a fast rice bowl that eats like takeout.
The Trick to Getting Mongolian Chicken Crispy Before the Sauce Hits
The biggest mistake with Mongolian chicken is rushing the sauce into the pan before the chicken has a chance to brown. If the pan is crowded or the heat is too low, the chicken steams and you lose the crispy edges that make this dish worth making. The cornstarch coating helps, but it only works if the chicken has direct contact with a hot pan and enough space to sear instead of simmer.
That second part matters more than people think. High heat gets you color, but it also burns garlic fast, so the sequence has to stay tight: sear the chicken first, remove it, then add the garlic and ginger for just a short bloom before the sauce goes in. Once the sauce is in, the slurry does the final thickening work in a minute or two, and that’s when the glossy, clingy texture shows up.
What the Cornstarch, Hoisin, and Sesame Oil Are Actually Doing
- Cornstarch — This is what gives the chicken that light crust and helps thicken the sauce later. Don’t skip the initial coating; it’s doing more than preventing sticking. If you only have all-purpose flour, the result will be heavier and less crisp, but it can work in a pinch.
- Hoisin sauce — A small amount adds depth and body that soy sauce alone can’t give you. It makes the sauce taste rounder and a little richer, almost like it’s been simmering longer than it has. There isn’t a perfect substitute, but a spoonful of barbecue sauce plus a touch more soy will get you in the neighborhood.
- Fresh ginger and garlic — Fresh is worth it here. Powdered ginger or jarred garlic won’t give you the same sharp, fragrant hit when they hit the hot pan. Keep the garlic moving and don’t let it sit in the pan too long or it’ll turn bitter.
- Sesame oil — This isn’t a cooking oil in this recipe; it’s a finishing note that makes the sauce taste unmistakably like a takeout-style stir-fry. A little goes a long way. Too much and it overwhelms the dish.
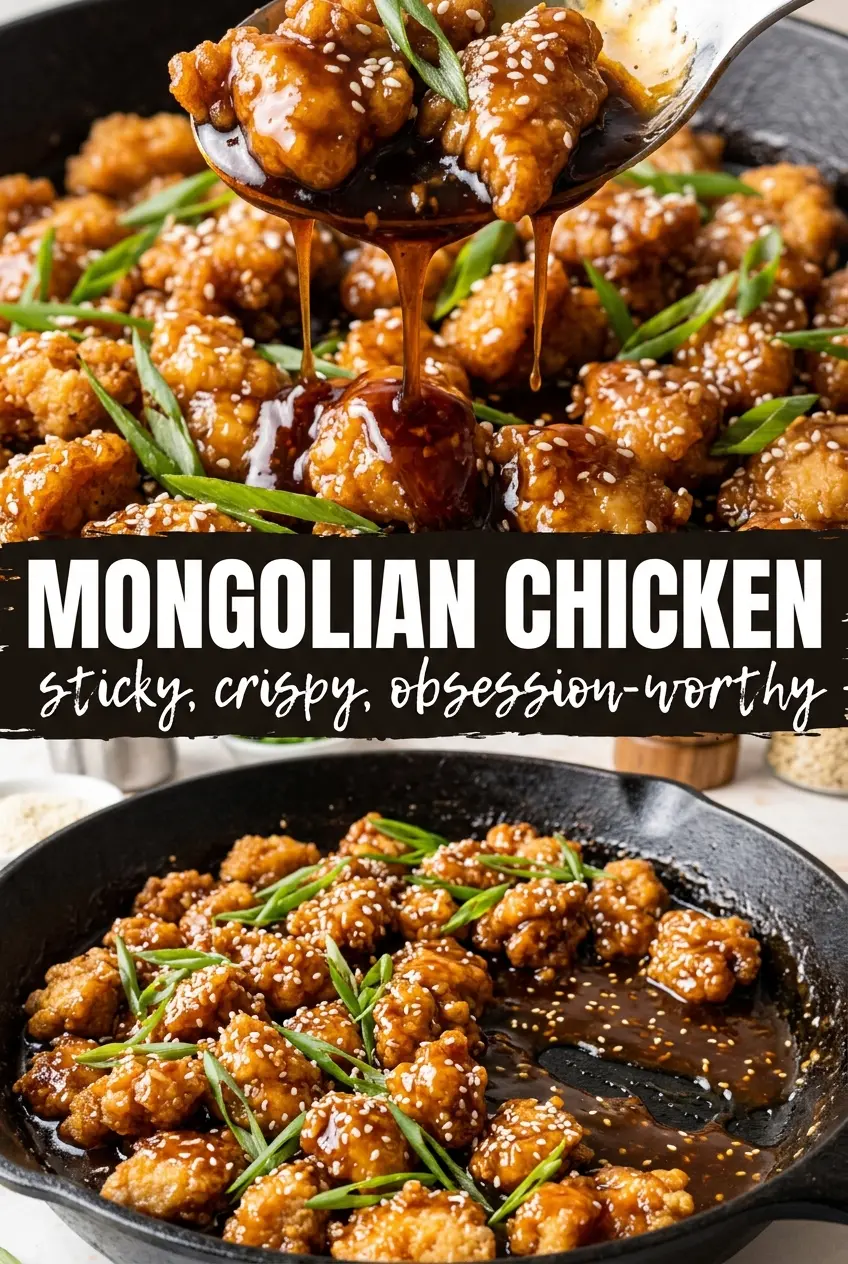
Building the Sauce So It Stays Glossy, Not Watery
Coating the Chicken First
Toss the sliced chicken with cornstarch, salt, and pepper until every piece looks lightly dusted, not clumped. That thin coating is what helps the outside turn golden instead of pale and damp. If the pieces are wet from rinsing or sitting in liquid, pat them dry first or the starch will slide right off.
Searing in a Hot Pan
Heat the oil until it shimmers, then add the chicken in a single layer. Leave it alone long enough to develop color before you flip it; if you start moving it too soon, it sticks and tears instead of forming that crisp edge. Work in batches if needed, because a crowded pan drops the temperature and the chicken loses its sear.
Turning the Sauce Glossy
After the chicken comes out, add the garlic and ginger for about 30 seconds, just until they smell fragrant. Pour in the sauce and bring it to a boil before adding the cornstarch slurry. If the sauce looks thin at first, that’s normal — the thickening happens as it bubbles, and it should coat the back of a spoon before the chicken goes back in.
Finishing with Green Onions
Stir the chicken back into the pan along with the green onions and toss just until everything is coated. The onions should soften slightly while still keeping some bite. If they go in too early, they lose their color and turn floppy instead of adding that fresh, sharp finish against the sticky sauce.
How to Adjust This Mongolian Chicken for Different Kitchens and Diets
Make It Gluten-Free
Use a certified gluten-free soy sauce or tamari and check that your hoisin sauce is gluten-free too, since that’s the ingredient that often gets missed. The texture stays the same, and the sauce still clings properly because the cornstarch does the thickening.
Swap in Chicken Thighs for Richer Flavor
Boneless skinless thighs stay juicier and handle high heat well, which makes them a good choice if you want a little more forgiveness in the pan. Cut them into even pieces and watch the cook time closely, since thighs may need an extra minute or two to brown fully.
Turn Up or Turn Down the Heat
The red pepper flakes are easy to adjust without changing the structure of the dish. Leave them out for a mild version, or add an extra pinch at the end if you like more heat that sits on top of the sweet-savory sauce instead of disappearing into it.
Storage and Reheating
- Refrigerator: Store leftovers in an airtight container for up to 4 days. The sauce will tighten a bit in the fridge, but it loosens again when reheated.
- Freezer: It freezes well for about 2 months, though the chicken won’t be quite as crisp after thawing. Let it cool fully before freezing, and pack it in a sealed container with as little extra air as possible.
- Reheating: Warm it in a skillet over medium-low heat with a splash of water to loosen the sauce. The common mistake is blasting it over high heat, which dries out the chicken and makes the sugar in the sauce taste scorched.
Questions I Get Asked About This Recipe
Mongolian Chicken
Ingredients
Equipment
Method
- Toss the sliced chicken with cornstarch, salt, and pepper until every piece is coated and looks dry-starchy, not wet.
- Mix the cornstarch with water for a slurry until smooth and no lumps remain, then set aside.
- Whisk soy sauce, brown sugar, water, hoisin sauce, sesame oil, and red pepper flakes until the sugar dissolves and the mixture turns a uniform amber-brown.
- Heat vegetable oil in a large skillet or wok over high heat until shimmering, then add chicken in a single layer and cook 3-4 minutes per side until deeply golden with crisp edges; remove to a plate.
- Add garlic and ginger to the same pan and stir-fry for 30 seconds until fragrant, keeping them from browning too much.
- Pour in the sauce mixture and bring it to a boil, stirring so the dark glaze starts bubbling immediately.
- Stir in the cornstarch slurry and cook for 1-2 minutes until thickened and glossy, with a slow ribboning texture.
- Return the chicken to the pan and add green onions; toss until the onions look lightly charred and the chicken is fully coated in the sticky glaze.
- Serve the Mongolian chicken over steamed white rice with sesame seeds sprinkled on top so the glaze clings as you eat.