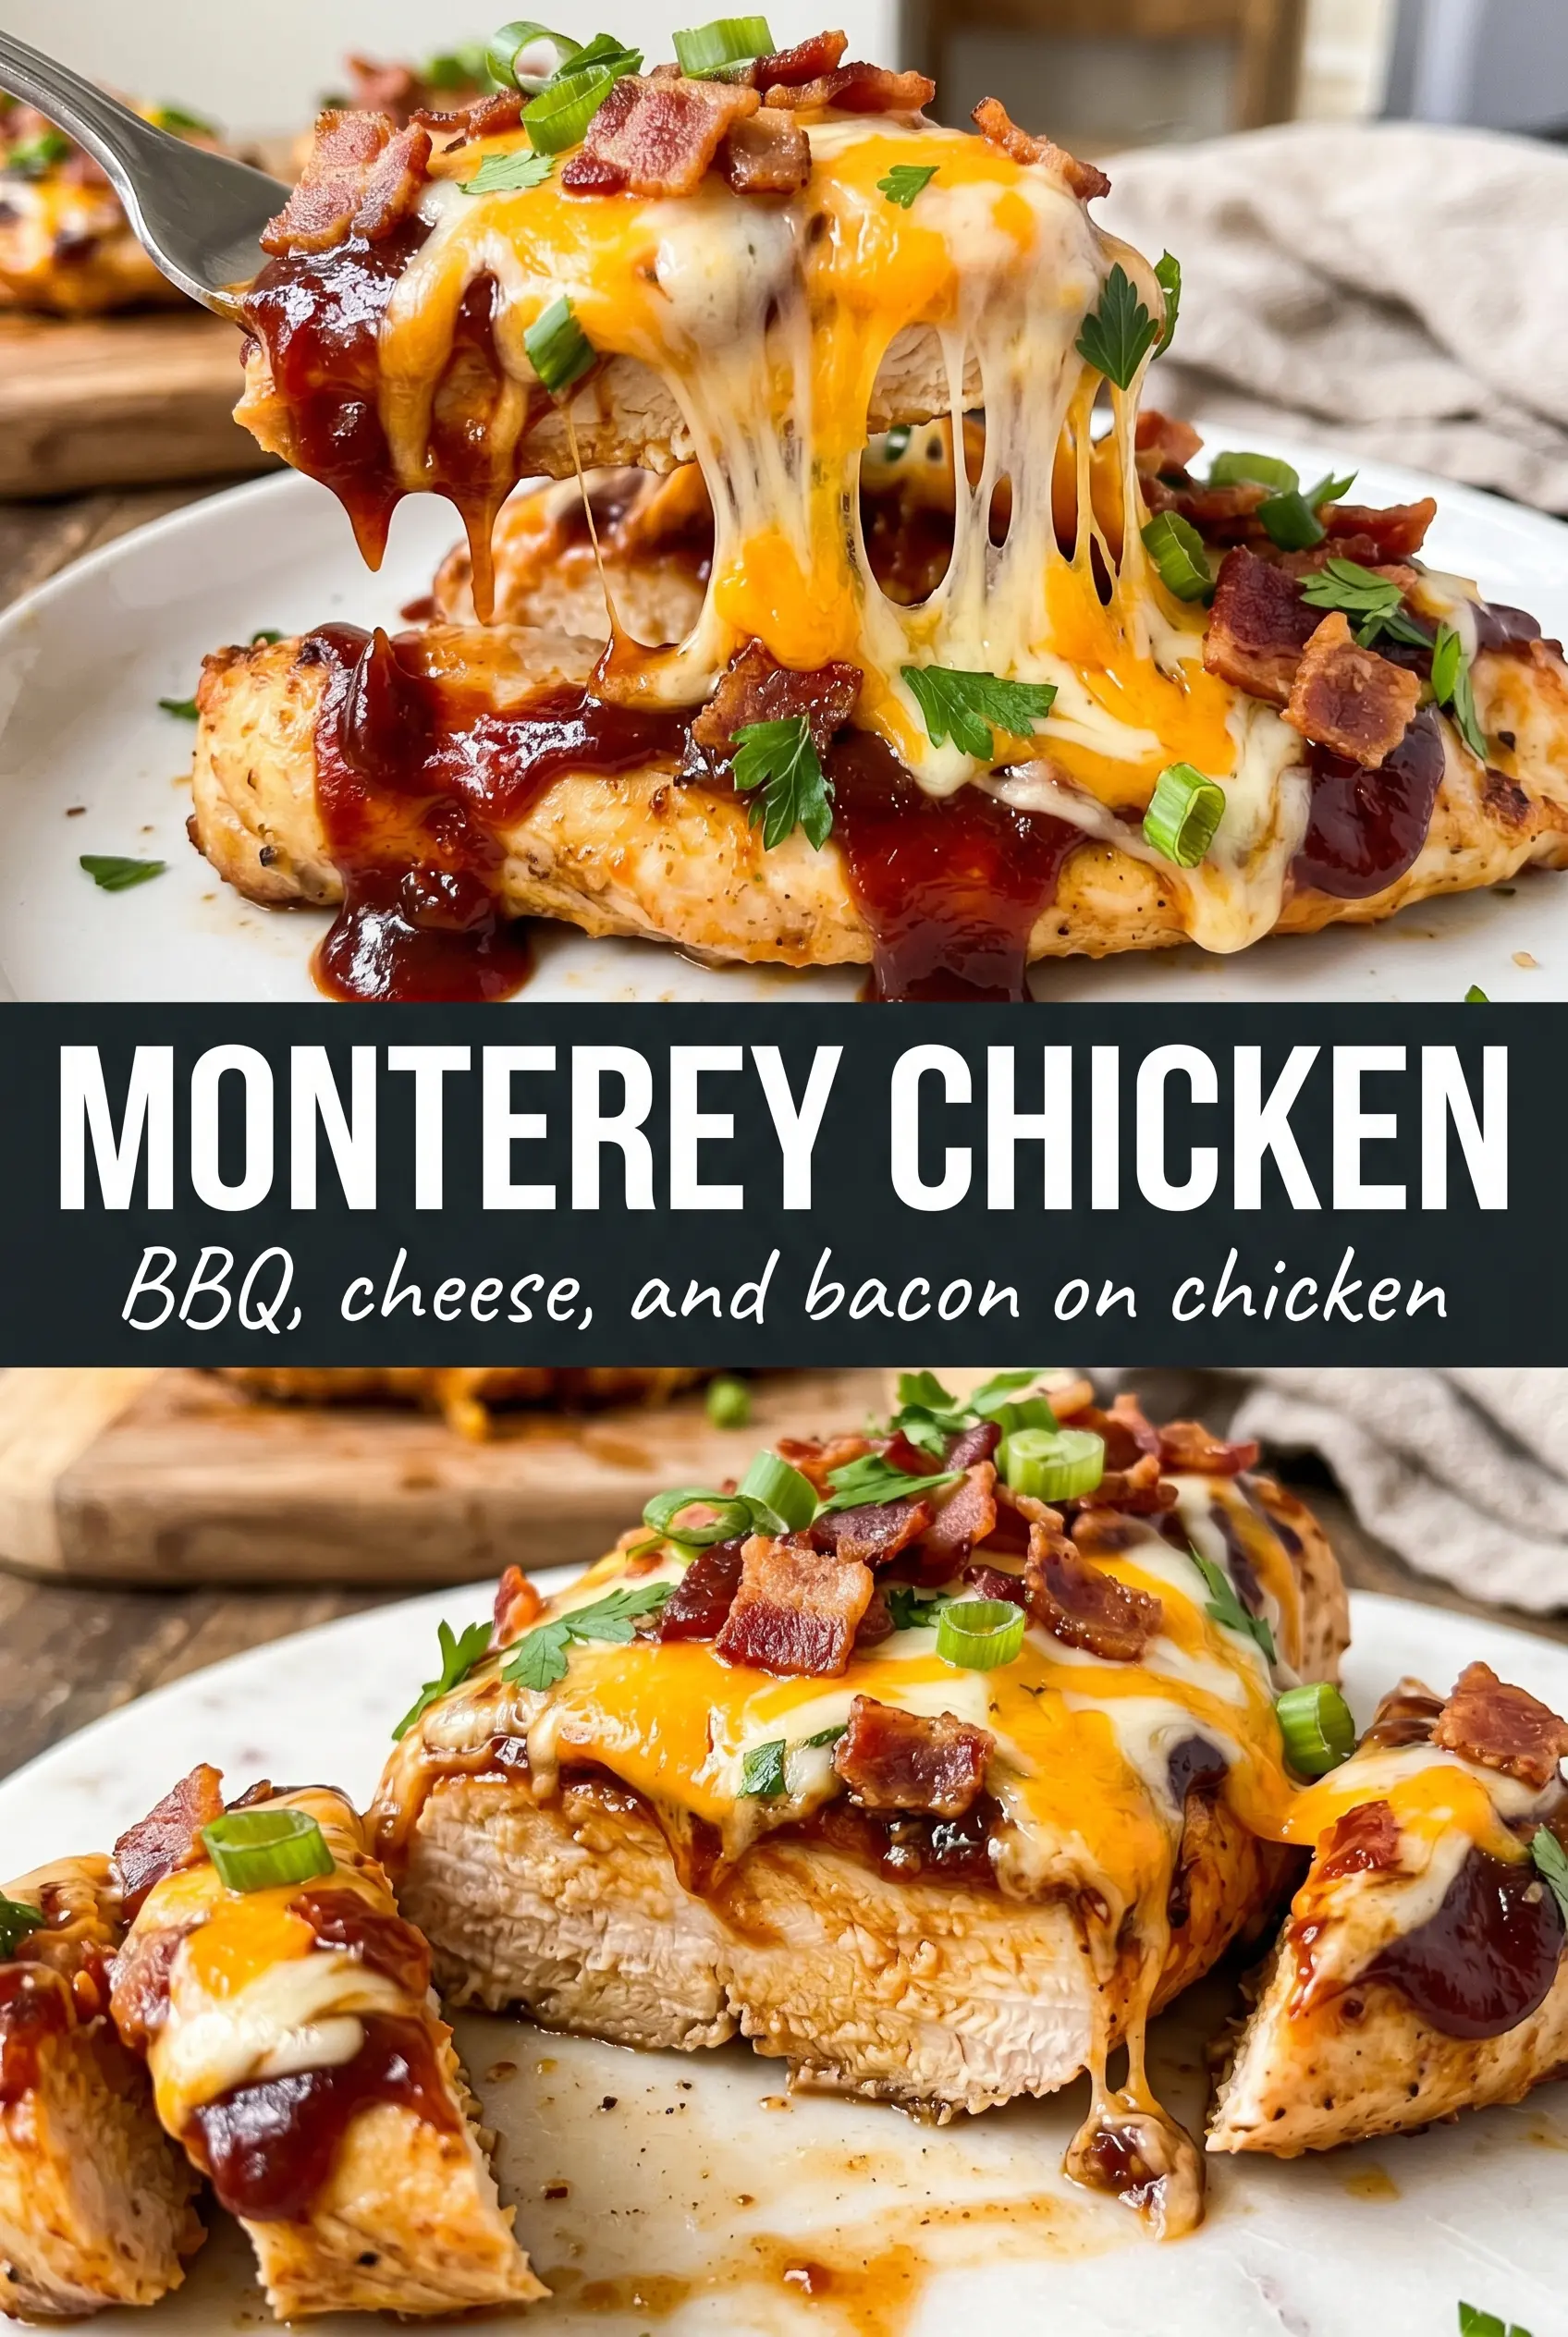
Golden, smoky Monterey chicken earns its spot in the dinner rotation because it gives you that restaurant-style finish without any tricky timing. The chicken stays juicy under the broiler, the barbecue sauce turns glossy and sticky, and the melted Monterey Jack settles over the bacon and onions in a way that feels a little indulgent without being fussy.
The key is building layers in the right order. A quick brush of barbecue sauce before searing gives the chicken flavor from the start, but the second layer goes on after the chicken is cooked so it doesn’t scorch in the pan. From there, the caramelized onions add sweetness, the bacon adds salt and crunch, and the cheese melts into everything instead of sliding off the top.
Below, I’ll show you the small timing details that keep the chicken from drying out and the broiler from going too far. There’s also a smart substitution section if you need to work with what’s already in your fridge.
The BBQ sauce set up beautifully under the cheese and the chicken stayed juicy even after broiling. I used the full 2 minutes under the broiler and the top got those perfect browned spots without burning.
Love that melted Monterey Jack, smoky bacon, and sticky BBQ sauce combo? Save this Monterey chicken for the nights when you want a skillet dinner that finishes under the broiler.
The Broiler Finish That Keeps the Cheese Melted, Not Burned
The part that ruins most Monterey chicken is rushing the final melt. If the chicken goes under the broiler with too much sauce on top, the cheese slides, the bacon dries out, and the edges darken before the center gets glossy. The fix is simple: cook the chicken through first, then add the sauce, onions, bacon, and cheese in that order so the broiler only has to finish, not cook.
Another detail that matters is skillet choice. An oven-safe skillet gives you the best crust because the chicken can go straight from the stove to the broiler without losing heat. If you use a baking dish instead, you’ll still get a good result, but the sear won’t be as deep and the sauce won’t cling quite as well to the bottom of the chicken.
- Chicken breasts — Keep them close to the same thickness so they finish evenly. If one side is much thicker, pound it lightly before cooking; otherwise the thin end dries out while the thick end catches up.
- BBQ sauce — This is the backbone of the dish, so use one you’d actually eat on its own. A thinner sauce can work, but a thick, smoky sauce clings better and gives you that lacquered finish after broiling.
- Monterey Jack cheese — Freshly shredded melts cleaner than pre-shredded because it doesn’t have the anti-caking coating that can make the top a little grainy. If Monterey Jack isn’t available, a mild cheddar blend works, but the melt will be slightly sharper and less silky.
- Caramelized onions — Don’t shortcut these with raw onions. You want the sweet, jammy texture that softens under the cheese and balances the barbecue sauce instead of fighting it.
- Bacon — Cook it crisp before it goes on the chicken. Soft bacon goes limp under the cheese; crisp bacon keeps enough structure to give you a little bite in every forkful.
What Each Ingredient Is Actually Doing in This Baked Chicken

- Chicken breasts (the protein) — Pat dry so they brown instead of steam. Even thickness ensures uniform cooking.
- Sauce or cooking liquid (the moisture keeper) — This prevents the chicken from drying out in the oven. Balance richness with acid.
- Garlic (the aromatic foundation) — Fresh minced garlic mellows and becomes sweet when baked. Don’t brown it or it turns bitter.
- Cream or wine (optional richness) — This adds luxury and moisture. Don’t let it boil hard or it can break and separate.
- Lemon or white wine (the brightness) — Acid prevents heavy sauces from tasting flat. Balance is essential.
- Fresh herbs (basil, thyme, parsley) — Add some during cooking and some after so you get both cooked and fresh flavors.
- Cheese (optional richness) — Parmesan or feta adds depth. Don’t overdo it or the dish becomes heavy.
- Proper oven temperature (375-400°F) — This temperature bakes chicken through without drying the edges. Use a thermometer for 165°F.
Layering the Toppings So They Stay Put
Searing the Chicken First
Warm the oil in an oven-safe skillet over medium-high heat until it shimmers, then add the seasoned chicken. You want a deep golden crust on the first side before you turn it, and that usually takes 4 to 5 minutes. If the chicken sticks when you try to move it, it’s not ready yet; let it release on its own so the crust stays intact.
Adding the Sauce and Toppings
Brush on the remaining barbecue sauce after the chicken is cooked through. That keeps the sugars from burning in the pan and gives you a sticky top layer instead of a bitter one. Pile the onions directly on the sauce, then the bacon, then the cheese so everything is anchored in place before it goes under the broiler.
Broiling to the Right Melt
Move the skillet close to the broiler, but don’t walk away. The cheese should melt fast, turn bubbly, and pick up a few golden spots at the edges in 2 to 3 minutes. If the broiler is too close or the rack is too high, the cheese can go from melted to scorched before the sauce underneath has a chance to warm through.
Make It With Chicken Thighs
Boneless skinless thighs work well if you want a richer, juicier result. They usually need a little less time than breasts, so cook until they’re just done and then build the toppings the same way. The flavor gets a little deeper, and the final dish feels more forgiving.
Dairy-Free Version
Use your favorite meltable dairy-free cheese and a dairy-free spread or oil for the onions. The texture will be a little less stretchy than Monterey Jack, but the barbecue, bacon, and onion layer still carry the dish. Choose a cheese that melts well instead of one that only softens.
Gluten-Free by Default
This recipe is naturally gluten-free as long as your barbecue sauce is labeled gluten-free. That’s the one ingredient worth checking carefully, since sauces can hide wheat-based thickeners or soy sauce.
Storage and Reheating
- Refrigerator: Store leftovers for up to 3 days. The cheese will set up and the bacon softens a bit, but the flavor holds up well.
- Freezer: It freezes, but the cheese and onions lose some of their texture. Freeze the cooked chicken with sauce only, then add fresh toppings after reheating if you want the best result.
- Reheating: Rewarm covered in a 325°F oven until hot, then uncover for the last few minutes so the top doesn’t turn soggy. The biggest mistake is microwaving it hard and fast, which makes the chicken rubbery and the cheese separate.
Answers to the Questions Worth Asking
Monterey Chicken
Ingredients
Equipment
Method
- Season the chicken breasts with salt, pepper, garlic powder, and smoked paprika, then brush with half the BBQ sauce. Let the chicken marinate for 10 minutes at room temperature.
- Heat olive oil in an oven-safe skillet over medium-high heat, then sear the chicken for 4-5 minutes per side. Cook until golden and the internal temperature reaches 165°F.
- Brush each breast with the remaining BBQ sauce, then top with caramelized onions followed by 2 strips of crispy bacon per breast. Keep the skillet warm so the sauce lightly sets on the chicken.
- Pile shredded Monterey Jack cheese generously over each breast. Transfer to the broiler and broil for 2-3 minutes until the cheese is fully melted, bubbly, and golden in spots.
- Garnish with diced tomatoes and fresh chives, then serve immediately. Plate so the bacon and onion topping stays visible under the melted cheese.


