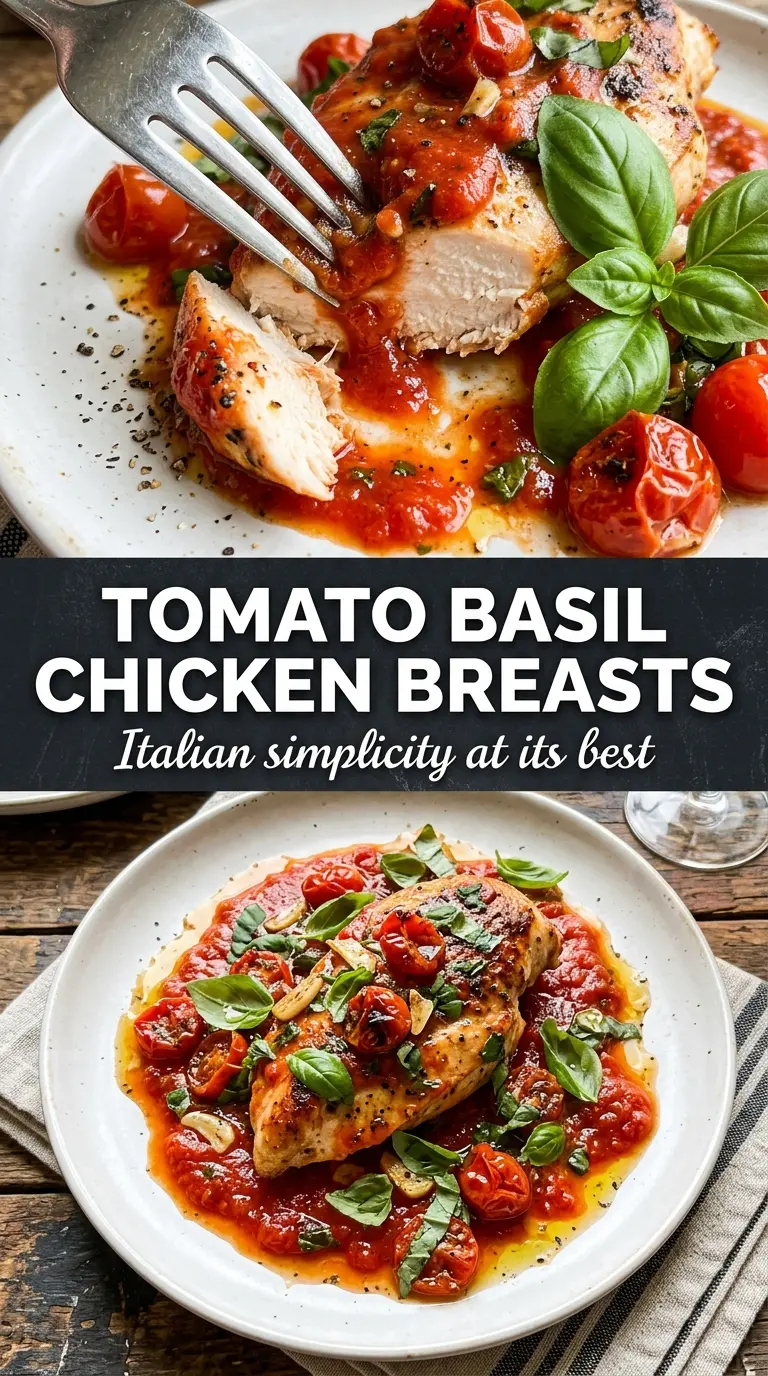
Golden-seared chicken breasts tucked into a bright tomato basil pan sauce earn their place in the dinner rotation fast. The chicken stays juicy, the cherry tomatoes collapse into a glossy sauce, and the fresh basil lifts everything at the end so it tastes fresh instead of heavy. It’s the kind of skillet dinner that looks like you worked longer than you did.
The trick here is building flavor in layers without crowding the pan. A hard sear gives the chicken a good crust, then the tomatoes go into the same skillet so their juices pick up every browned bit left behind. A splash of white wine or broth loosens the sauce, while a little balsamic adds the rounded finish that keeps the tomatoes from tasting flat. Parmesan goes on at the end, where it melts just enough to cling to the chicken without turning grainy.
Below you’ll find the timing that keeps the chicken tender, the best way to handle the sauce if your tomatoes are slow to burst, and a few smart swaps for making this work with what you already have.
The tomatoes broke down into the prettiest sauce and the basil at the end made it taste bright instead of heavy. My chicken stayed juicy, and the pan was almost empty after dinner.
Like this tomato basil chicken? Save it for the nights when you want a skillet dinner with juicy chicken, burst tomatoes, and a fresh basil finish.
The Part People Get Wrong With Tomato Chicken: Let the Pan Do the Work
The mistake most often made with tomato-based chicken skillet dinners is adding the tomatoes before the chicken has a real sear. That leaves you with pale chicken and a sauce that tastes boiled instead of built. Start with a hot pan and enough oil to coat the surface, then leave the chicken alone until it releases easily and shows deep golden color on the first side.
Another common problem is turning the sauce watery. Cherry tomatoes need a few minutes of direct heat before they burst and concentrate, and that’s where the flavor comes from. If the pan looks dry before they start giving up juice, don’t panic; the tomatoes will catch up once they soften and split.
- Boneless skinless chicken breasts — These work because they sear fast and stay lean, but they dry out if you cook past 165°F. If your breasts are thick, pound them to an even thickness so the centers finish when the outside is still tender.
- Cherry tomatoes — They’re the backbone of the sauce because they burst into something sweet and jammy instead of just turning mushy. Grape tomatoes can work in a pinch, but they’re usually a little less juicy and need an extra minute or two.
- Dry white wine or chicken broth — Wine gives the sauce a sharper, more layered edge, while broth keeps it mellow and family-friendly. If you skip the wine, use broth and keep the balsamic; that’s what keeps the sauce from tasting flat.
- Balsamic vinegar — This is the small amount that makes the tomato flavor pop. Don’t add more than the recipe calls for or the sauce starts tasting dark instead of bright.
What Each Ingredient Is Actually Doing in This Baked Chicken
- Chicken breasts (the protein) — Pat dry so they brown instead of steam. Even thickness ensures uniform cooking.
- Sauce or cooking liquid (the moisture keeper) — This prevents the chicken from drying out in the oven. Balance richness with acid.
- Garlic (the aromatic foundation) — Fresh minced garlic mellows and becomes sweet when baked. Don’t brown it or it turns bitter.
- Cream or wine (optional richness) — This adds luxury and moisture. Don’t let it boil hard or it can break and separate.
- Lemon or white wine (the brightness) — Acid prevents heavy sauces from tasting flat. Balance is essential.
- Fresh herbs (basil, thyme, parsley) — Add some during cooking and some after so you get both cooked and fresh flavors.
- Cheese (optional richness) — Parmesan or feta adds depth. Don’t overdo it or the dish becomes heavy.
- Proper oven temperature (375-400°F) — This temperature bakes chicken through without drying the edges. Use a thermometer for 165°F.
Building the Sauce in the Same Skillet Without Losing the Chicken
Searing the Chicken First
Season both sides well, then lay the chicken in the hot skillet without moving it. You want a deep golden crust before you turn it; if it sticks at first, it usually needs another minute. Pull it off when it reaches 165°F, because it finishes gently in the sauce and stays juicier that way.
Coaxing the Tomatoes to Burst
Garlic only needs about 30 seconds in the pan before the tomatoes go in. Once the tomatoes hit the heat, stir them just enough to keep the garlic from scorching, then let them sit and collapse. If they’re stubborn, press a few with the back of a spoon to get the juices flowing.
Finishing the Sauce and Bringing the Chicken Back
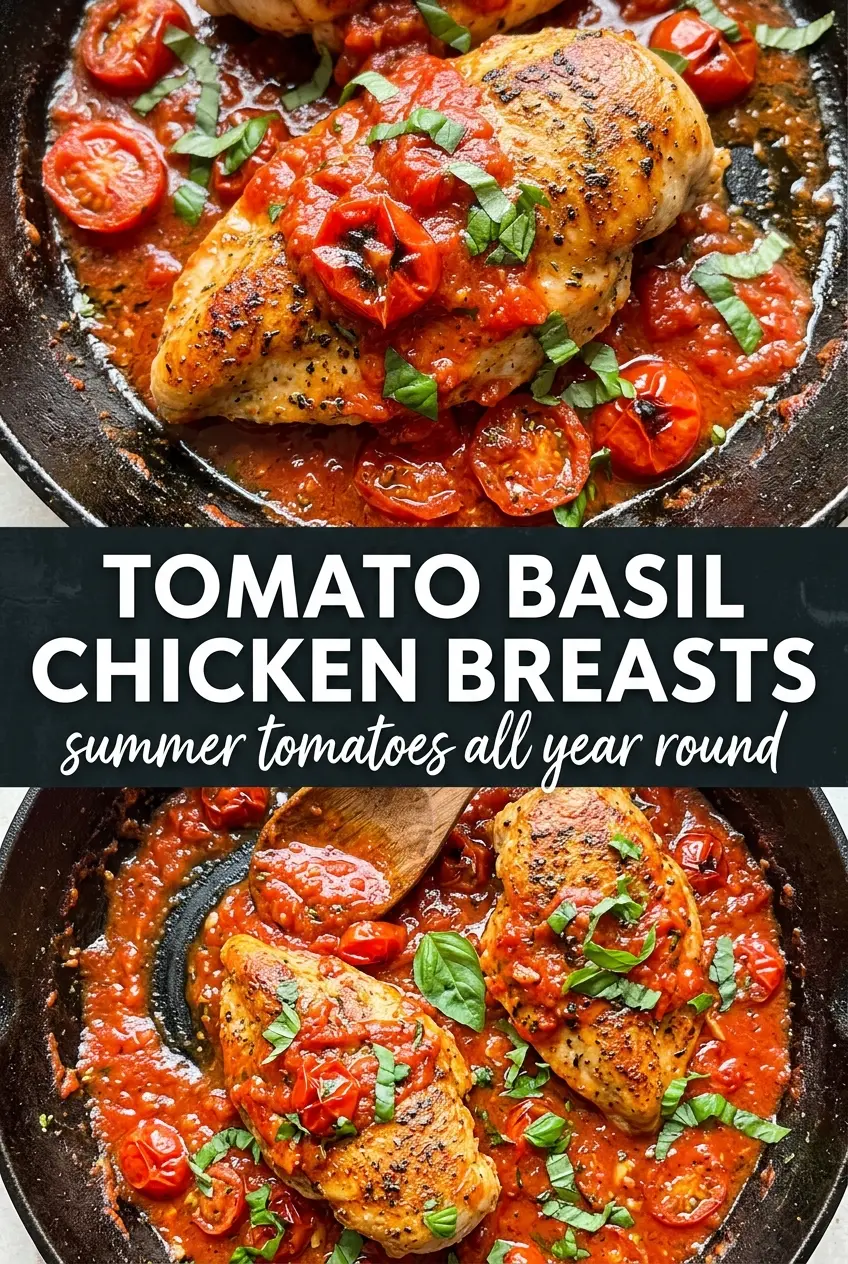
When the wine or broth goes in, let it bubble for a minute so the raw edge cooks off and the pan juices turn into sauce. Add the Italian seasoning, red pepper flakes, and balsamic, then return the chicken and spoon sauce over the top. The last two minutes are about marrying everything together, not cooking the chicken further from scratch.
How to Adapt This Skillet Dinner Without Losing the Bright Tomato-Basil Finish
Make it dairy-free
Leave off the Parmesan or replace it with a dairy-free finishing sprinkle. The sauce still works because the tomatoes, balsamic, and basil carry the flavor; you’ll just lose the salty, savory finish that Parmesan adds.
Swap in chicken thighs
Use boneless skinless thighs for a richer, more forgiving version. They take a little longer to cook through, but they stay moist even if the pan runs a touch hot, and the sauce clings nicely to the darker meat.
Keep it gluten-free
This recipe is naturally gluten-free as written as long as your broth is certified gluten-free. That’s one of the reasons it’s such a useful weeknight dinner — you don’t need extra swaps to make it work.
Use what you have for the tomatoes
If cherry tomatoes aren’t available, use chopped Roma tomatoes and cook them a little longer so the juices concentrate. You’ll get a slightly less sweet sauce, but the garlic and balsamic will pull it back into balance.
Storage and Reheating
- Refrigerator: Store leftovers in an airtight container for up to 3 days. The sauce thickens as it sits, and the basil will lose some of its bright color.
- Freezer: The chicken and tomato sauce freeze well for up to 2 months, though the basil is best added fresh after reheating. Freeze in a sealed container with a little room for expansion.
- Reheating: Warm gently in a covered skillet over low heat with a splash of broth or water. High heat dries out the chicken fast and can make the sauce taste sharp instead of rounded.
Questions I Get Asked About This Recipe
Tomato Basil Chicken Breasts
Ingredients
Equipment
Method
- Season the chicken breasts with salt, pepper, garlic powder, and Italian seasoning to taste. Heat a large skillet with 2 tbsp olive oil over medium-high heat until shimmering.
- Add the chicken to the skillet and sear for 5-6 minutes per side until deep golden, and the internal temperature reaches 165°F. Remove the chicken to a plate.
- Reduce heat slightly and cook the minced garlic in the same pan for 30 seconds, stirring until fragrant and just starting to turn golden. Keep the pan moving so it doesn’t burn.
- Add the halved cherry tomatoes and cook for 3-4 minutes until they burst and release their juices. Stir occasionally to coat the tomatoes with the garlicky oil.
- Pour in the dry white wine (or chicken broth) and let it bubble for 1 minute, scraping up any browned bits from the bottom. Cook until the liquid is slightly reduced.
- Stir in dried Italian seasoning, red pepper flakes, and balsamic vinegar. Simmer just until the sauce looks glossy and evenly seasoned.
- Return the chicken to the pan and spoon the tomato sauce over each breast. Simmer for 2 minutes so the flavors cling to the chicken.
- Scatter the fresh basil chiffonade over the top right before finishing. Add shaved Parmesan and drizzle with extra olive oil before serving for a bright, aromatic finish.


